執筆バージョン: Unreal Engine 4.27
|
第17回ぷちコンのテーマ「かいとう」にちなんで、氷が溶ける表現を作成します。
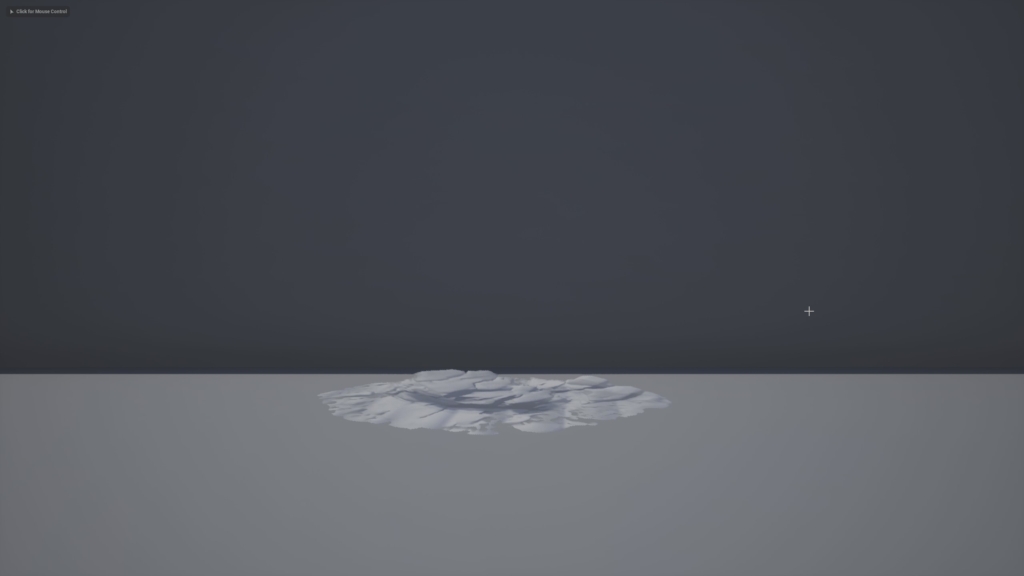
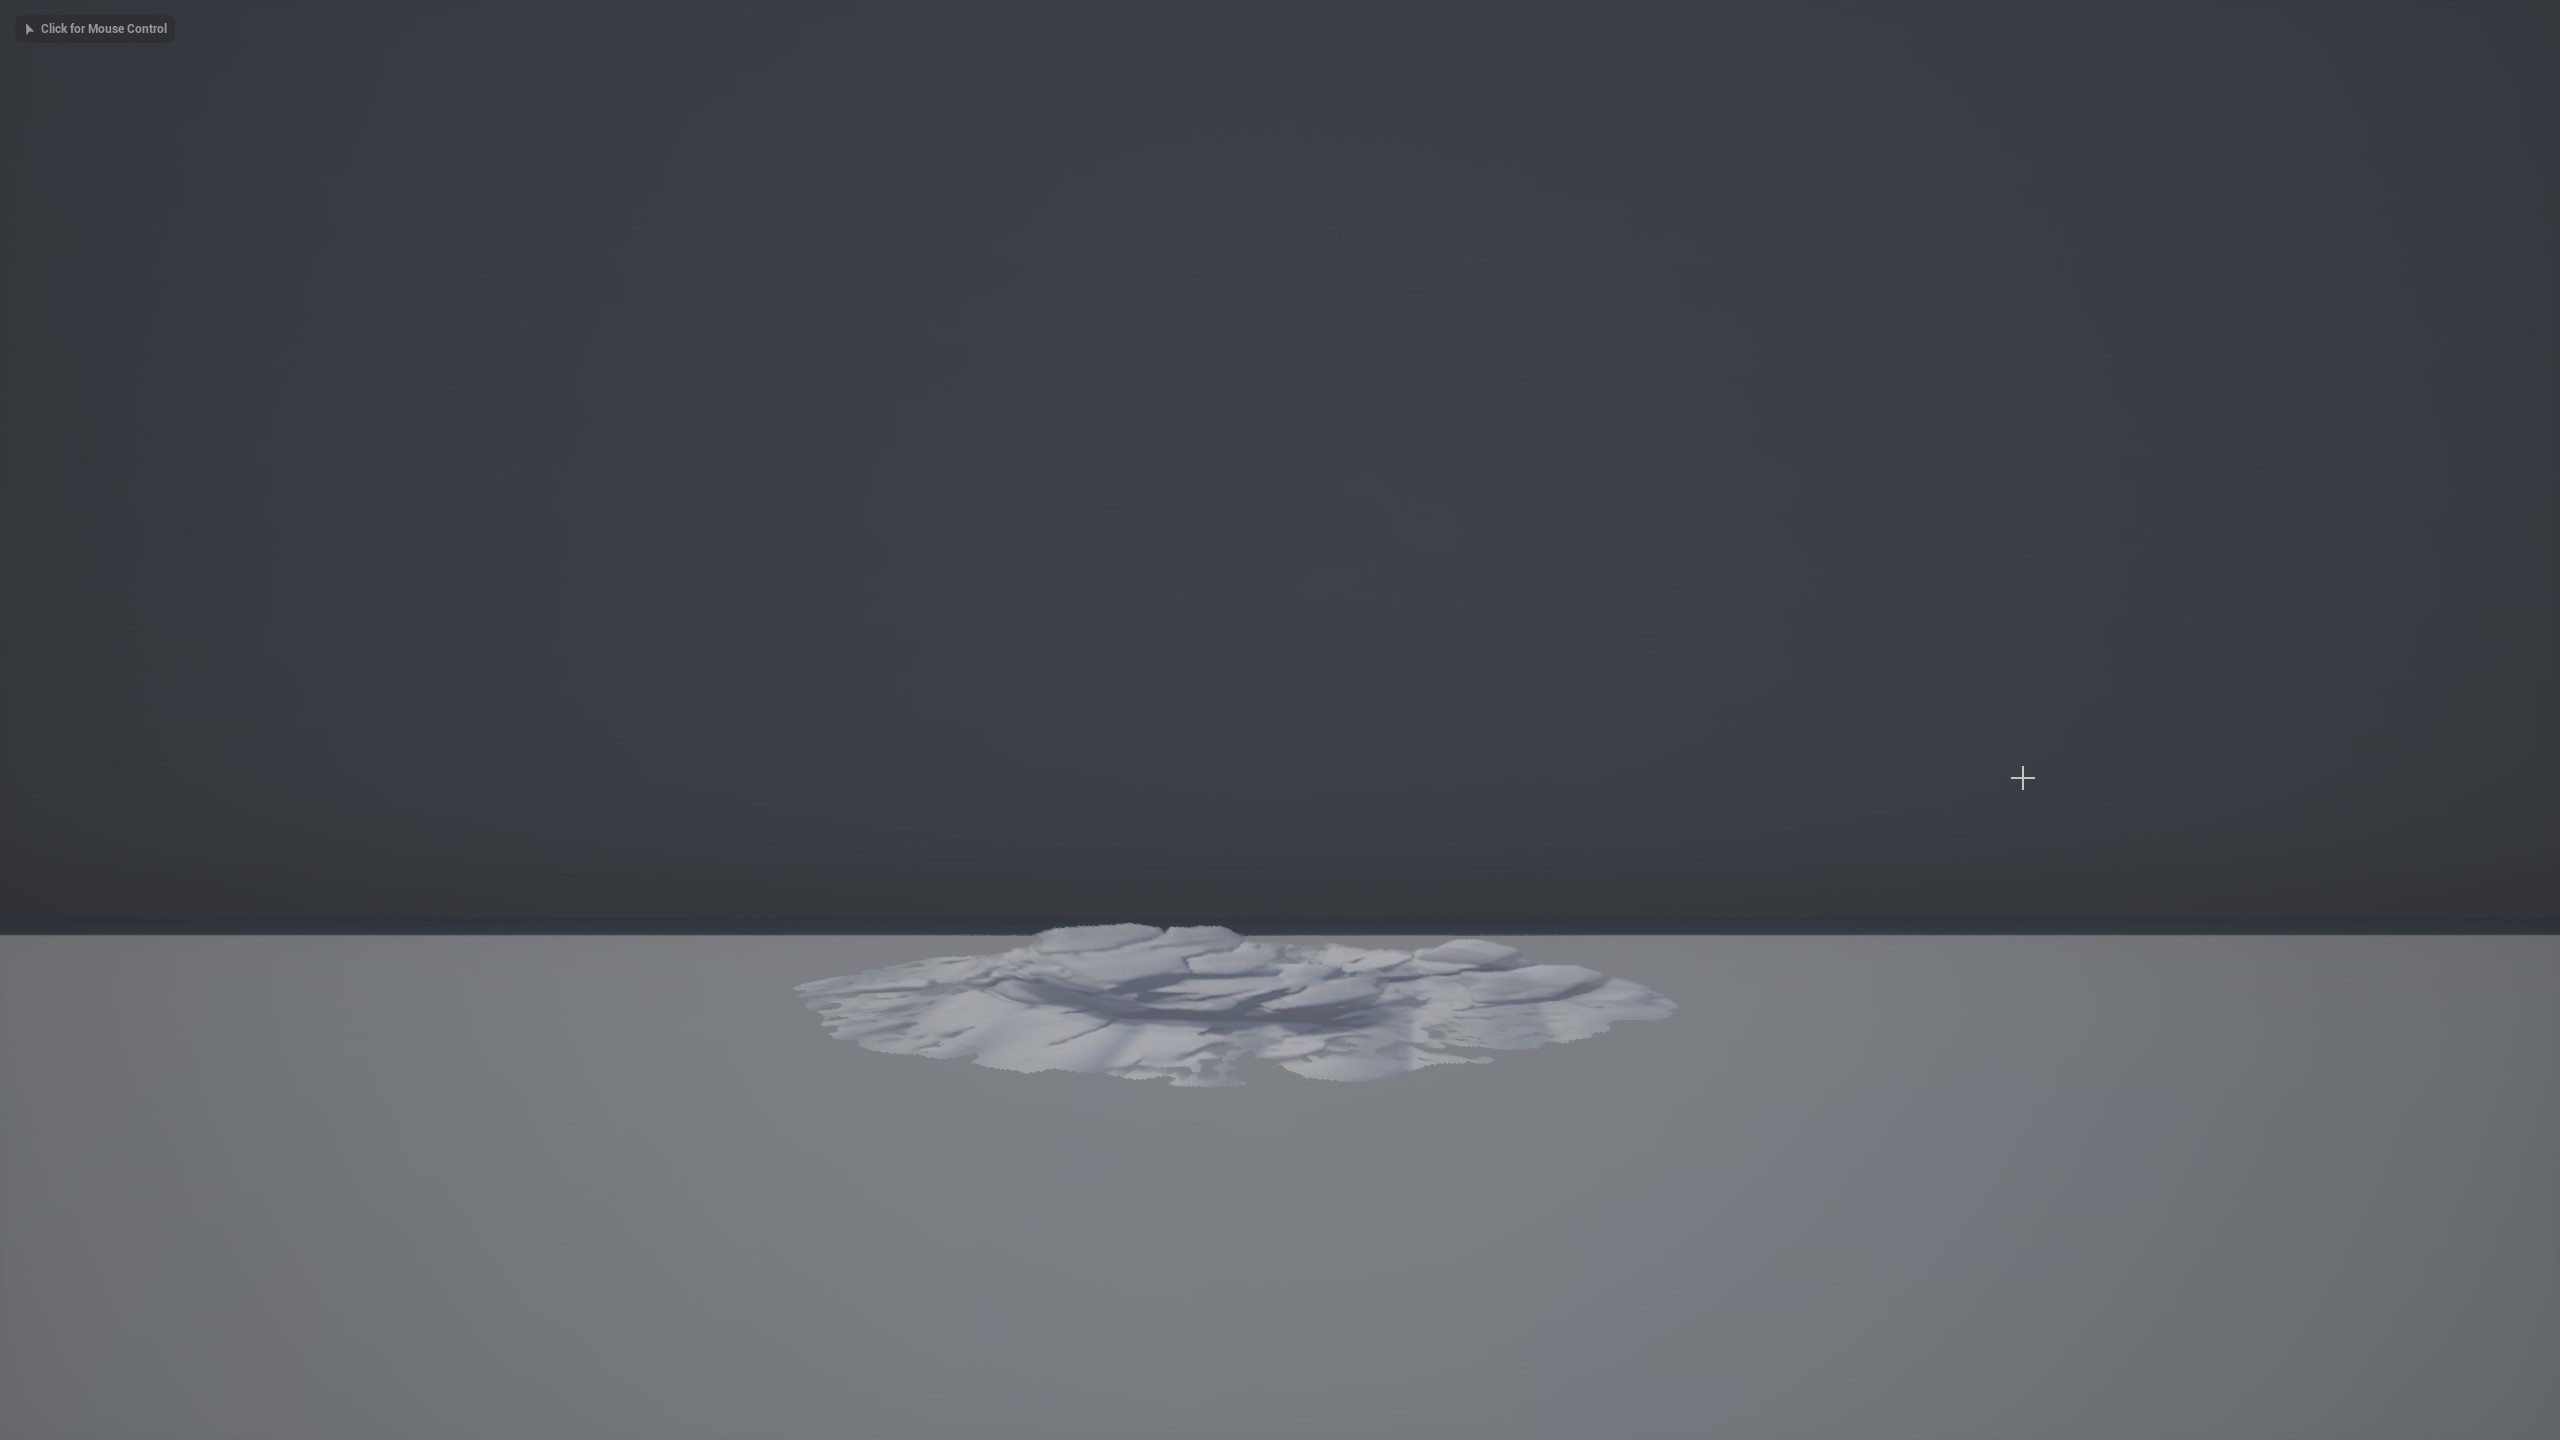
完成イメージはこちら!
【目次】
・準備
・ブループリントの作成
・フェードアウト機能の追加
・好きなタイミングで氷を解かす
・完成
準備
作成に入る前に下記のものを用意します。
・氷のアセット
・作成したファイルをまとめておくフォルダ
■アセットの用意
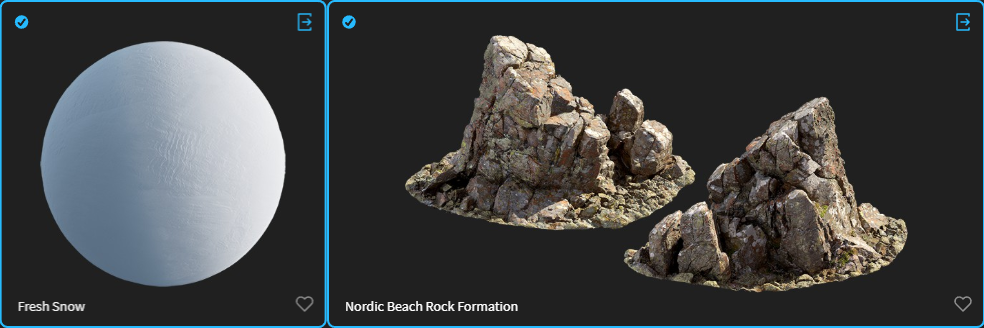
氷のアセットを用意してください。※雪のアセットですが氷で通します!
記事内では、Megascansのアセットを使用しています。
・FRESH SNOW
https://quixel.com/megascans/home?category=surface&search=FRESH&search=SNOW&assetId=ue3jdeqfw
・NORDIC BEACH ROCK FORMATION
https://quixel.com/megascans/home?search=NORDIC&search=BEACH&search=ROCK&search=FORMATION&assetId=veflbabqx
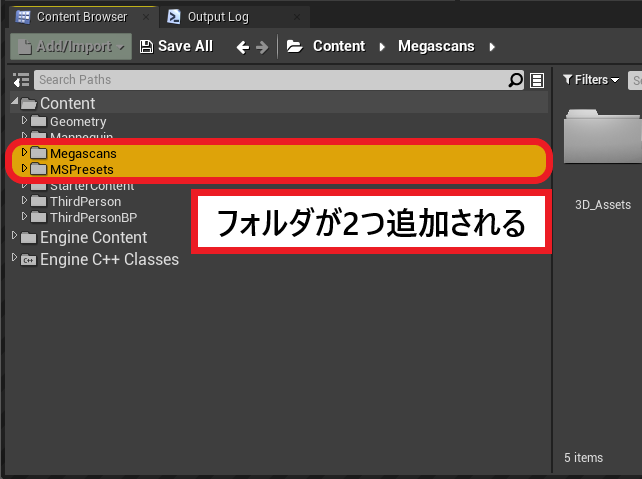
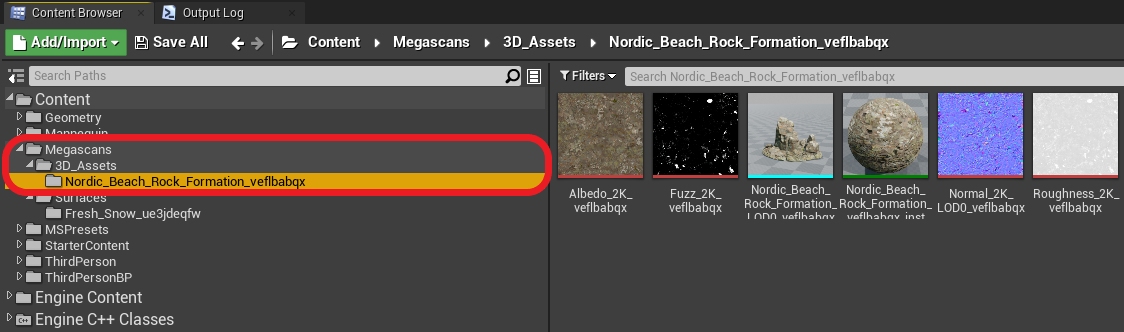
Megascansのアセットを追加すると、フォルダが2つ追加されます。
追加したアセットは”Megascans”フォルダに入っています。
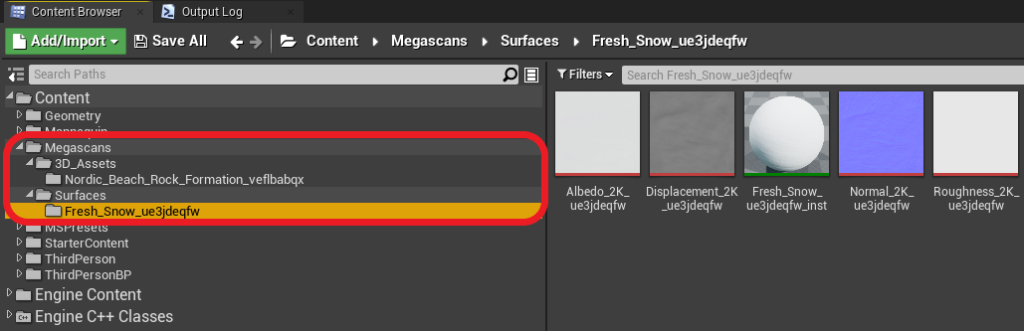
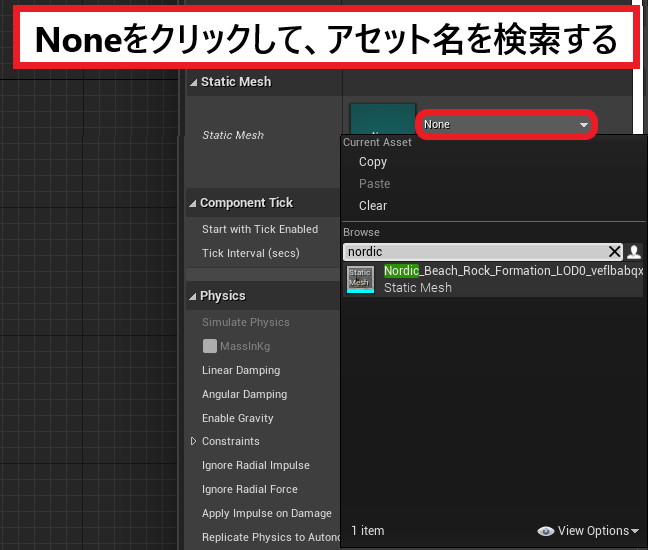
岩のアセットは、”Megascans→3D_Assets→Nordic_Beach_Rock_Formation_veflbabqx”に入っています。

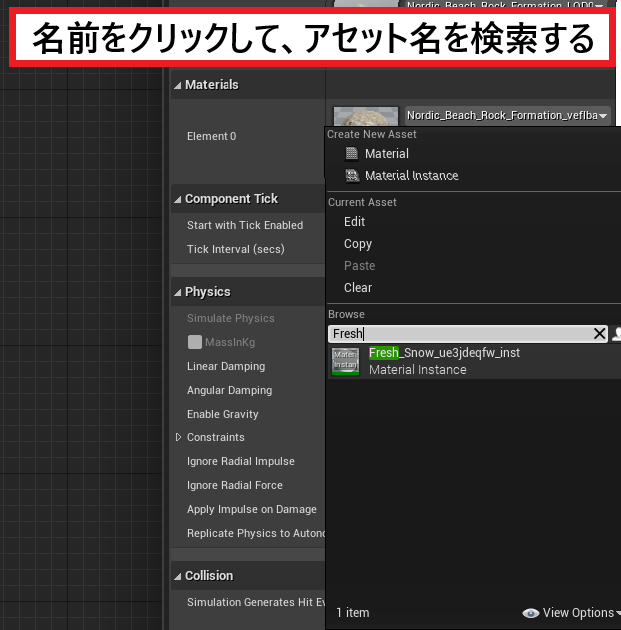
氷のマテリアルは、”Megascans→Surfaces→Fresh_Snow_ue3jdeqfw”に入っています。
※Megascansの使用方法についてはこちらをご覧ください。
https://historia.co.jp/archives/13752/
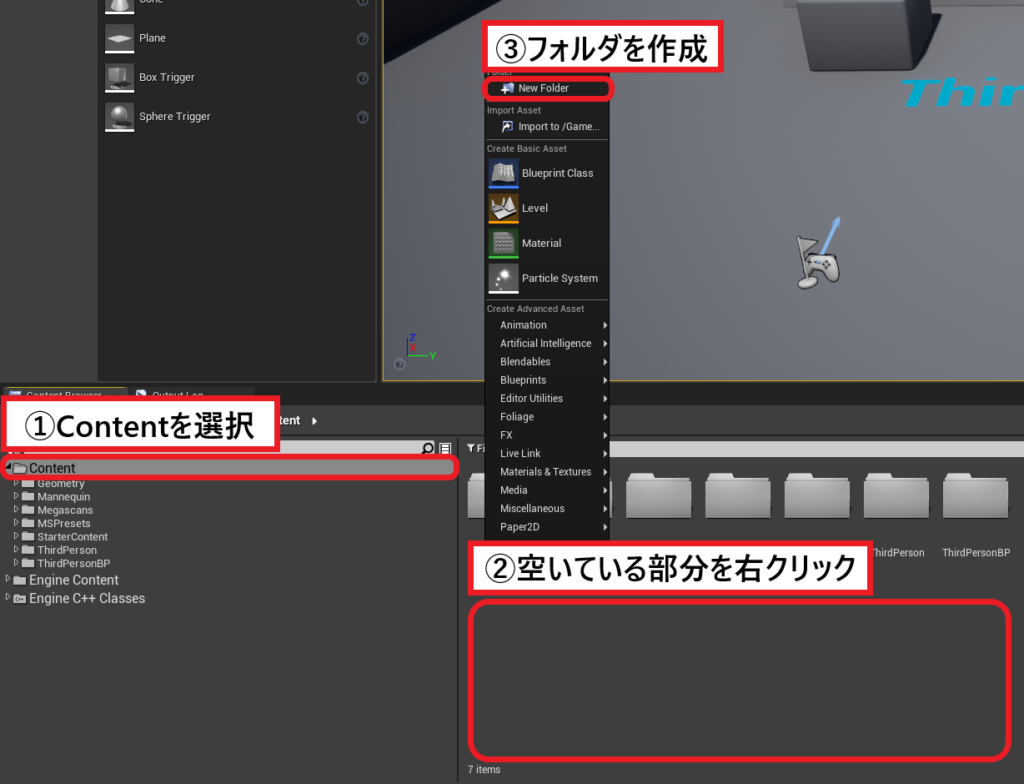
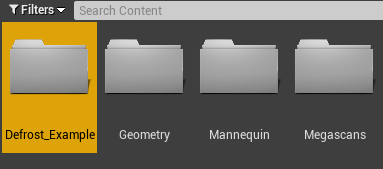
■フォルダの作成
Content直下にフォルダを作成します。
フォルダ名は”Defrost_Example”にしました。
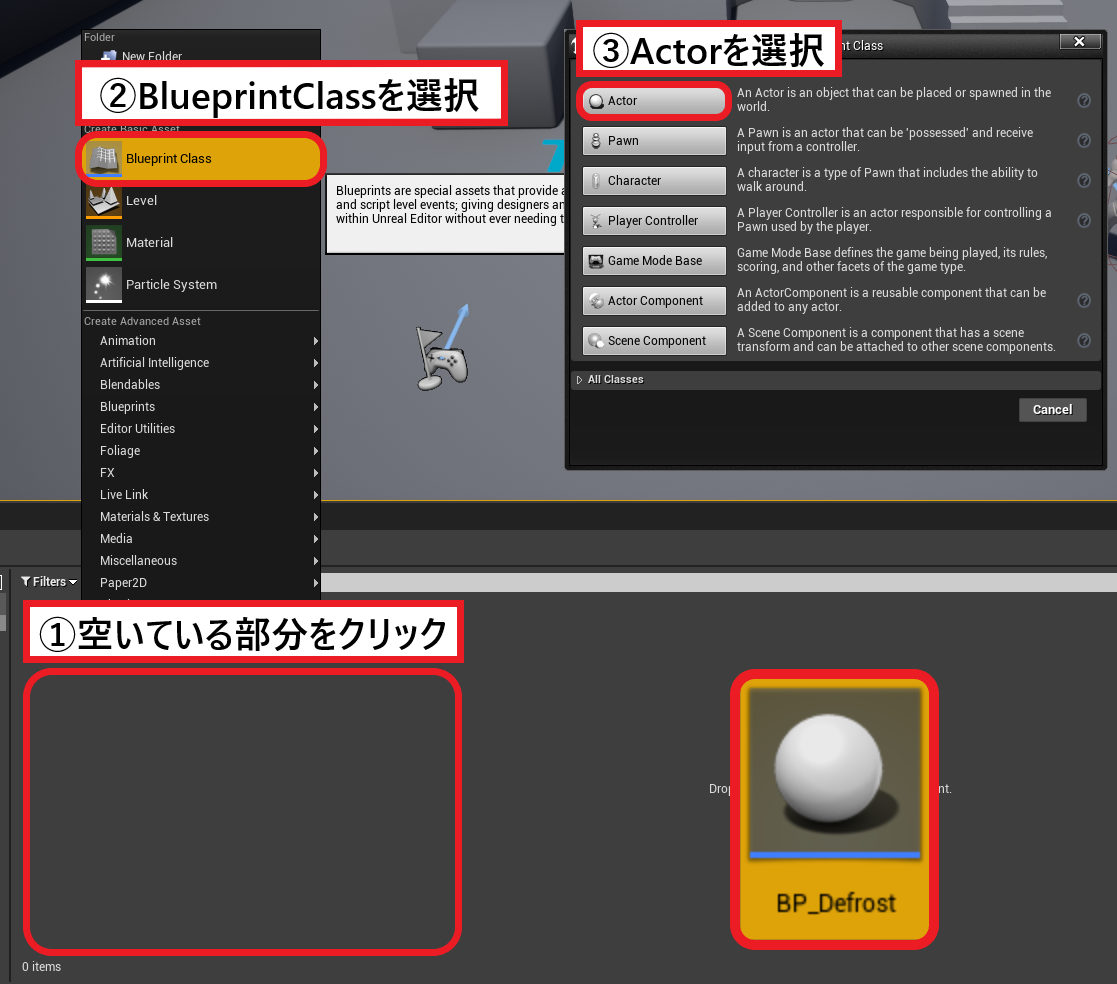
ブループリントの作成
氷のブループリントを作成します。
ファイル名は”BP_Defrost”にしました。

■アセットを追加
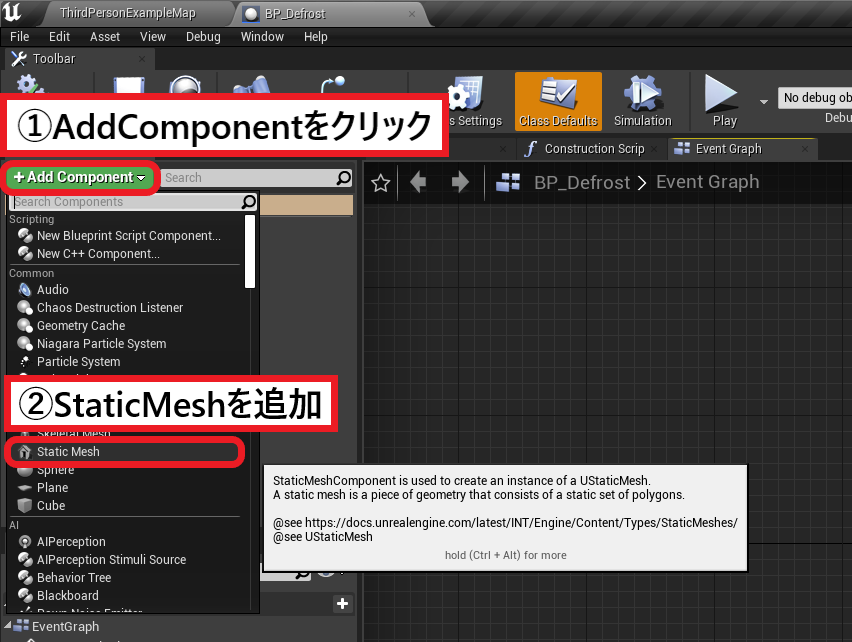
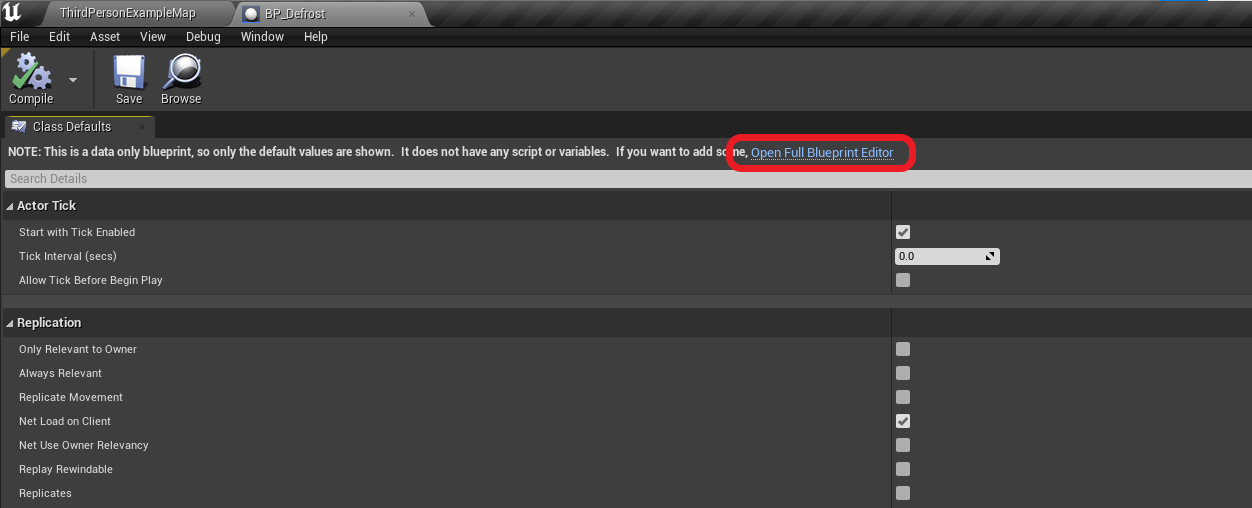
BP_Defrostを開いて、氷のアセットを追加します。
※ClassDefautsしか出てこないときは、”OpenFullBlueprintEditor”をクリックしてください。

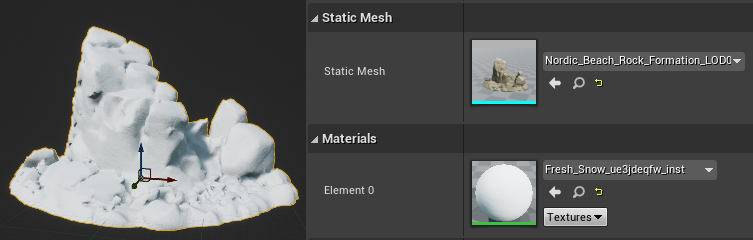
氷のアセットを追加するために、StaticMeshを作成します。
追加したStaticMeshに、岩のアセットを設定します。


Materials→Element 0を氷のマテリアルに変更します。
アセットの追加完了しました!
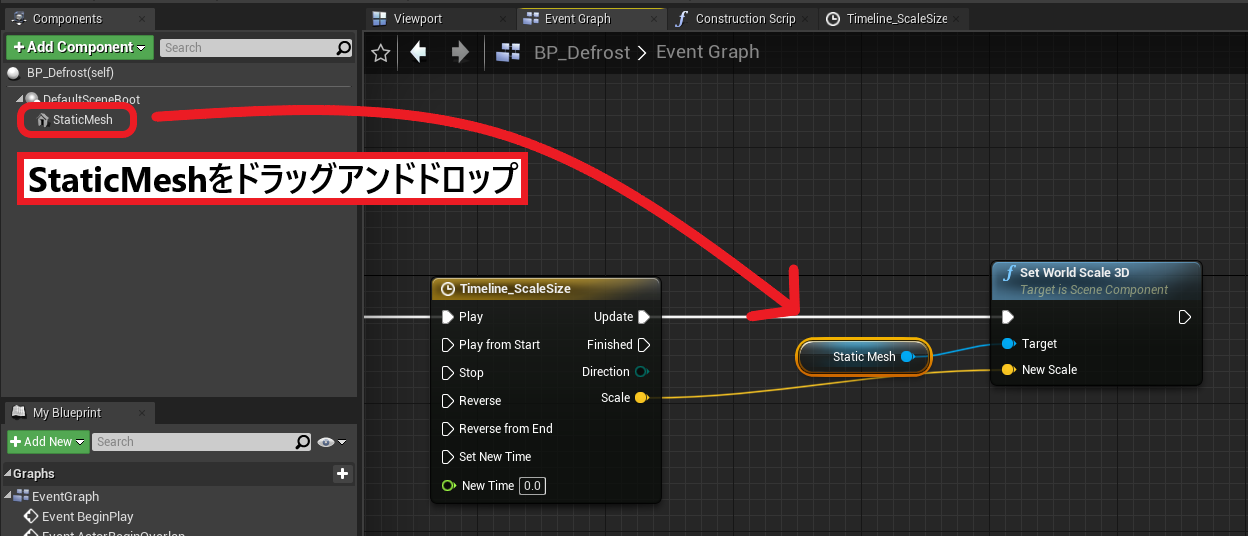
■スケール変更ロジック
「時間経過でモデルのスケールを変更する機能」を作成します。
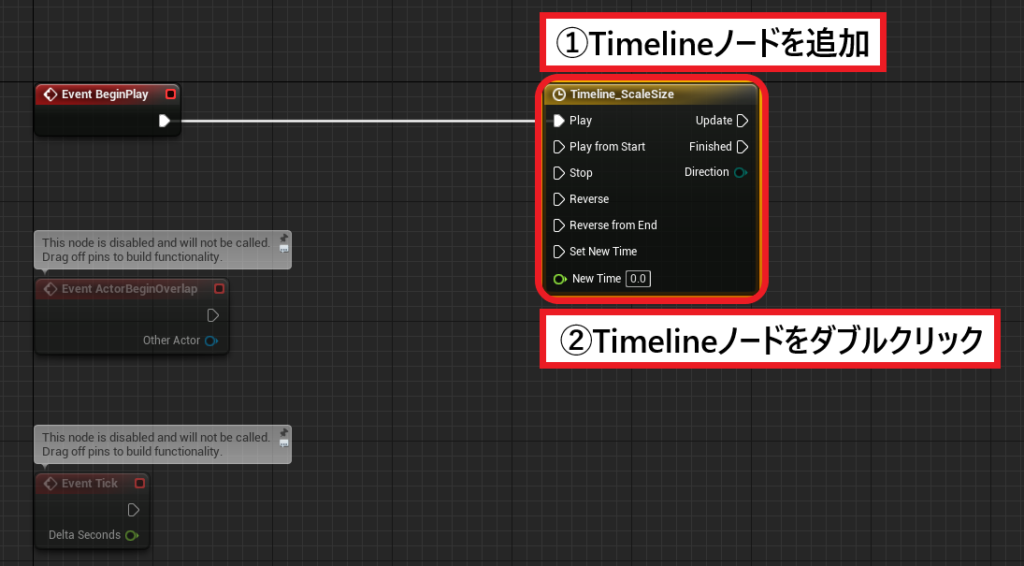
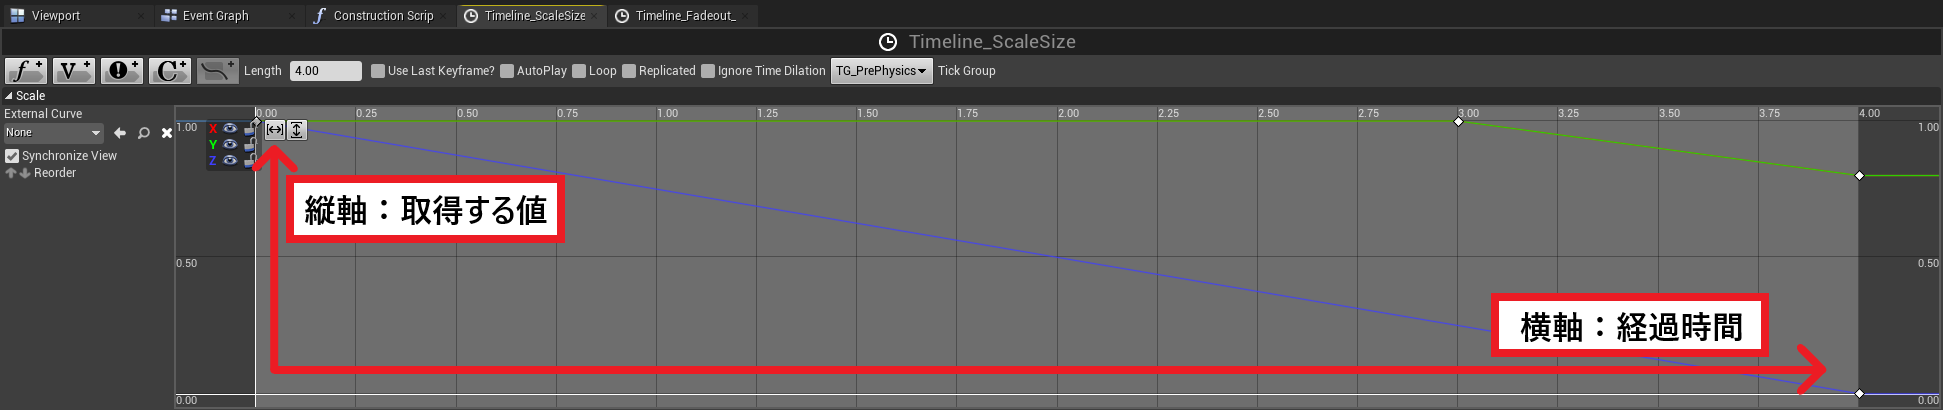
モデルのスケールをX,Y,Zそれぞれで変更するために、”Timelineノード”を使用します。
Timelineノードは、作成したグラフの値を時間経過で取得することができます。

実際に作成していきます。
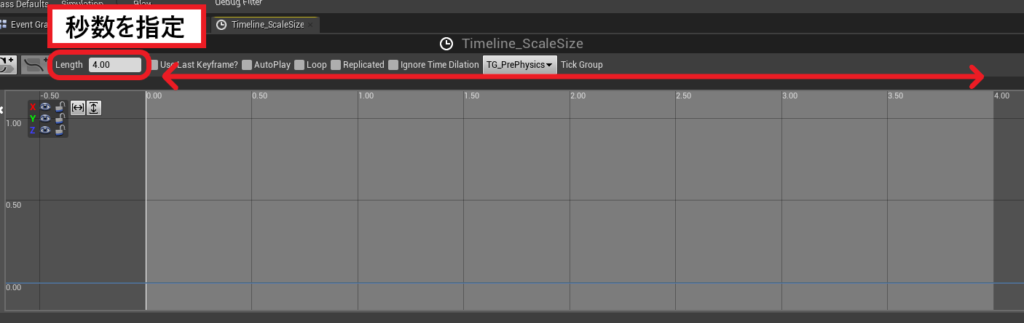
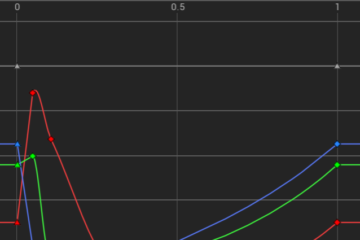
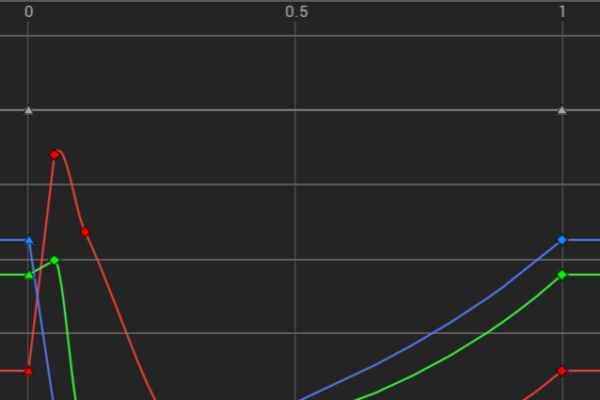
X,Y,Zの値が欲しいので、Vectorのグラフを作成します。
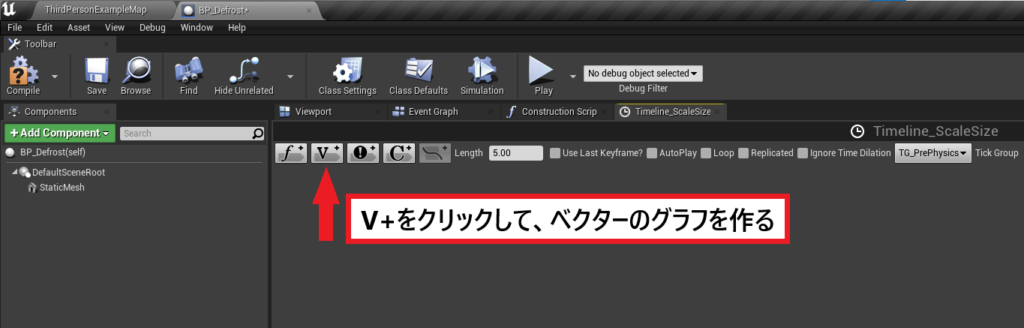
氷が解けきる秒数を指定します。
今回は4秒にしています。
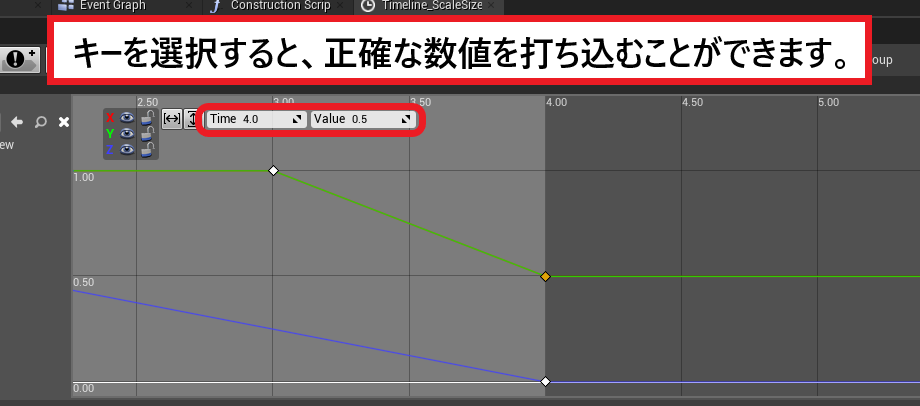
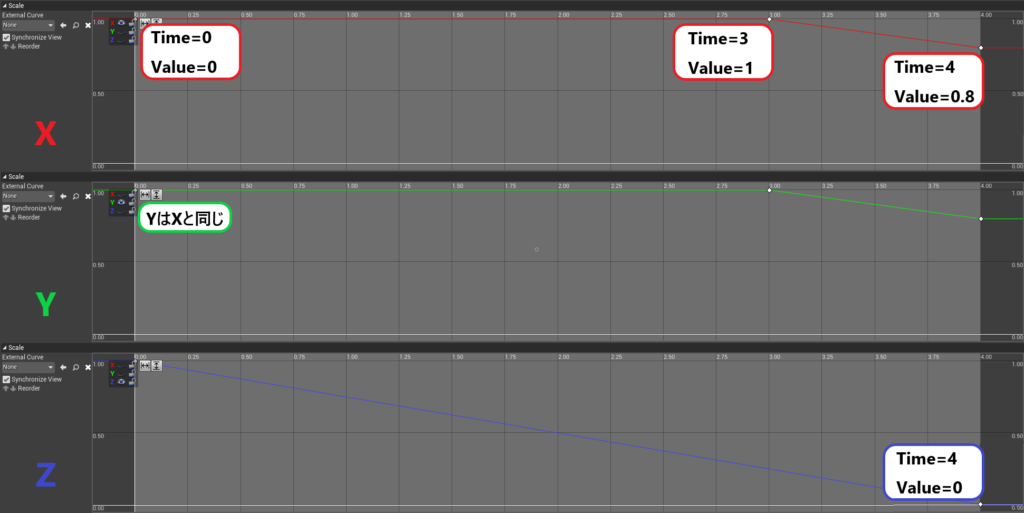
グラフにキーを打って、時間経過で取得する値を決めます。
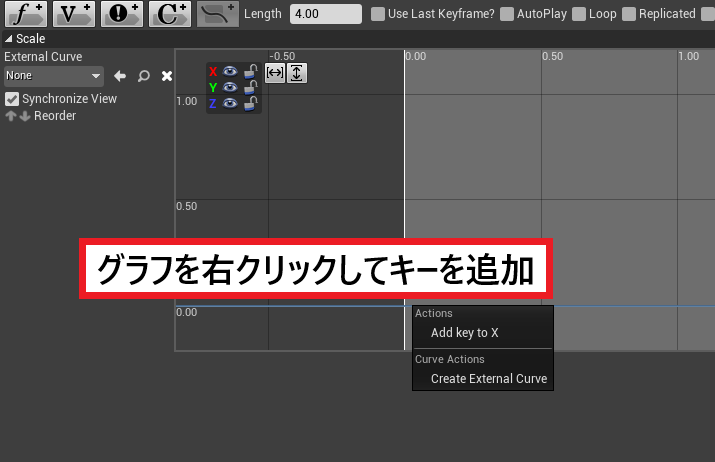
※目のアイコンで、グラフの表示/非表示を切り替えられます

X,Y,Zそれぞれ設定してください。
最後にグラフの名前を変更しておきます。
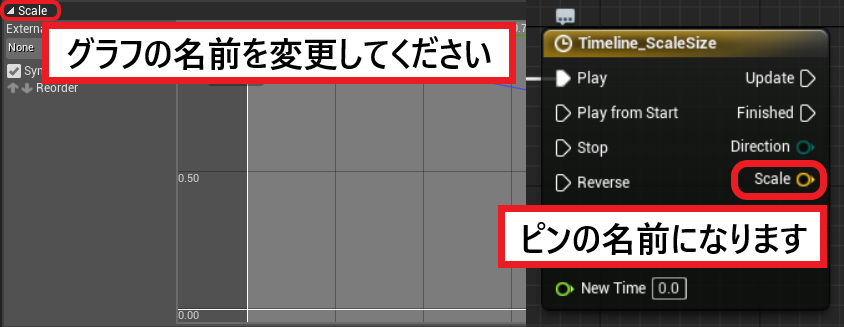
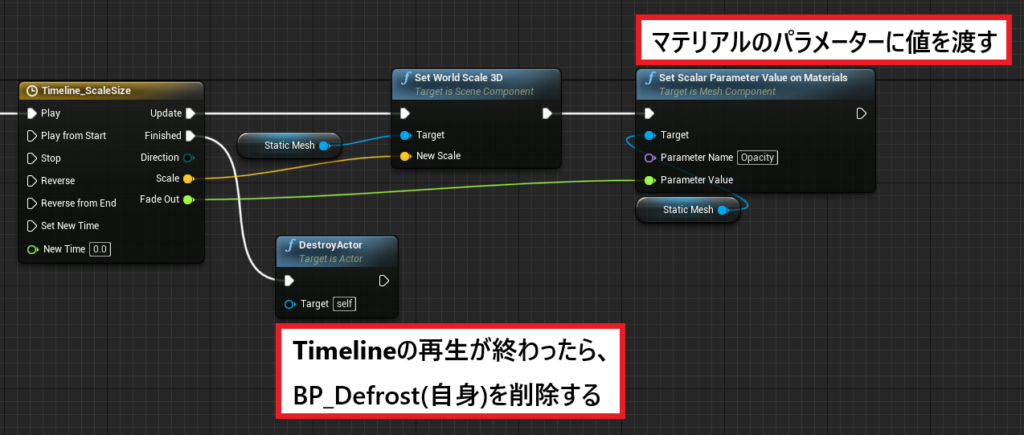
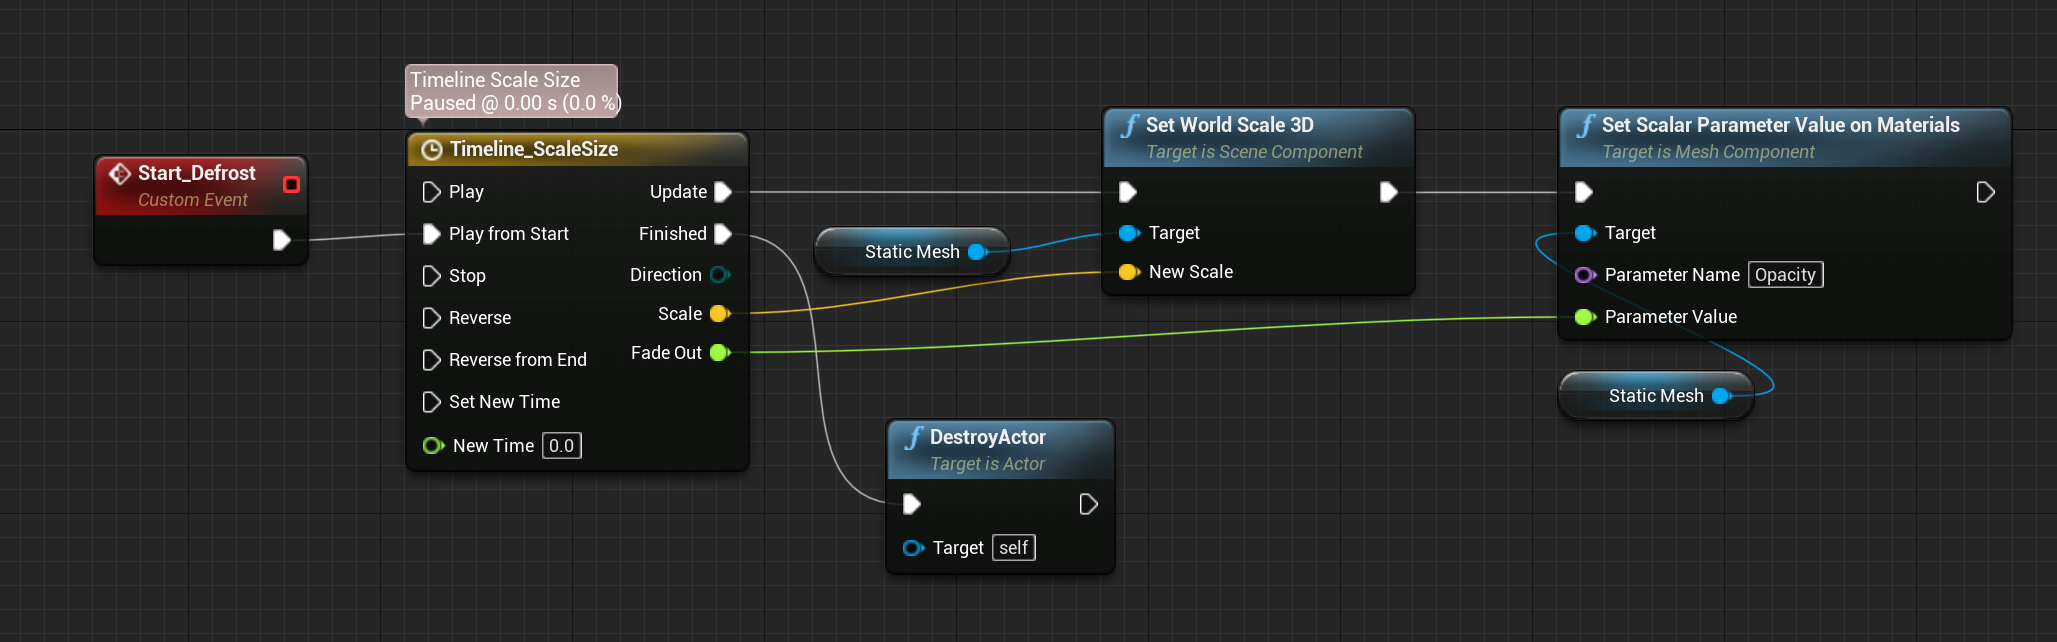
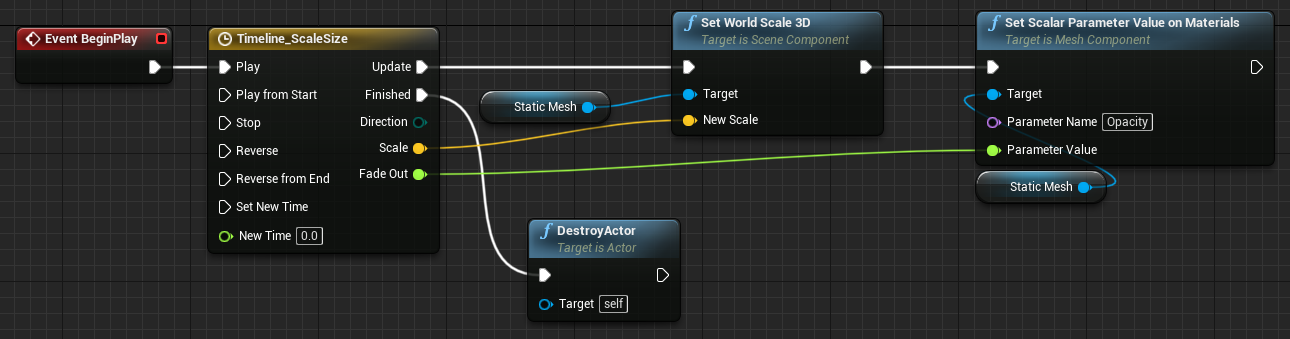
”SetWorldScale3D”にScaleの値を渡すことで、時間経過でモデルのスケールが変わるようになります。

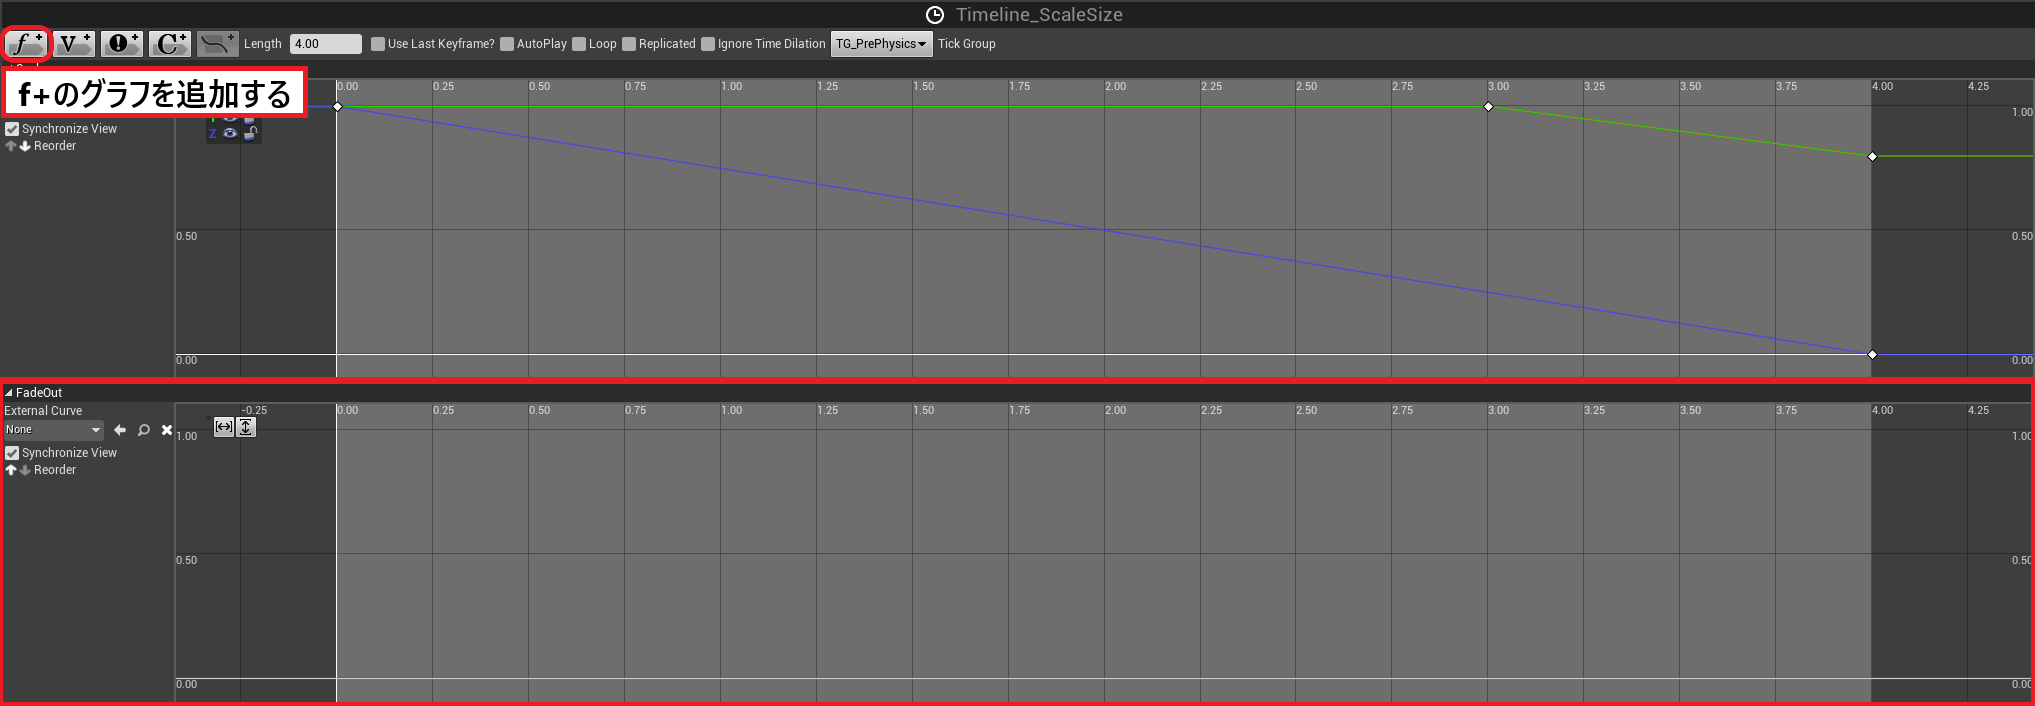
■フェードアウトで消す
ある程度解けたら、StaticMeshをフェードアウトさせて自然に消えるようにします。
フェードアウト自体はマテリアルで行っています。
BP_Defrostでは、フェードアウトに必要な値をマテリアルに渡しています。
マテリアルに渡す値を取得するため、タイムラインに新しくグラフを追加します。
今回はV+ではなく、”f+”のグラフを作ります。
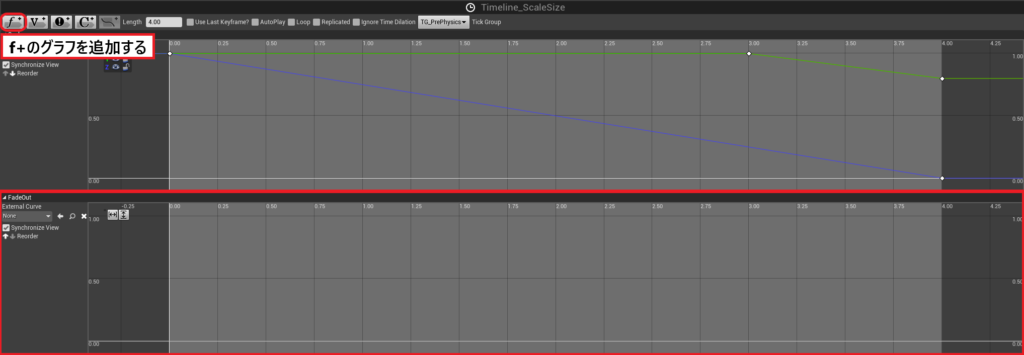
Zのスケールが半分潰れたくらいのタイミングで、フェードアウトを開始します。

FadeOutをマテリアルのパラメーター”Opacity”に渡します。
※パラメーターOpacityはこの後作成します。
スケール変更ロジックの完成です!

フェードアウト機能の追加
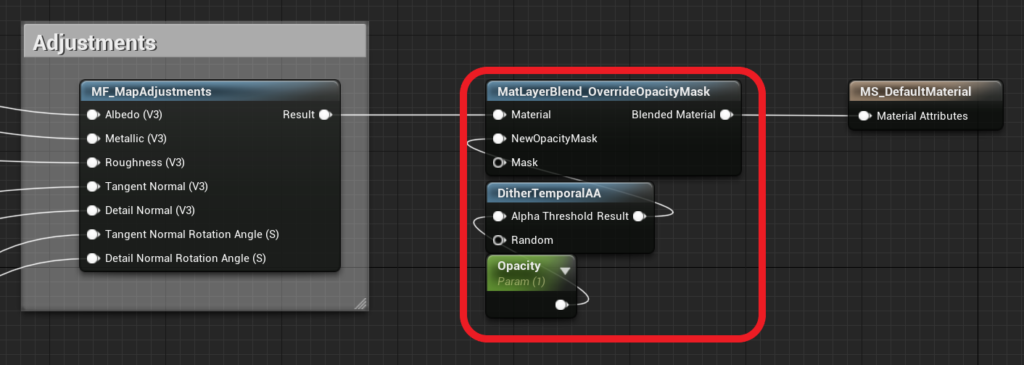
BP_Defrostから受けとった値で、フェードアウトするロジックをマテリアルに追加します。
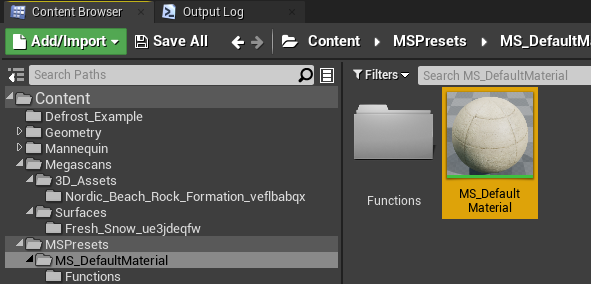
Content→Megascans→MSPresets→MS_DefaultMaterial→MS_DefaultMaterialを開きます。
※氷のマテリアルは、MS_DefaultMaterialのマテリアルインスタンスです。
マテリアルインスタンスの使用方法についてはこちらをご覧ください。
[UE4]Material Instanceの基本的な使い方|株式会社ヒストリア
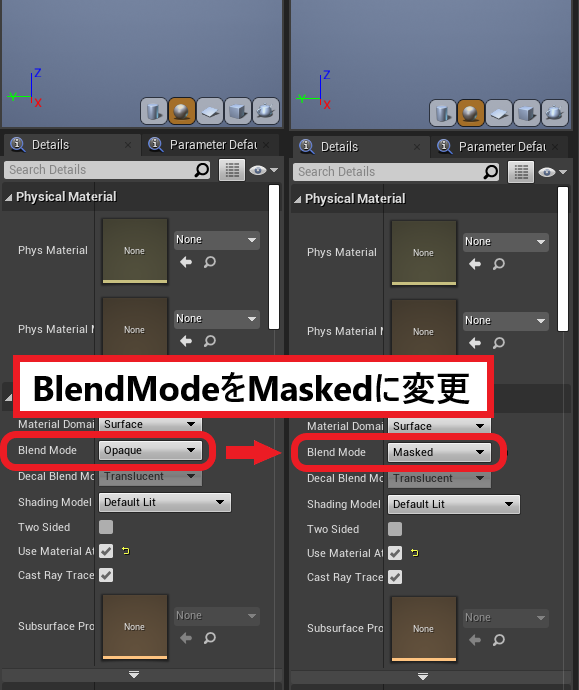
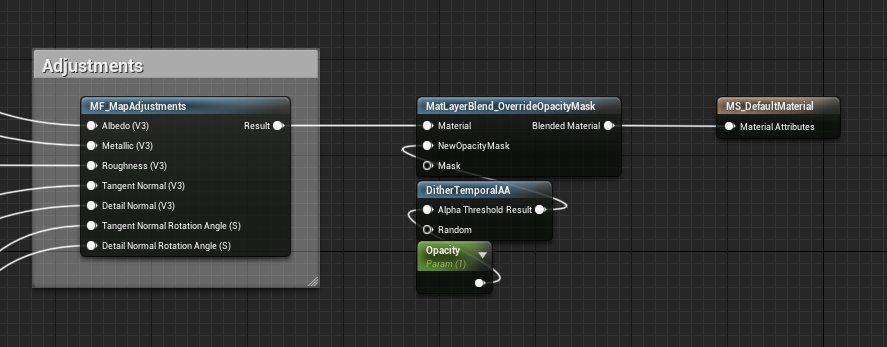
フェードアウトするためには、透明度の値を変更する必要があります。
BlendModeを”Masked”に変更することで、OpacityMask(透明度)の値を変更することができるようになります。
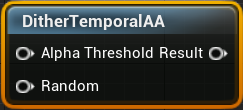
”DitherTemporalAA”はMeshの表示を薄くすることができます。
薄くするというのがポイントです!
OpacityMaskに直接値を渡すと、表示か非表示かの2択になってしまいます。
少しずつ薄くするためにDitherTemporalAAを追加しています。
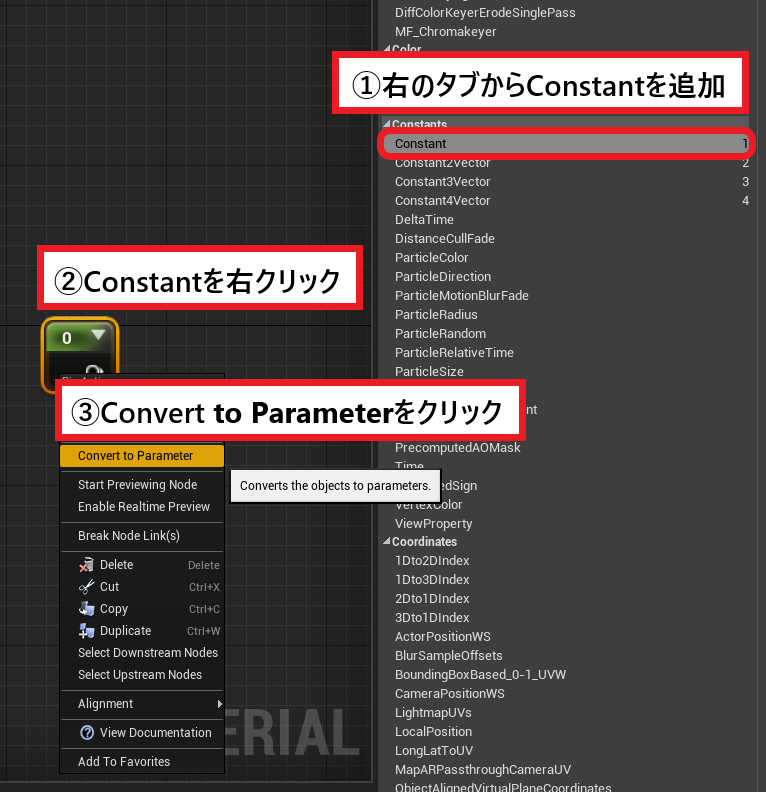
パラメーター化することで、外部(BP_Defrost)から値を変更することができるようになります。

好きなタイミングで氷を解かす
EventBeginPlayで呼び出していたので、ゲーム再生と同時に氷が解けていました。
そこで、何かしらのキーを押したときに、氷が解けるように修正します。
■カスタムイベントの作成
キーを押したときに呼び出すイベントを作成します。
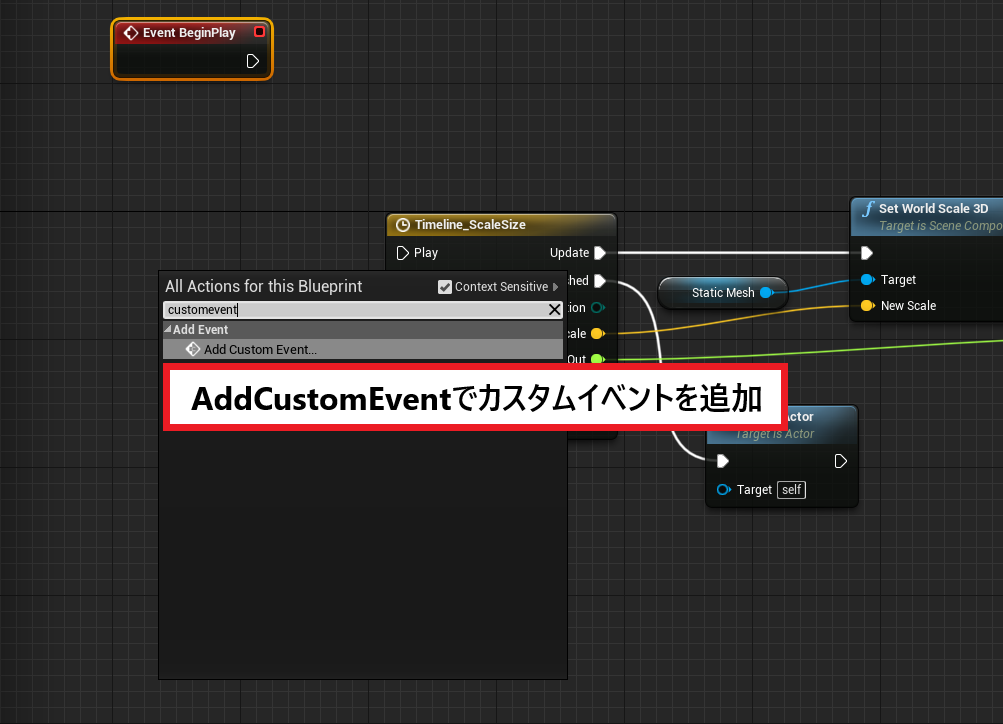
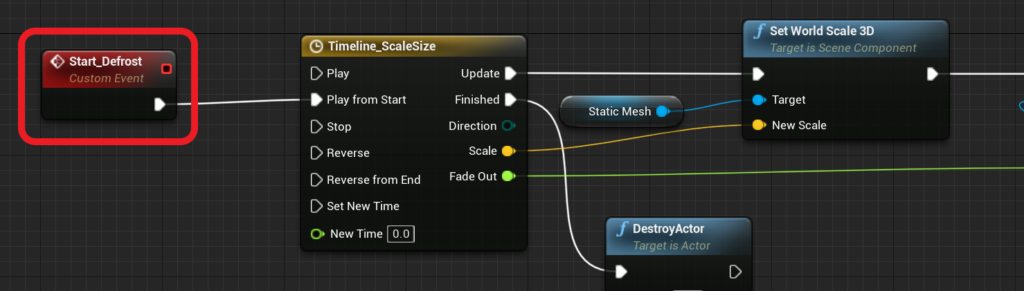
EventBeginPlayを切り離して削除します。代わりに作成したカスタムイベントを繋ぎます。
イベント名は”Start_Defrost”にしました。
■レベルブループリントから呼び出す
キーを押したとき、作成したイベントを呼びだす機能を作成します。
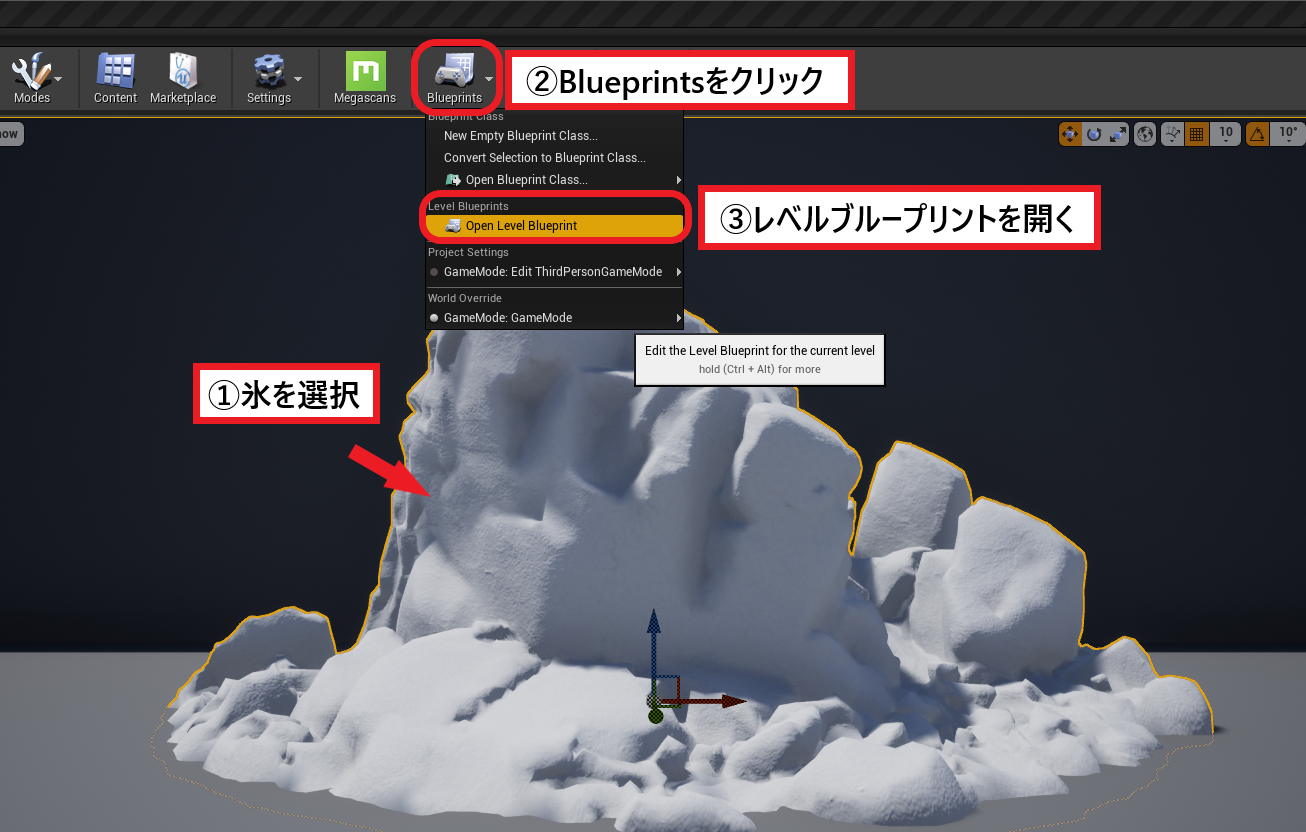
レベルブループリントを開きます。

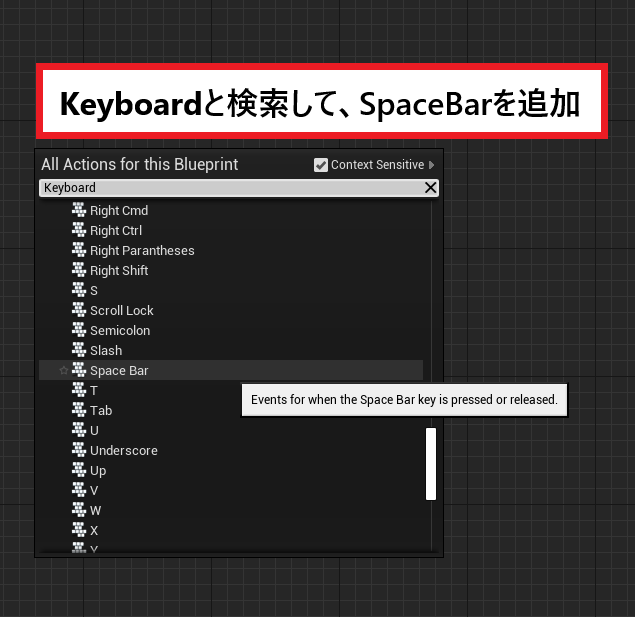
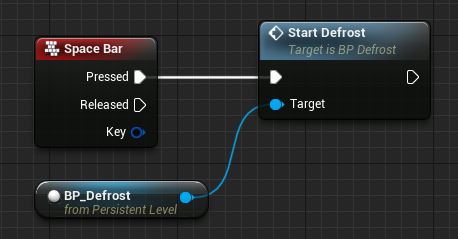
今回はスペースキーを押したときに、氷が解け始めるようにします。
スペースのキーイベントを追加します。
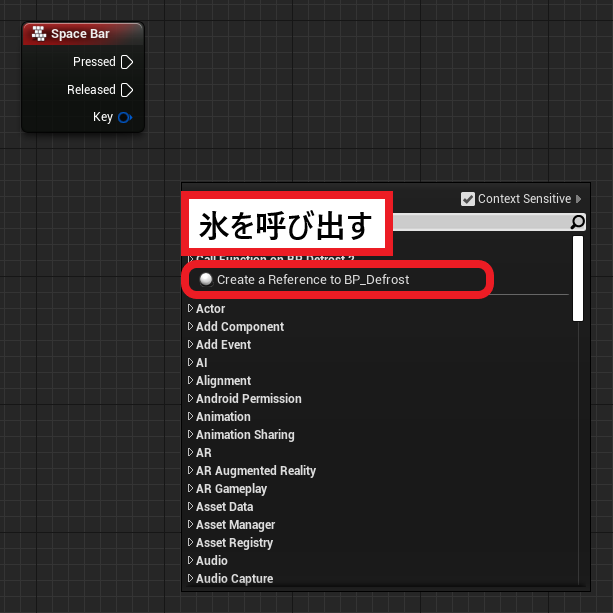
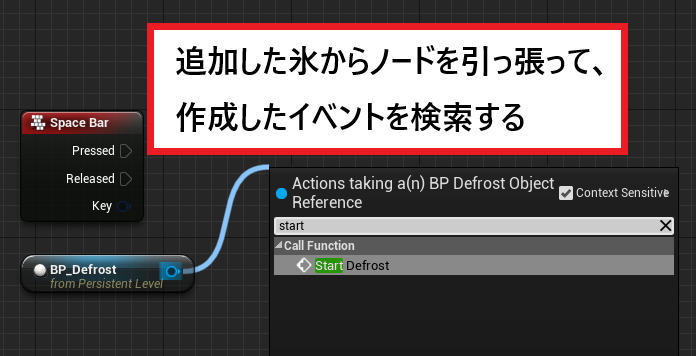
作成したカスタムイベントを呼びだします。
氷を選択した状態でないと、検索に出てこないので注意して下さい!
■完成
スペースキーを押すとカスタムイベント(Start_Defrost)が呼ばれて、氷が解け始めます。
レベルブループリント
BP_Defrost
※映像でスペースキーを押したことを伝えるために、PrintStringで画面に”PressSpaceBar!”と表示しています。
完成
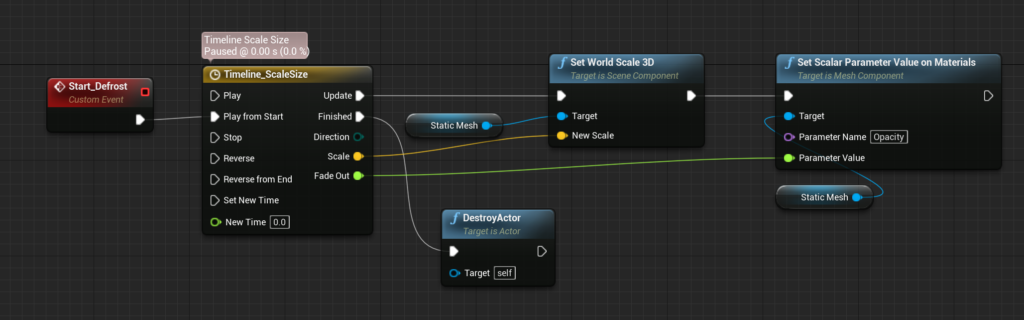
完成したノードの全容になります。
BP_Defrost
MS_DefaultMaterial
レベルブループリント
エフェクトを付け加えるとより解けているように見えると思います。
是非、ぷちコンでお役立てください!


 [UE5]マテリアルのSDFとは?画像から考える距離場のしくみ
2025.12.03UE
[UE5]マテリアルのSDFとは?画像から考える距離場のしくみ
2025.12.03UE
 [UE5]Color CurveをMaterial Functionで設定するには
2025.04.09その他
[UE5]Color CurveをMaterial Functionで設定するには
2025.04.09その他
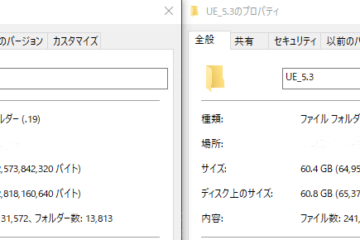
 [UE4][UE5]開発環境の容量を少しでも減らす
2024.08.14UE
[UE4][UE5]開発環境の容量を少しでも減らす
2024.08.14UE