執筆バージョン: Unreal Engine 4.27
|
皆さんこんにちは。エンジニアの森です。
今回は、Epic から公開されている「Action RPG」の Loading Screen を見てみます。
UE エディタ上でゲームを Standalone 実行すると、こちらの画面を確認できます
Action RPG Sample
この Loading Screen を使うと、ゲームスレッドの読み込み処理と別スレッドでロード画面が動くため、カクつかないロード画面が作れます。
実装を確認
まずは Epic Game Launcher を使って Action RPG を入手し、ソースコードを見ていきます。
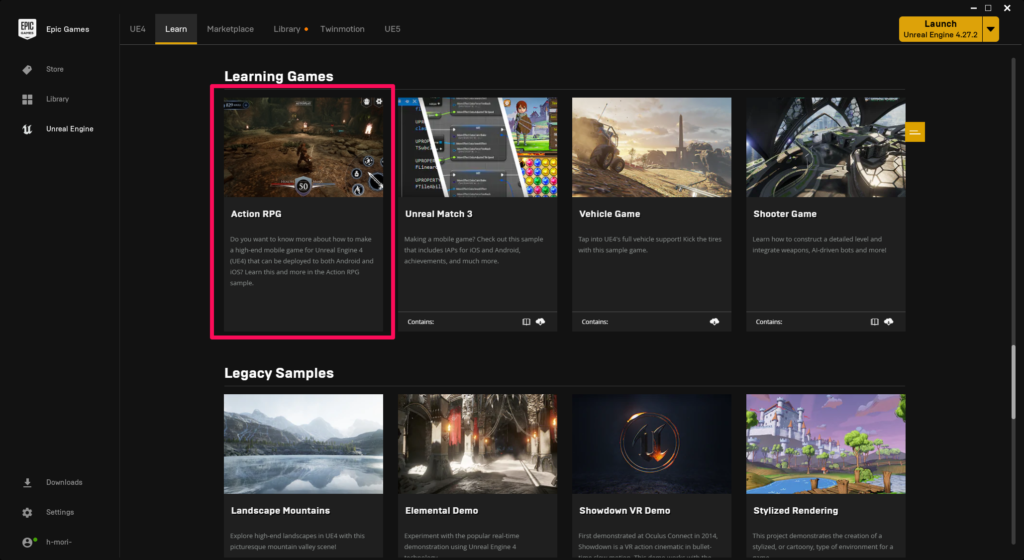
Laerning Games タブにあります
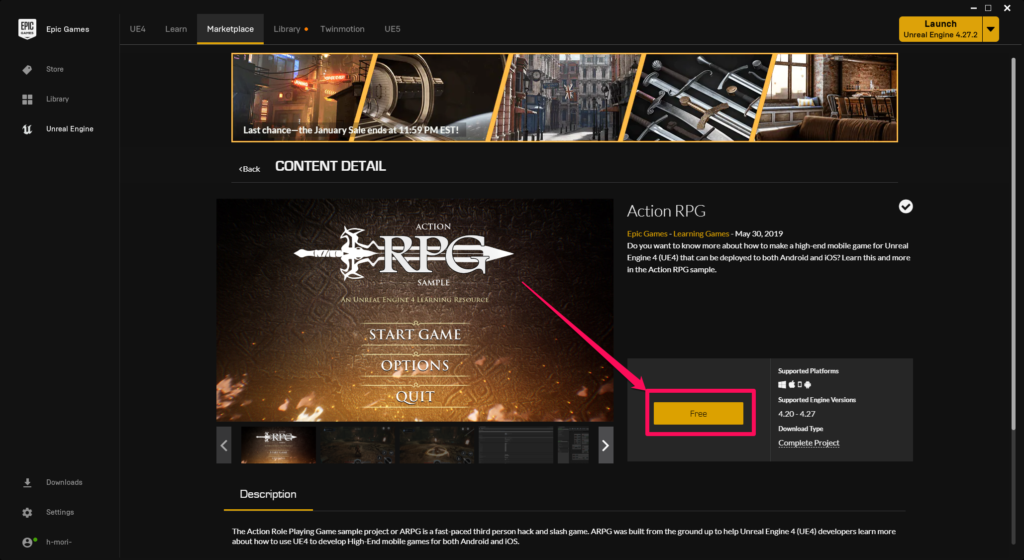
Free を押してダウンロード
こちらの実装の中身は Action RPG Loading Screen モジュールにありました。
構成はいたってシンプルで、以下の3つのファイルがあるだけです。
- ActionRPGLoadingScreen.Build.cs
- ActionRPGLoadingScreen.h
- ActionRPGLoadingScreen.cpp
ActionRPGLoadingScreen.cpp 内の FActionRPGLoadingScreenModule の実装を掲載します。
|
|
<br /> class FActionRPGLoadingScreenModule : public IActionRPGLoadingScreenModule<br /> {<br /> public:<br /> virtual void StartupModule() override<br /> {<br /> // Force load for cooker reference<br /> LoadObject(nullptr, TEXT("/Game/UI/T_ActionRPG_TransparentLogo.T_ActionRPG_TransparentLogo") ); |
if (IsMoviePlayerEnabled())
{
CreateScreen();
}
}
virtual bool IsGameModule() const override
{
return true;
}
virtual void StartInGameLoadingScreen(bool bPlayUntilStopped, float PlayTime) override
{
FLoadingScreenAttributes LoadingScreen;
LoadingScreen.bAutoCompleteWhenLoadingCompletes = !bPlayUntilStopped;
LoadingScreen.bWaitForManualStop = bPlayUntilStopped;
LoadingScreen.bAllowEngineTick = bPlayUntilStopped;
LoadingScreen.MinimumLoadingScreenDisplayTime = PlayTime;
LoadingScreen.WidgetLoadingScreen = SNew(SRPGLoadingScreen);
GetMoviePlayer()->SetupLoadingScreen(LoadingScreen);
}
virtual void StopInGameLoadingScreen() override
{
GetMoviePlayer()->StopMovie();
}
virtual void CreateScreen()
{
FLoadingScreenAttributes LoadingScreen;
LoadingScreen.bAutoCompleteWhenLoadingCompletes = true;
LoadingScreen.MinimumLoadingScreenDisplayTime = 3.f;
LoadingScreen.WidgetLoadingScreen = SNew(SRPGLoadingScreen);
GetMoviePlayer()->SetupLoadingScreen(LoadingScreen);
}
};
こちらに注目すると、CreateScreen() や StartInGameLoadingScreen() の中で
GetMoviePlayer()->SetupLoadingScreen() を呼んでいるようです。
表示する画像は StartupModule() 内で T_ActionRPG_TransparentLogo を読み込んでいます。
Slate が混ざっている点を除けば、実装もとてもシンプルと言えそうです。
使う
これを、自分のプロジェクトにコピペするだけでも、もちろん使えます。
ただ、ソースコード内で Slate を使っているため、ロード画面の UI をデザインできる方が限られてしまいます。
なので今回は、Slate ではなく任意のウィジェットでこれを使えるようにします。
まず、build.cs に UMG モジュールを追加後、以下のソースコードを追加します。
|
|
<br /> {<br /> "Modules": [<br /> {<br /> "Name": "MyProject",<br /> "Type": "Runtime",<br /> "LoadingPhase": "Default"<br /> },<br /> {<br /> "Name": "MyProjectLoadingScreen", // ←追加<br /> "Type": "Runtime",<br /> "LoadingPhase": "PreLoadingScreen"<br /> }<br /> ]<br /> }<br /> |
|
|
<br /> PrivateDependencyModuleNames.AddRange(new string[] { "MyProjectLoadingScreen", "UMG" }); // ←追加<br /> |
|
|
<br /> // Copyright Epic Games, Inc. All Rights Reserved. |
using UnrealBuildTool;
// This module must be loaded “PreLoadingScreen” in the .uproject file, otherwise it will not hook in time!
public class MyProjectLoadingScreen : ModuleRules
{
public MyProjectLoadingScreen(ReadOnlyTargetRules Target)
: base(Target)
{
PrivatePCHHeaderFile = “Public/MyProjectLoadingScreen.h”;
PCHUsage = PCHUsageMode.UseSharedPCHs;
PrivateIncludePaths.Add(“MyProjectLoadingScreen/Private”);
PublicDependencyModuleNames.AddRange(
new string[] {
“Core”,
“CoreUObject”,
“Engine”
}
);
PrivateDependencyModuleNames.AddRange(
new string[] {
“MoviePlayer”,
“Slate”,
“SlateCore”,
“InputCore”,
“UMG”
}
);
}
}
|
|
<br /> // Copyright Epic Games, Inc. All Rights Reserved. |
#pragma once
#include “Modules/ModuleInterface.h”
#include “Modules/ModuleManager.h”
class UUserWidget;
/** Module interface for this game’s loading screens */
class IMyProjectLoadingScreenModule : public IModuleInterface
{
public:
/** Loads the module so it can be turned on */
static inline IMyProjectLoadingScreenModule& Get()
{
return FModuleManager::LoadModuleChecked(“MyProjectLoadingScreen”);
}
/** Kicks off the loading screen for in game loading (not startup) */
virtual void StartInGameLoadingScreen(UUserWidget *Widget, bool bPlayUntilStopped, float PlayTime) = 0;
/** Stops the loading screen */
virtual void StopInGameLoadingScreen() = 0;
};
|
|
<br /> // Copyright Epic Games, Inc. All Rights Reserved. |
#include “MyProjectLoadingScreen.h”
#include “MoviePlayer.h”
#include “Blueprint/UserWidget.h”
class FMyProjectLoadingScreenModule : public IMyProjectLoadingScreenModule
{
public:
virtual void StartupModule() override
{
// Force load for cooker reference
LoadObject(nullptr, TEXT(“/Game/UI/T_MyProject_TransparentLogo.T_MyProject_TransparentLogo”) );
}
virtual bool IsGameModule() const override
{
return true;
}
virtual void StartInGameLoadingScreen(UUserWidget *Widget, bool bPlayUntilStopped, float PlayTime) override
{
FLoadingScreenAttributes LoadingScreen;
LoadingScreen.bAutoCompleteWhenLoadingCompletes = !bPlayUntilStopped;
LoadingScreen.MinimumLoadingScreenDisplayTime = PlayTime;
LoadingScreen.WidgetLoadingScreen = Widget->TakeWidget();
GetMoviePlayer()->SetupLoadingScreen(LoadingScreen);
}
virtual void StopInGameLoadingScreen() override
{
GetMoviePlayer()->StopMovie();
}
};
IMPLEMENT_GAME_MODULE(FMyProjectLoadingScreenModule, MyProjectLoadingScreen);
そして、Action RPG にならってランタイムモジュールの方に Blueprint function library クラスを作成します。
|
|
<br /> // Copyright Epic Games, Inc. All Rights Reserved. |
#pragma once
#include “MyProjectBlueprintLibrary.generated.h”
class UUserWidget;
/**
* Game-specific blueprint library
* Most games will need to implement one or more blueprint function libraries to expose their native code to blueprints
*/
UCLASS()
class UMyProjectBlueprintLibrary : public UBlueprintFunctionLibrary
{
GENERATED_UCLASS_BODY()
public:
/** Show the native loading screen, such as on a map transfer. If bPlayUntilStopped is false, it will be displayed for PlayTime and automatically stop */
UFUNCTION(BlueprintCallable, Category = Loading)
static void PlayLoadingScreen(UUserWidget *Widget, bool bPlayUntilStopped, float PlayTime);
/** Turns off the native loading screen if it is visible. This must be called if bPlayUntilStopped was true */
UFUNCTION(BlueprintCallable, Category = Loading)
static void StopLoadingScreen();
/** Returns true if this is being run from an editor preview */
UFUNCTION(BlueprintPure, Category = Loading)
static bool IsInEditor();
};
|
|
<br /> // Copyright Epic Games, Inc. All Rights Reserved. |
#include “MyProjectBlueprintLibrary.h”
#include “MyProjectLoadingScreen/MyProjectLoadingScreen.h”
UMyProjectBlueprintLibrary::UMyProjectBlueprintLibrary(const FObjectInitializer& ObjectInitializer)
: Super(ObjectInitializer)
{
}
void UMyProjectBlueprintLibrary::PlayLoadingScreen(UUserWidget *Widget, bool bPlayUntilStopped, float PlayTime)
{
IMyProjectLoadingScreenModule& LoadingScreenModule = IMyProjectLoadingScreenModule::Get();
LoadingScreenModule.StartInGameLoadingScreen(Widget, bPlayUntilStopped, PlayTime);
}
void UMyProjectBlueprintLibrary::StopLoadingScreen()
{
IMyProjectLoadingScreenModule& LoadingScreenModule = IMyProjectLoadingScreenModule::Get();
LoadingScreenModule.StopInGameLoadingScreen();
}
bool UMyProjectBlueprintLibrary::IsInEditor()
{
return GIsEditor;
}
最後にウィジェットを作成します。
ウィジェットは Game Instance で管理しています。
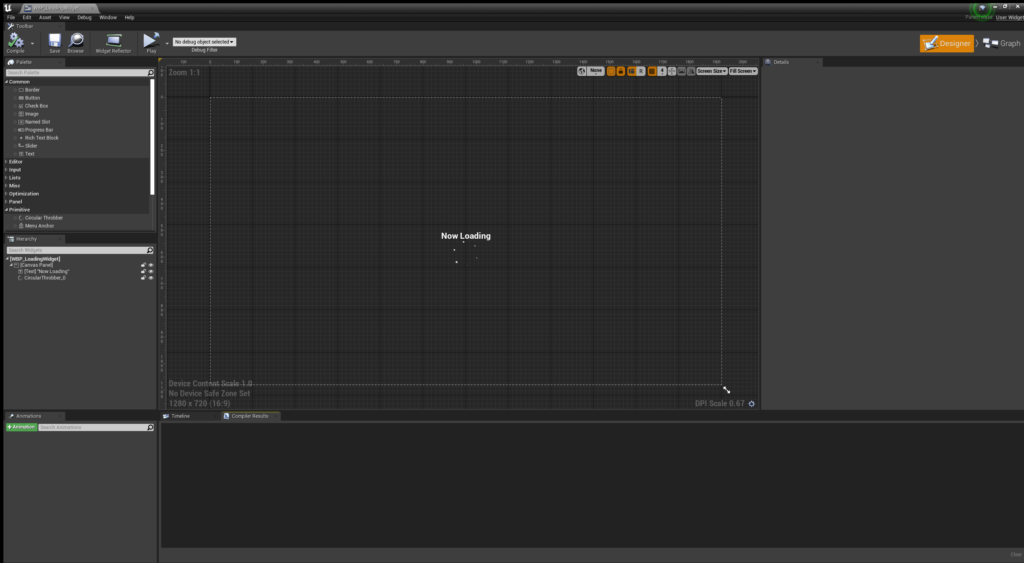
試してみましょう。
ロード画面が出ていますね。
今回は、Loading Screen を見ていきました。
ありがとうございました。
こちらからダウンロード












 [UE5]マテリアルのSDFとは?画像から考える距離場のしくみ
2025.12.03UE
 [UE5]Color CurveをMaterial Functionで設定するには
2025.04.09UE
 [UE4][UE5]開発環境の容量を少しでも減らす
2024.08.14UE