執筆バージョン: Unreal Engine 5.0 Early Access
改訂バージョン: Unreal Engine 5.0 |
MegascansをUE4でエクスポートするのに使うQuixel Bridgeですが
UE5に統合され事により、ドラッグ&ドロップで直接レベルに配置できるなど大きく中身も変わりました。
この記事ではUE5でのQuixel Bridgeを使った
無料の高品質アセットMegascansのインポートのやり方を説明したいと思います。
――Megascansとは
3Dスキャンから作成された高品質なライブラリ。Unreal Engineでの使用では無料で、毎週大量の新規アセットが追加されてる。
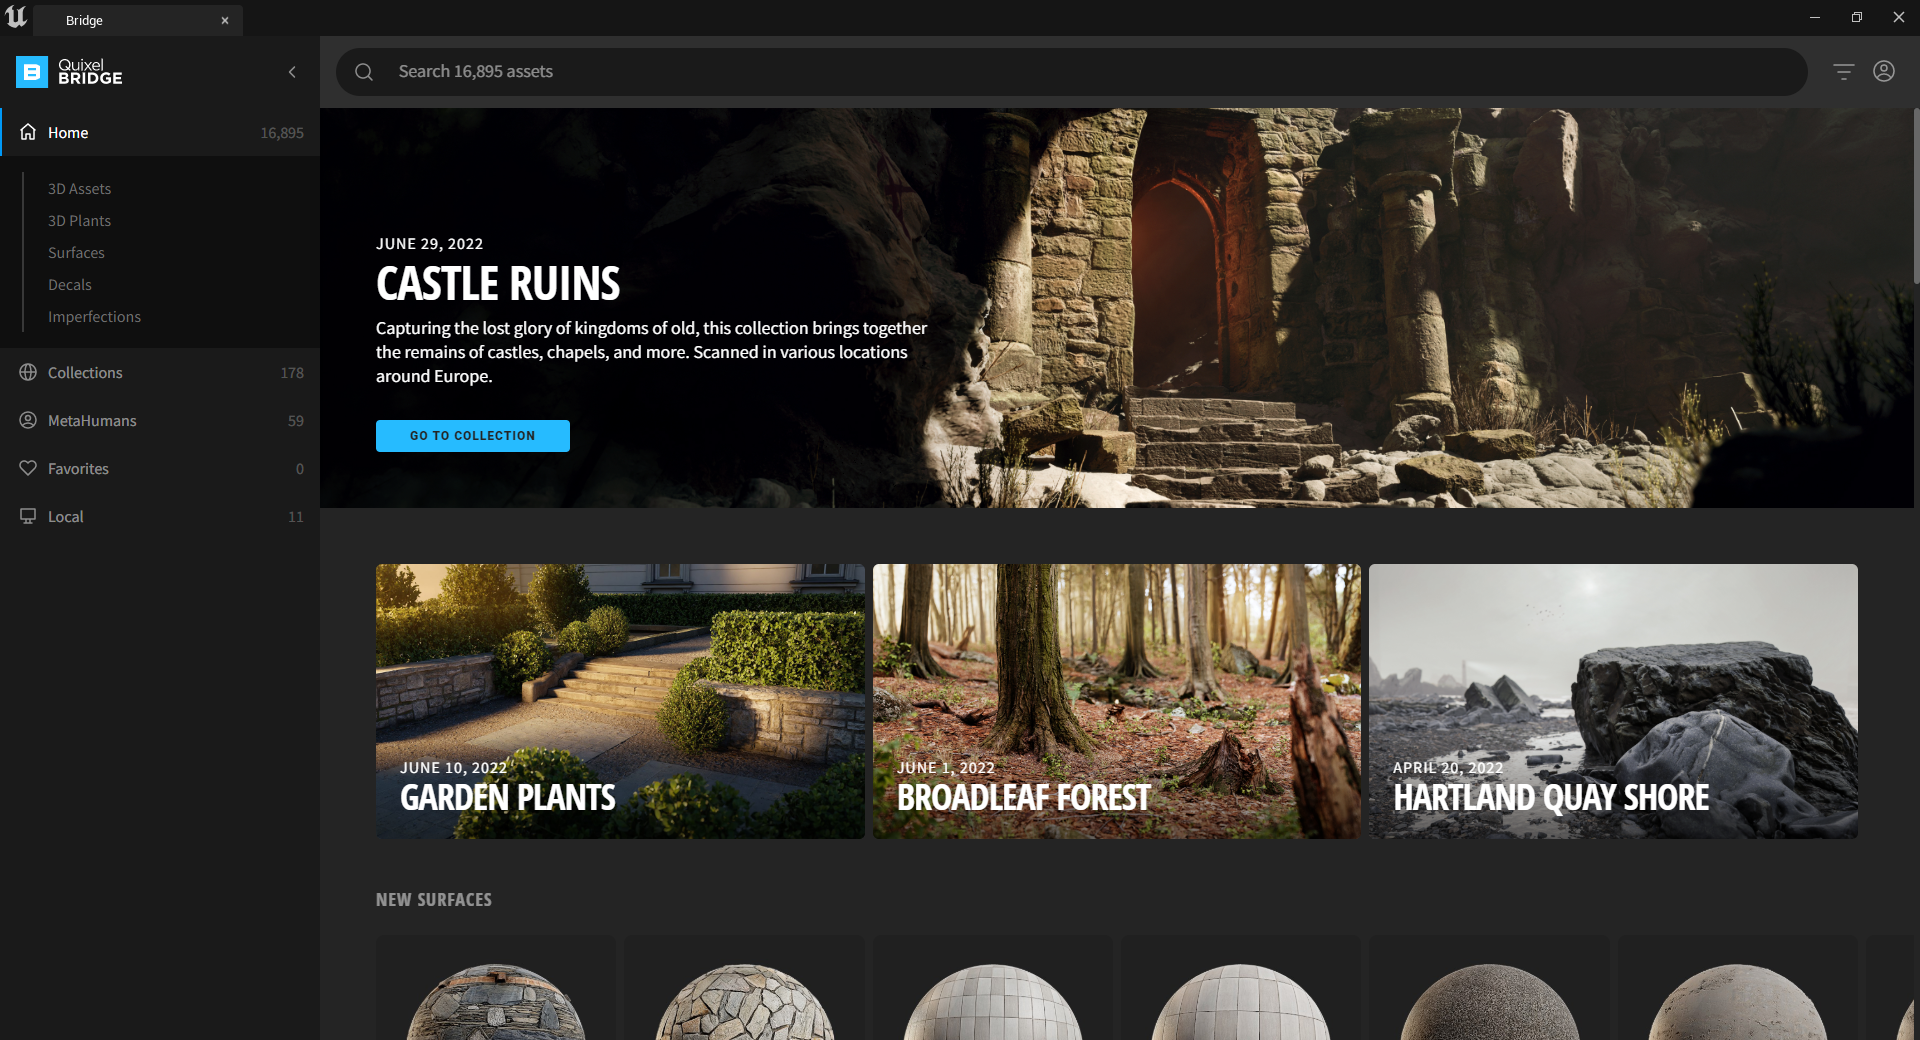
――Quixel Bridgeとは
Megascansのアセットを閲覧、ダウンロード、Unreal Engineにエクスポートすることができるツール。
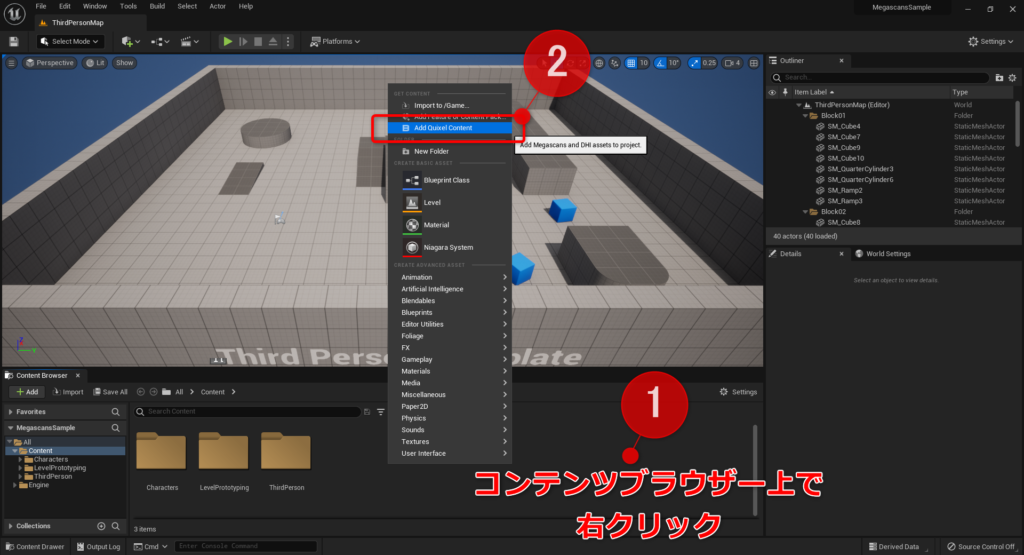
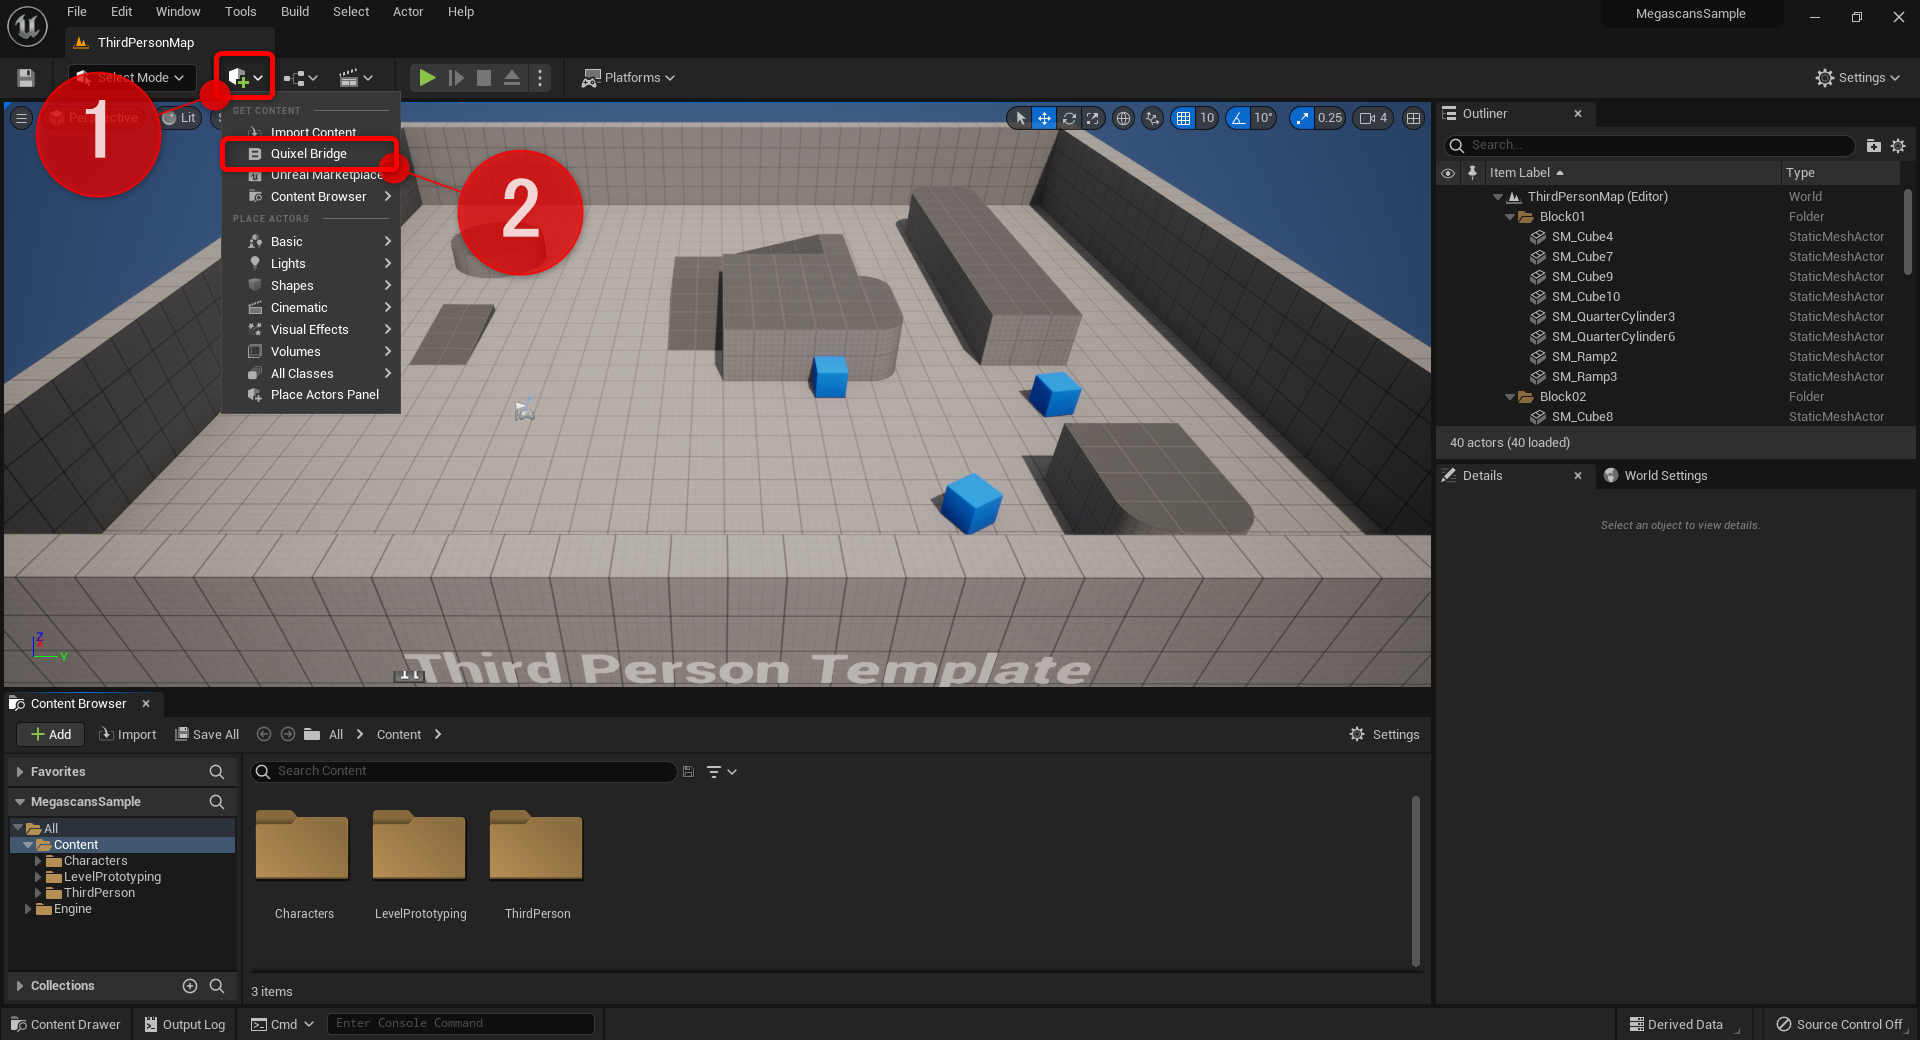
1,Quixel Bridge起動の方法は2種類
- コンテンツブラウザー上で右クリックし、「Add Quixel Content」を選択
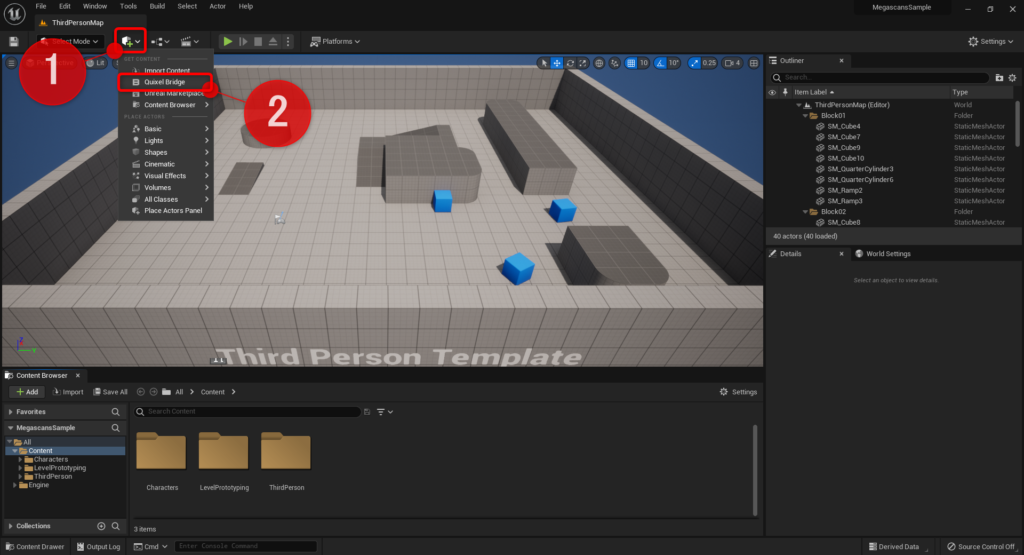
- 「コンテンツの作成」から「Quixel Bridge」を選択
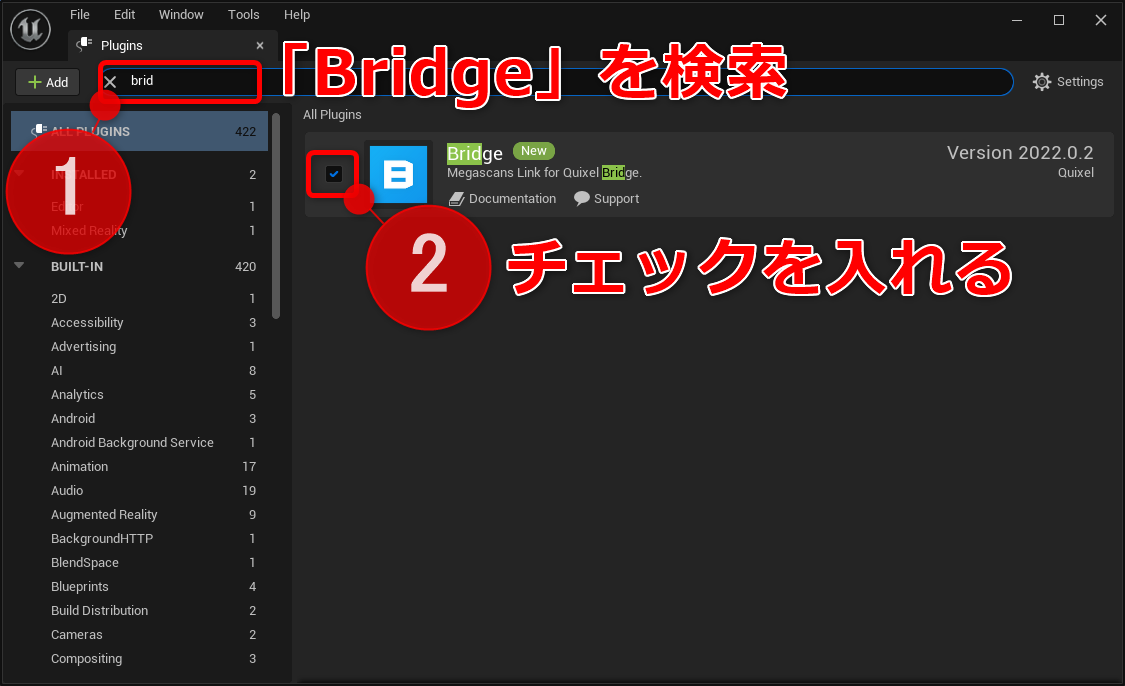
――Quixel Bridgeが表示されない場合は
Edit>Plugins>BridgeをEnableにして再起動すれば表示されます。
デフォルトでプラグインはオンになっています。


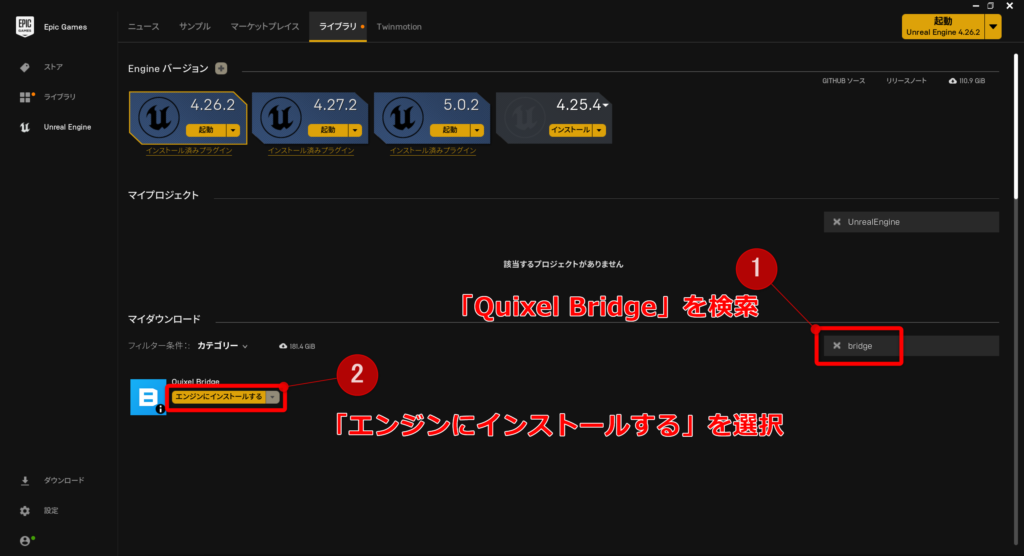
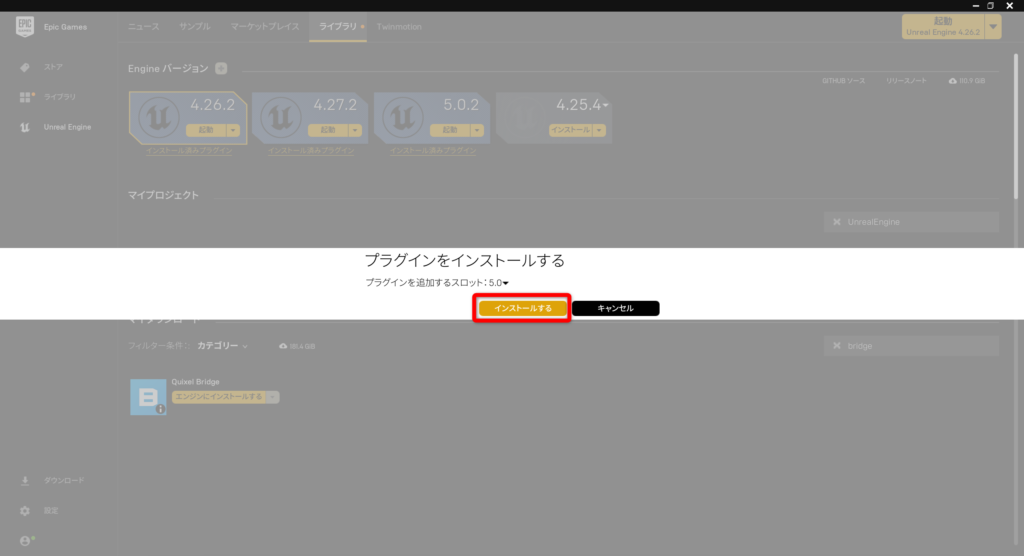
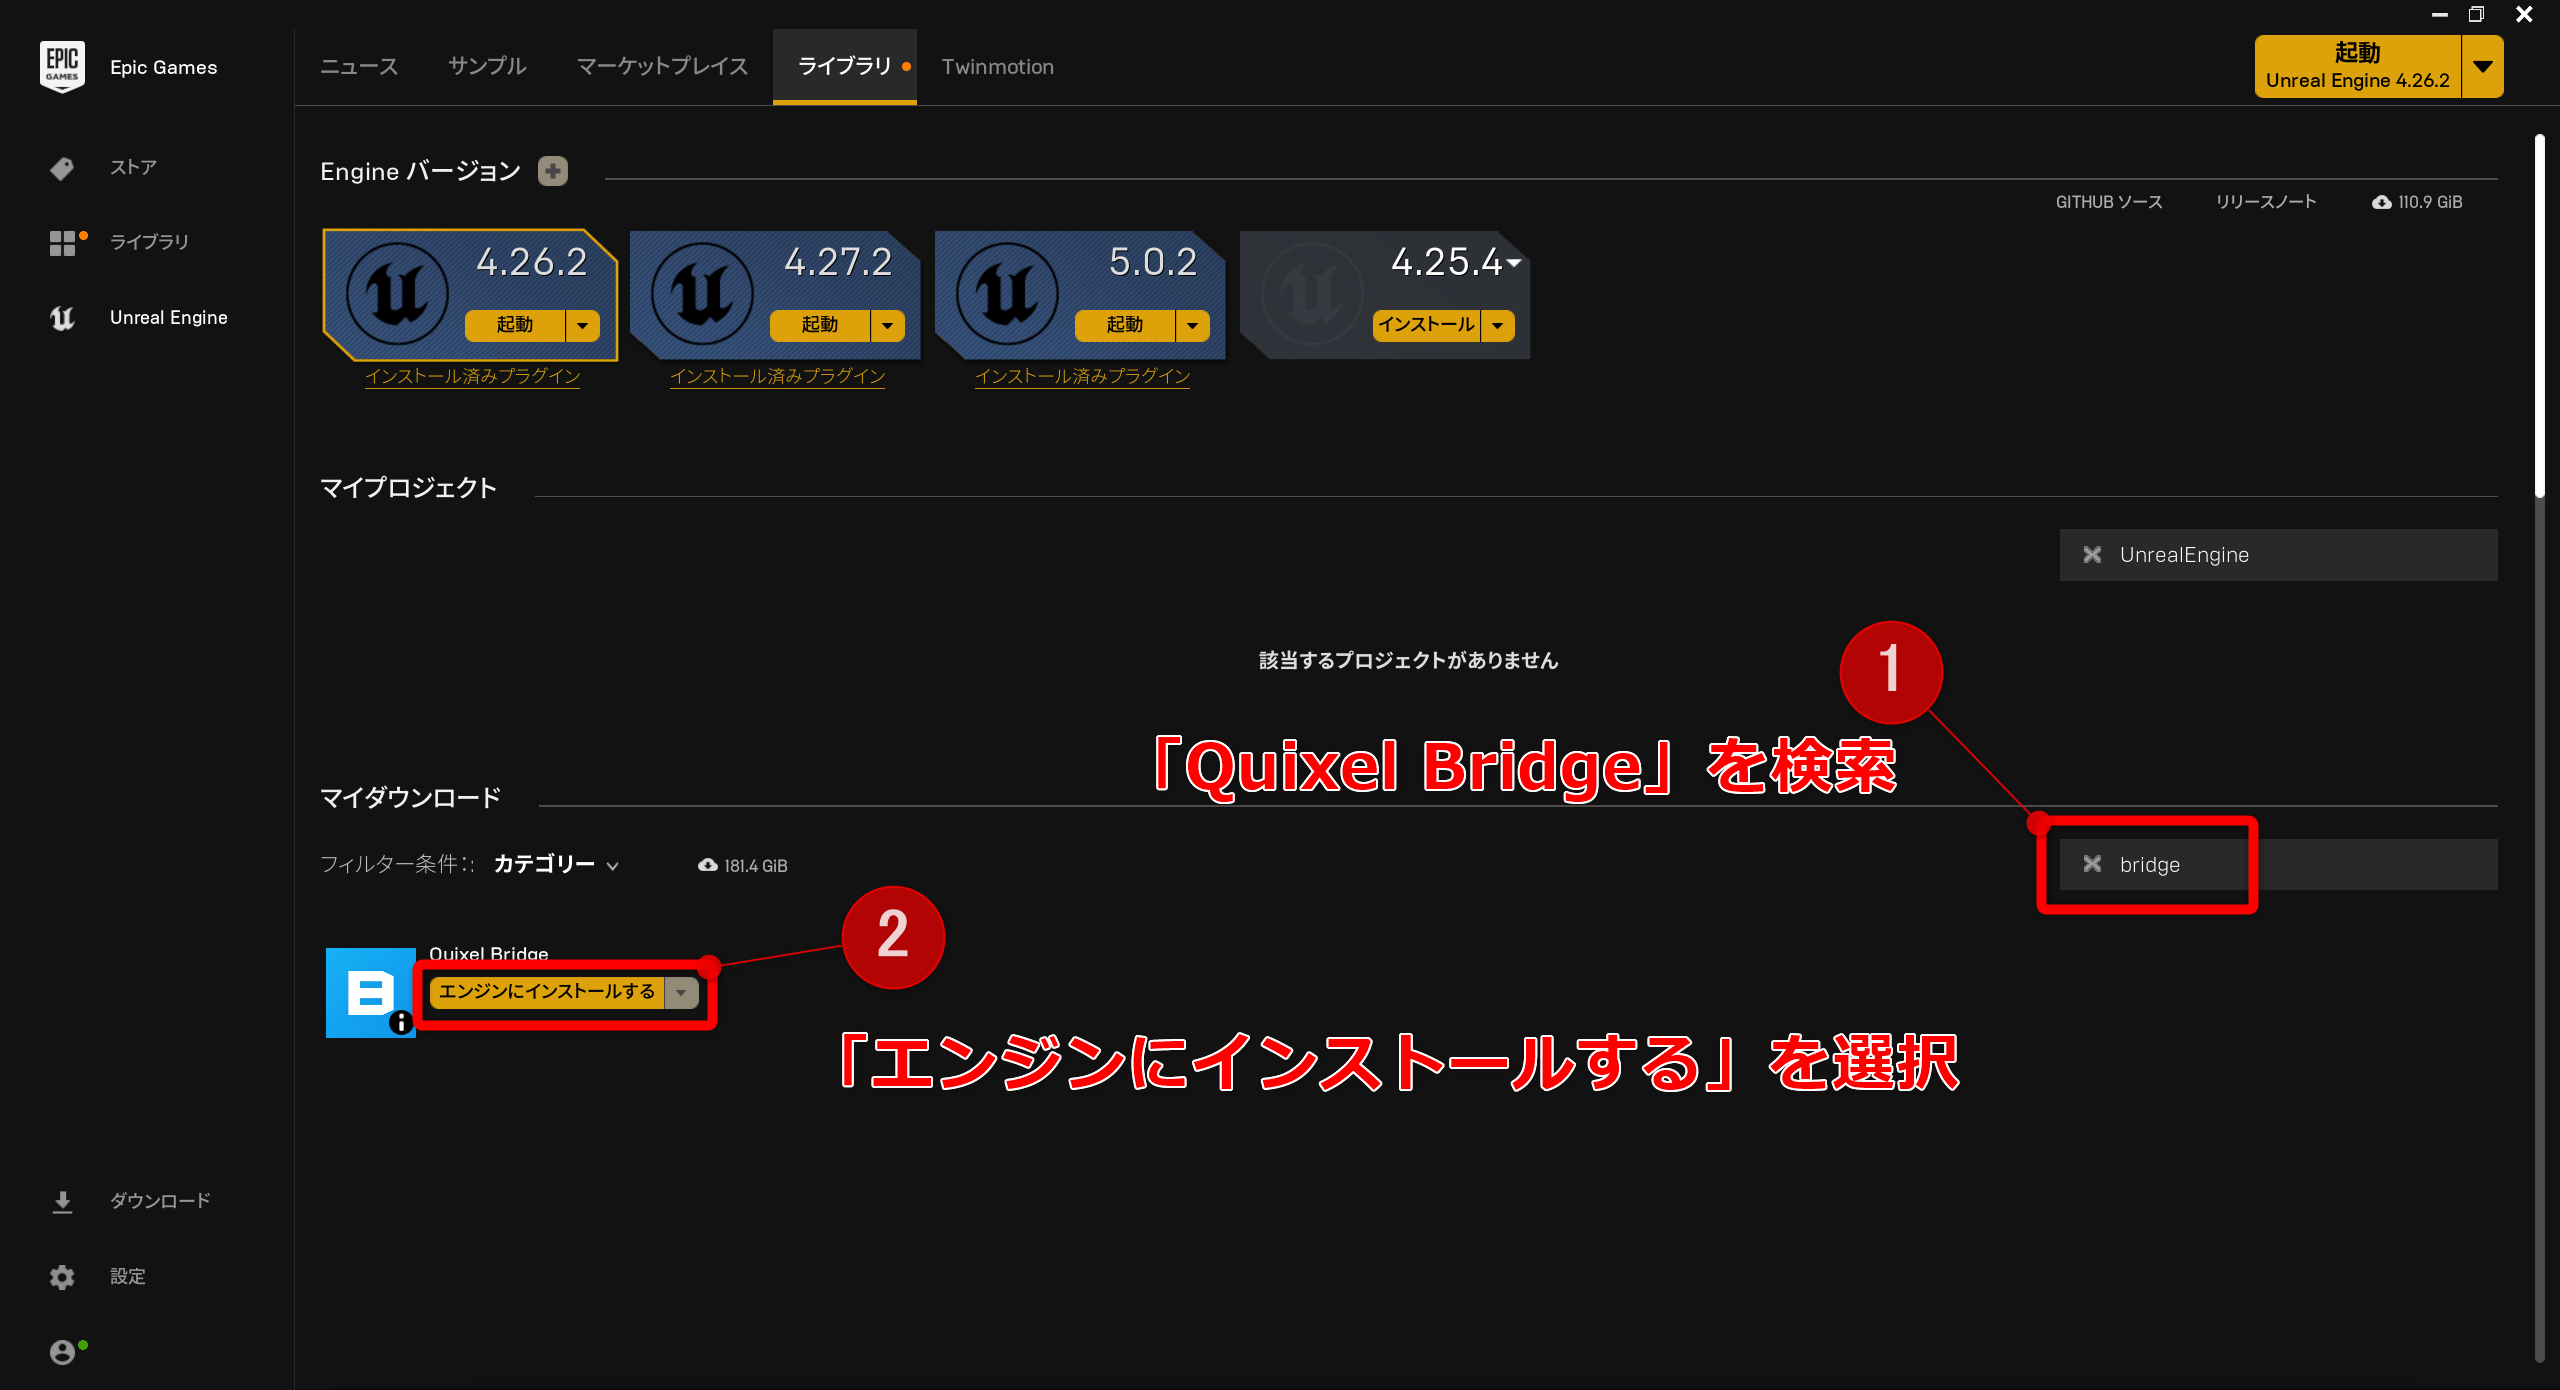
Pluginsの一覧に「Bridge」が表示されない場合は、Epic Games Launcherから「Quixel Bridge」をエンジンにインストールする必要があります。
|
2,Sign In
Quixel BridgeでMegascansをDownloadするには
Sign Inが必要になります。
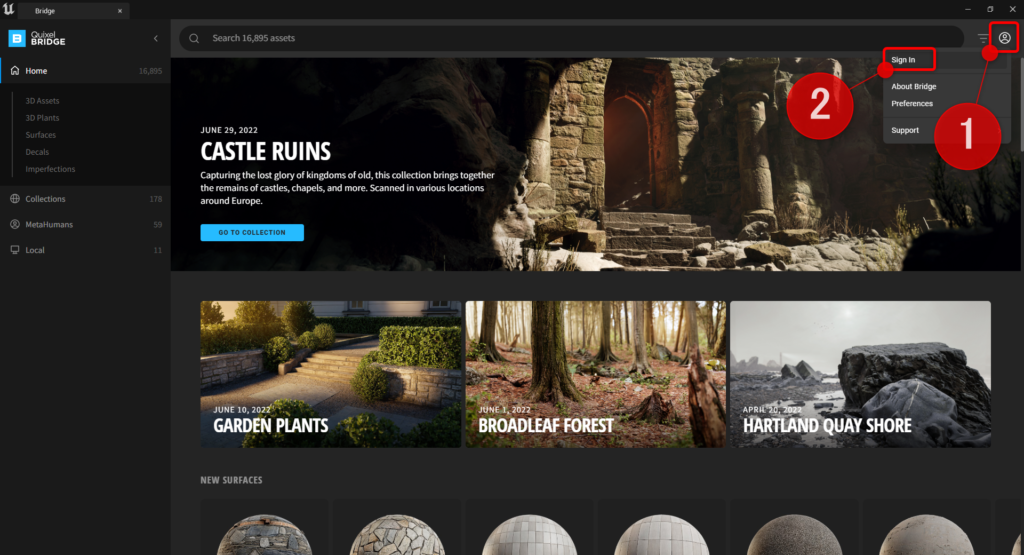
先程の行程を進めるとBridgeのウインドウが開きます。

右上のアイコンからSign In
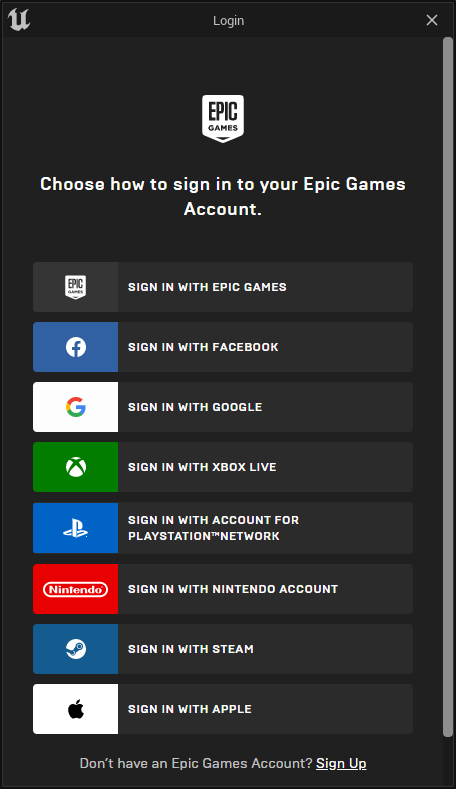
Sign In With Epic Gamesを押して
Epic Gamesのアカウントを入力。
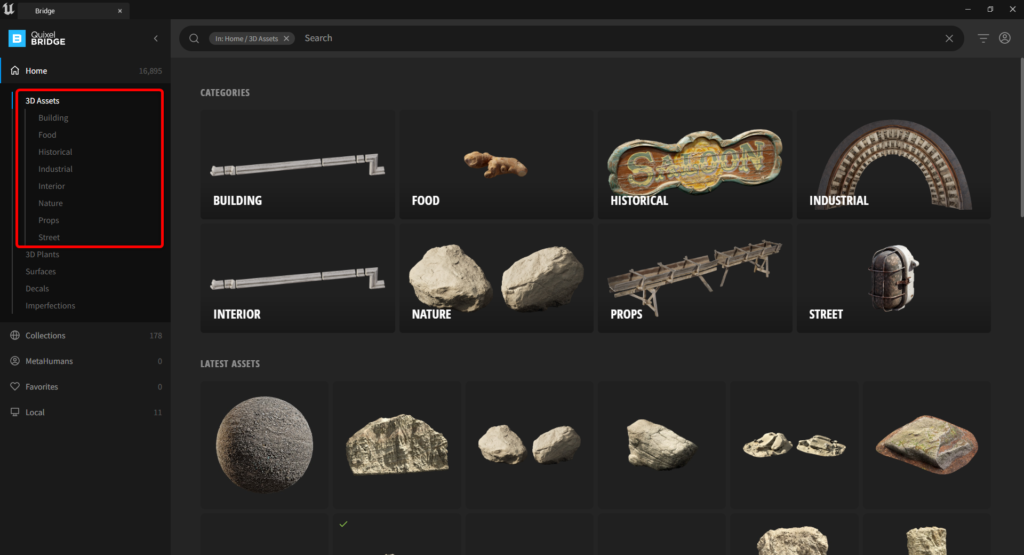
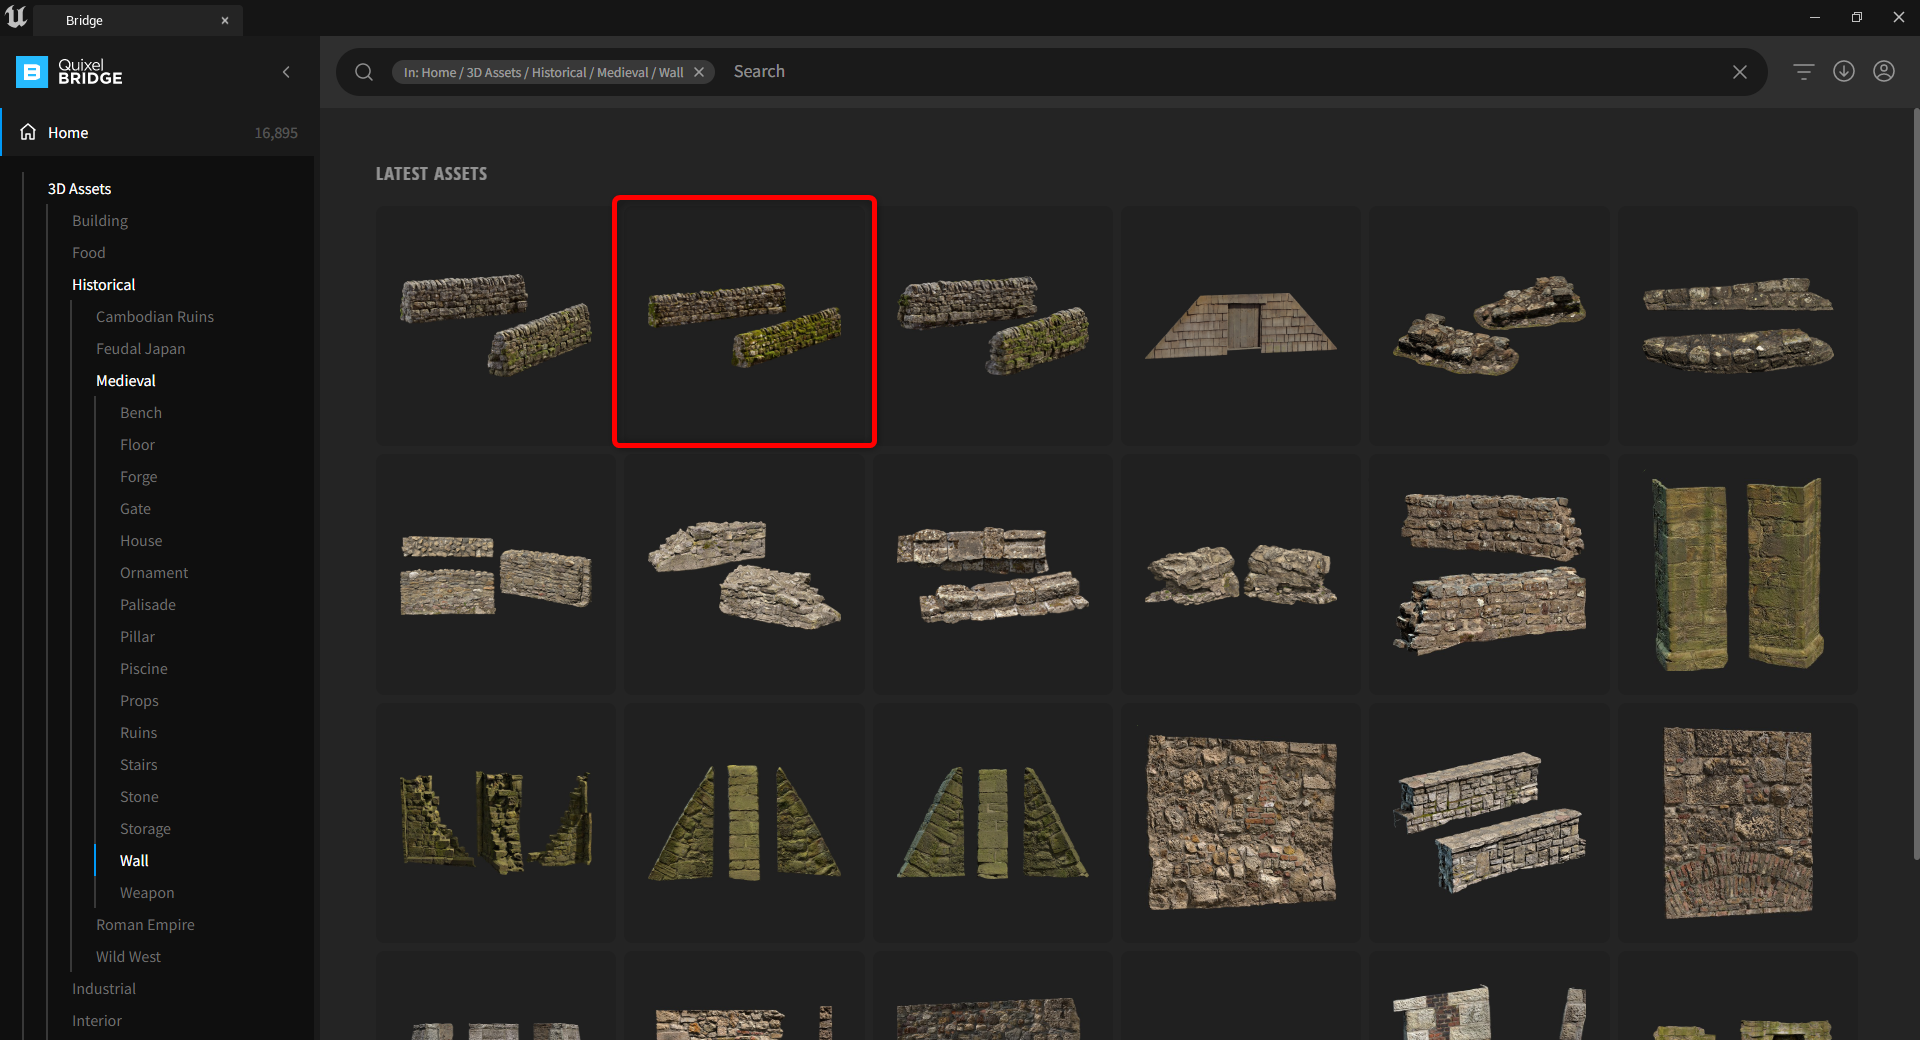
3,アセットの選択
Sing Inができたら
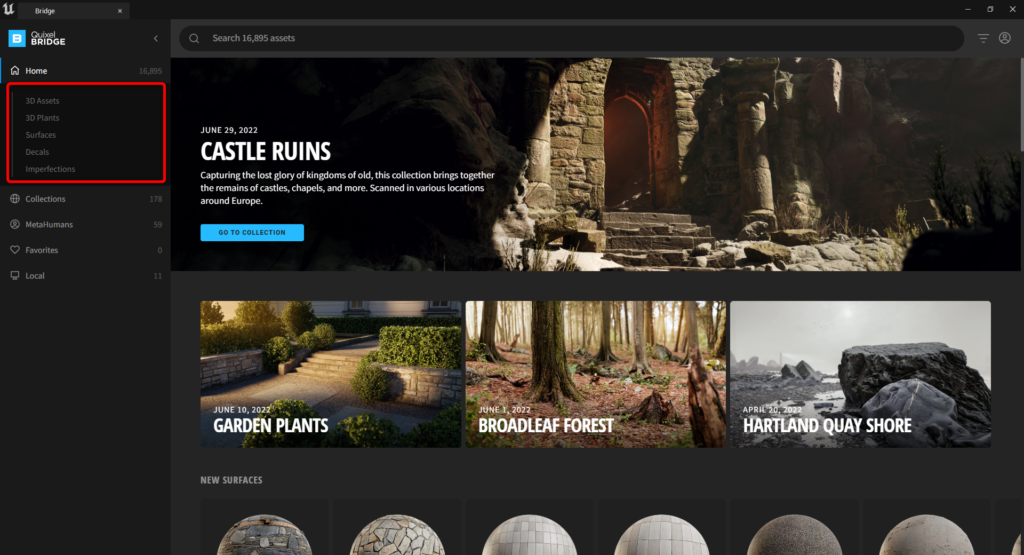
あとは置きたいアセットをクリックで選びます。
アセットは左のカテゴリ一覧から探していきます。

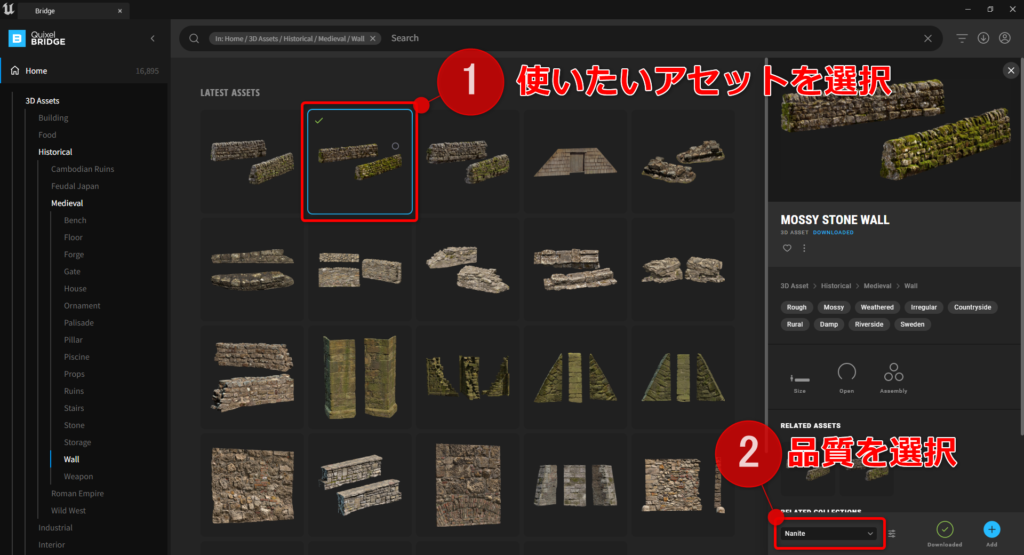
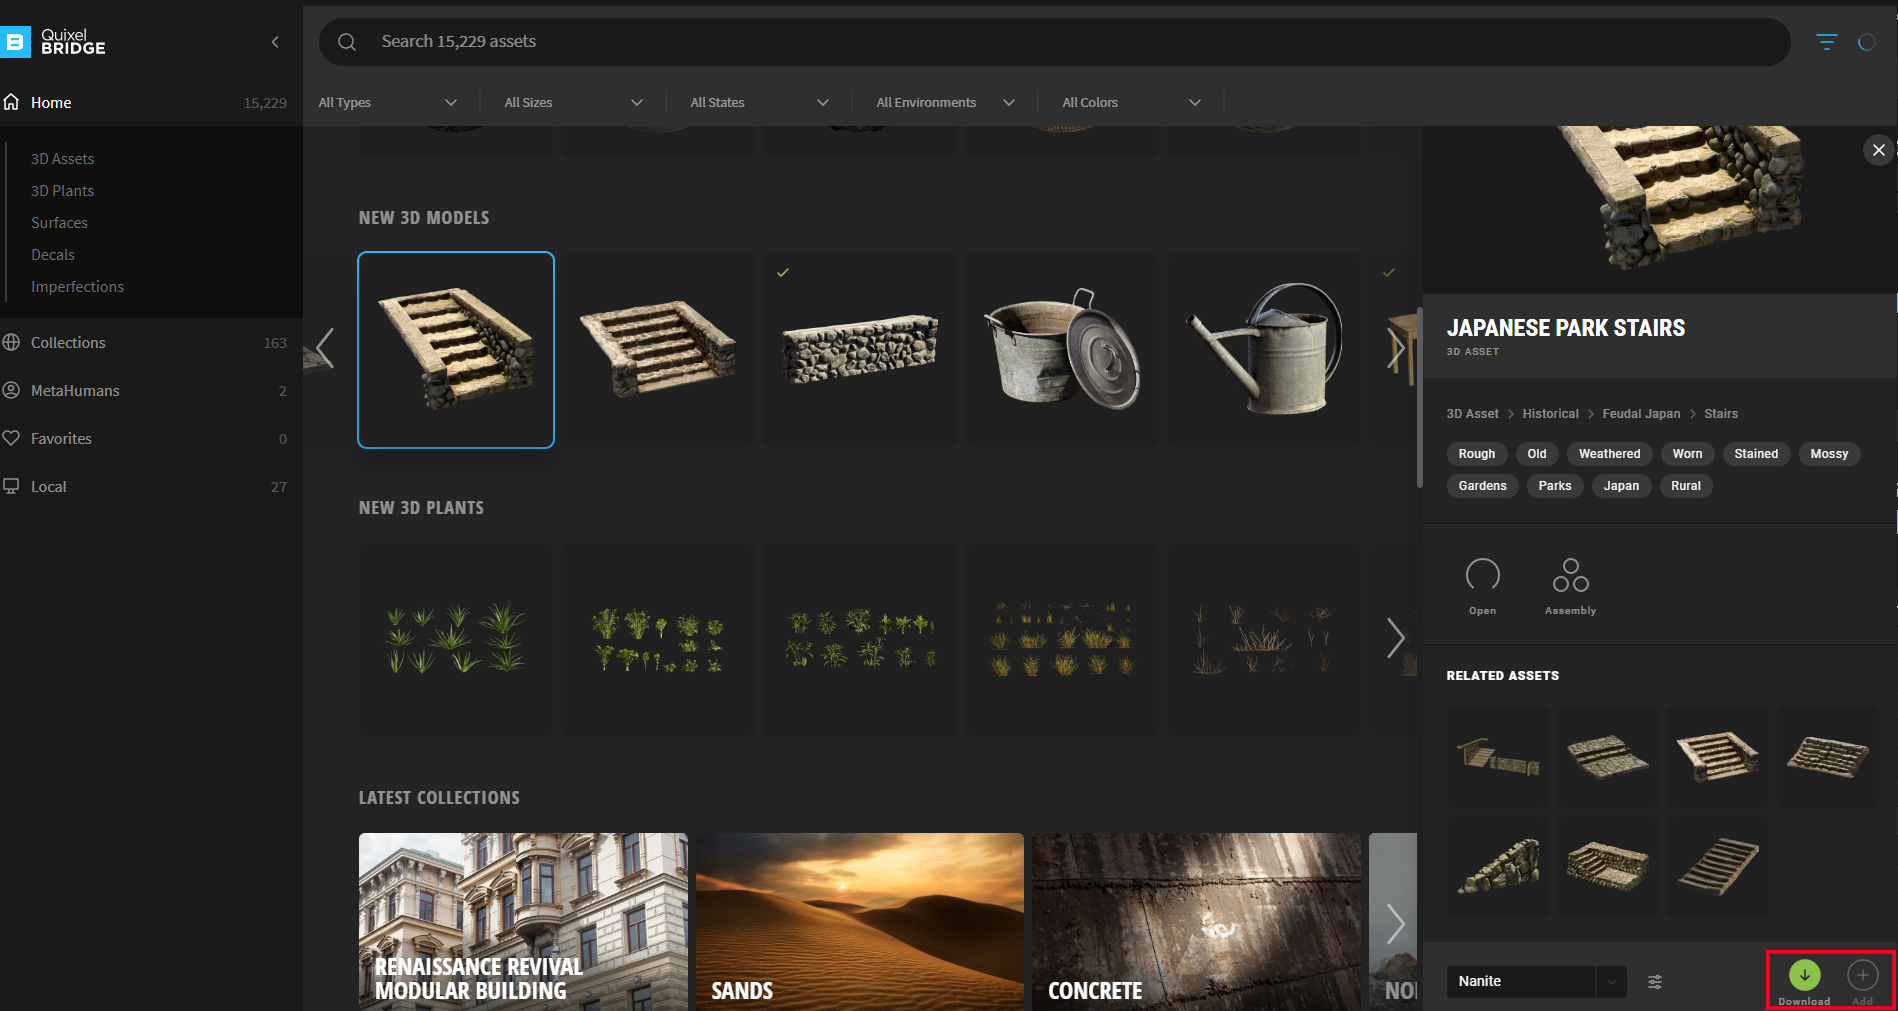
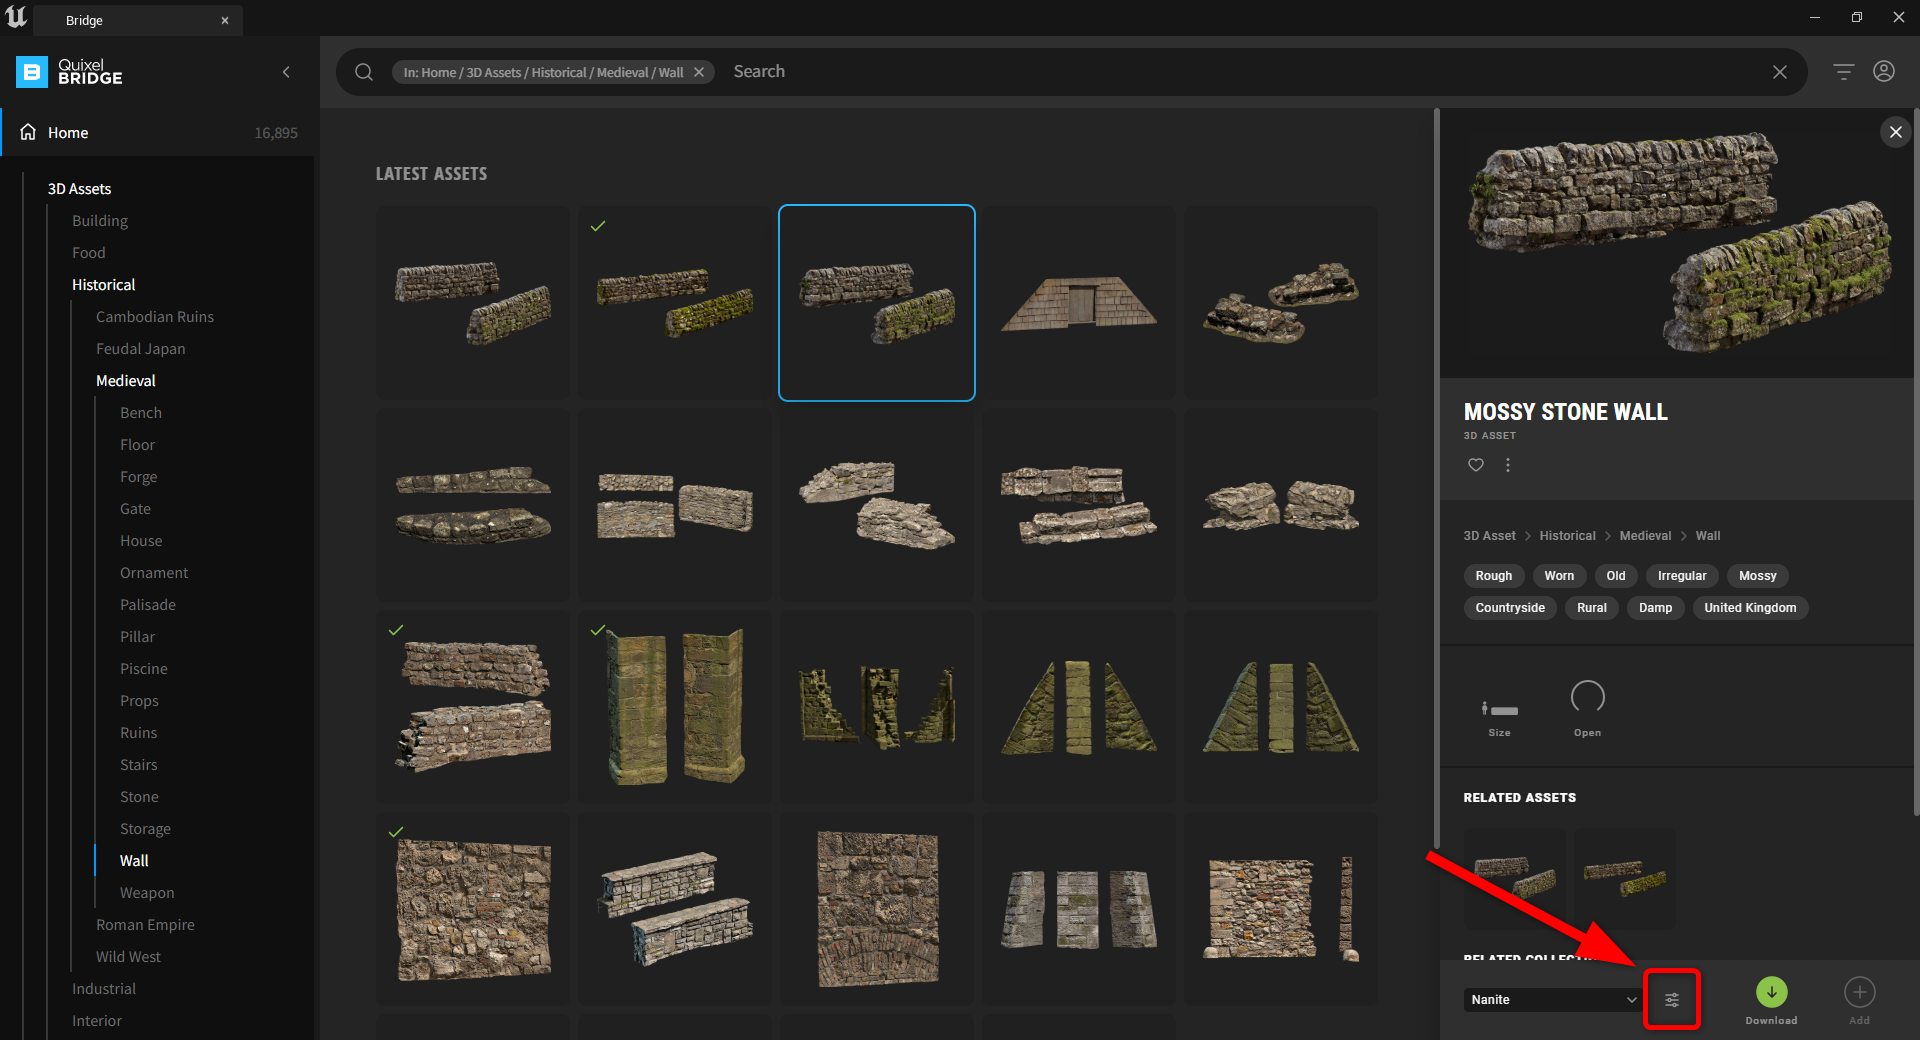
4,ダウンロードする品質
アセットを選択すると右側に詳細が表示されます。
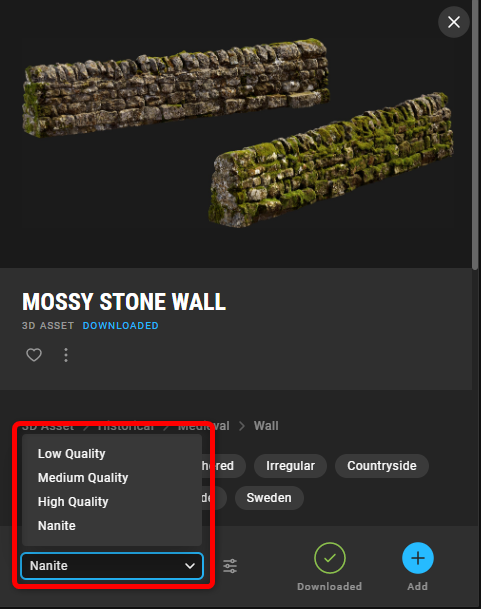
ダウンロードするアセットの品質は右下のプルダウンメニューから選択します。
Naniteが最高品質です。
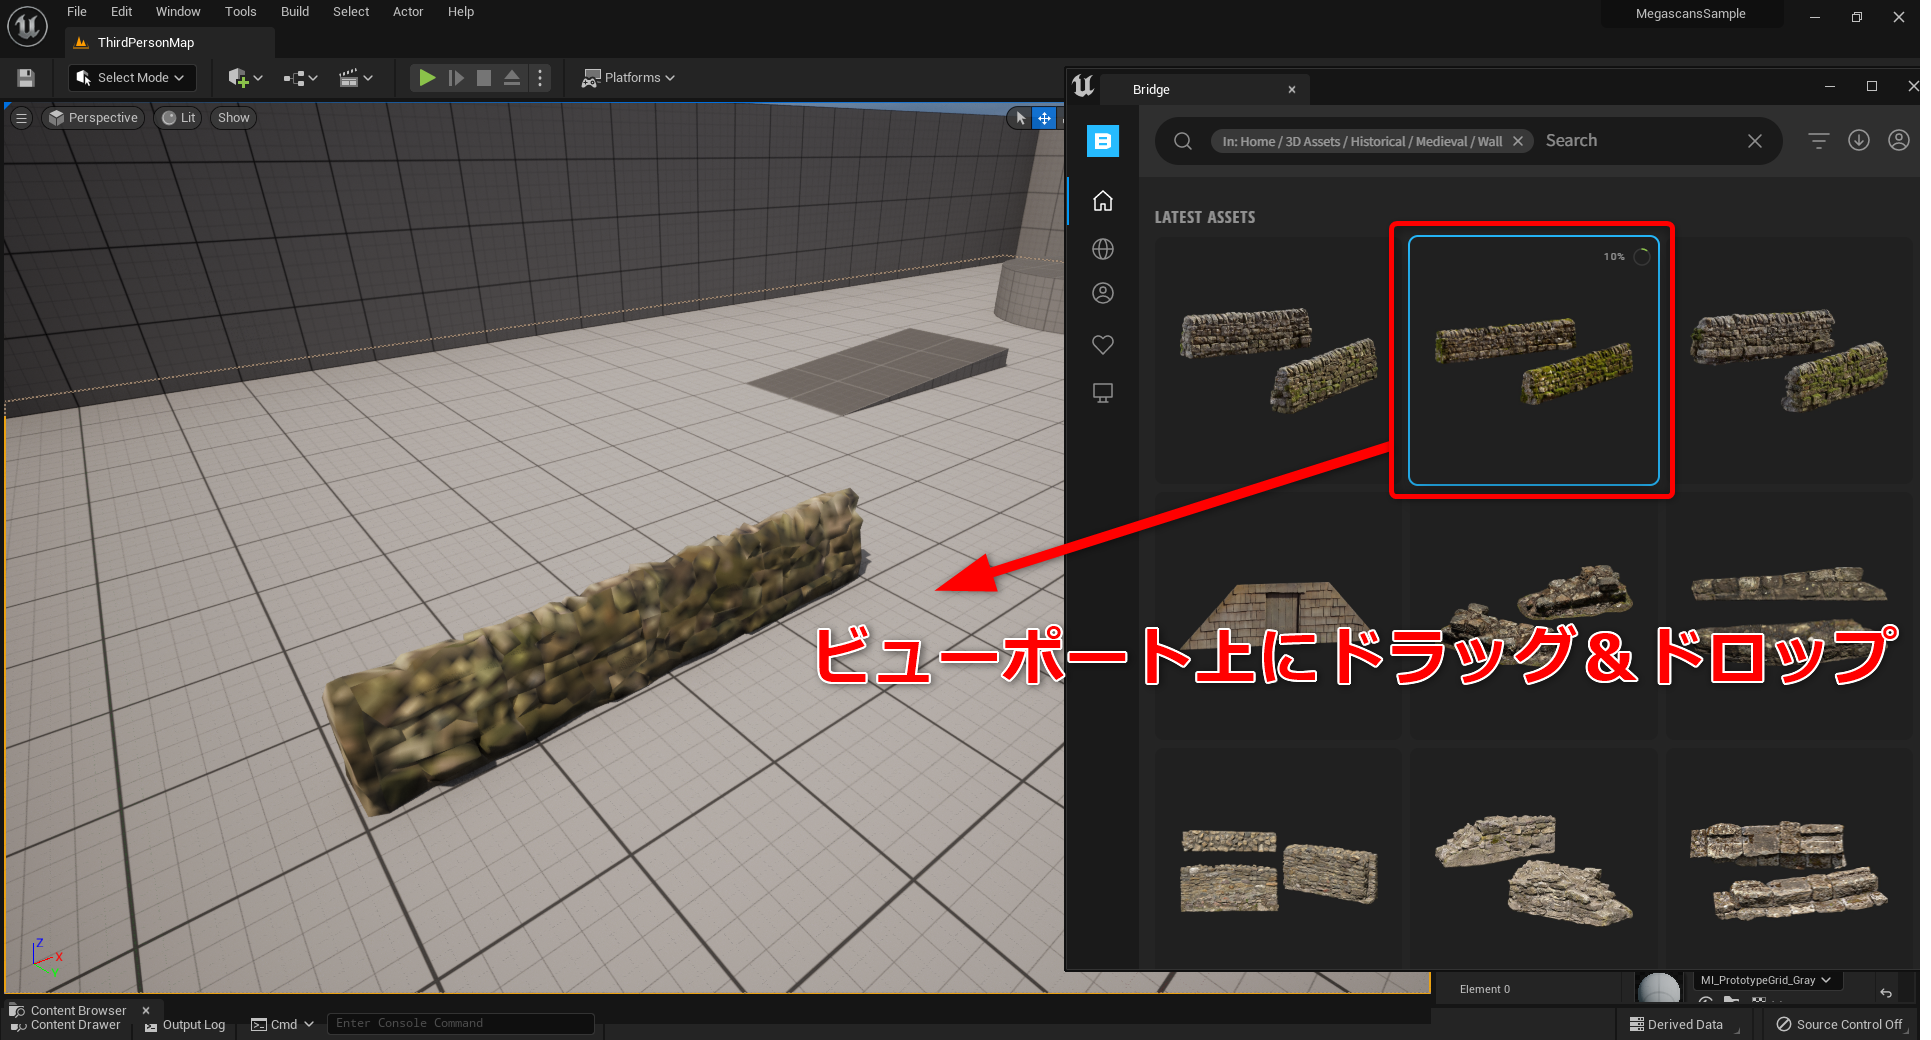
5,アセットのDownloadとUE5プロジェクトへのExport
ここがUE5になって一番変わった点になります。
Bridgeから使いたいアセットを選択しUE5のシーン上にドラッグ&ドロップ
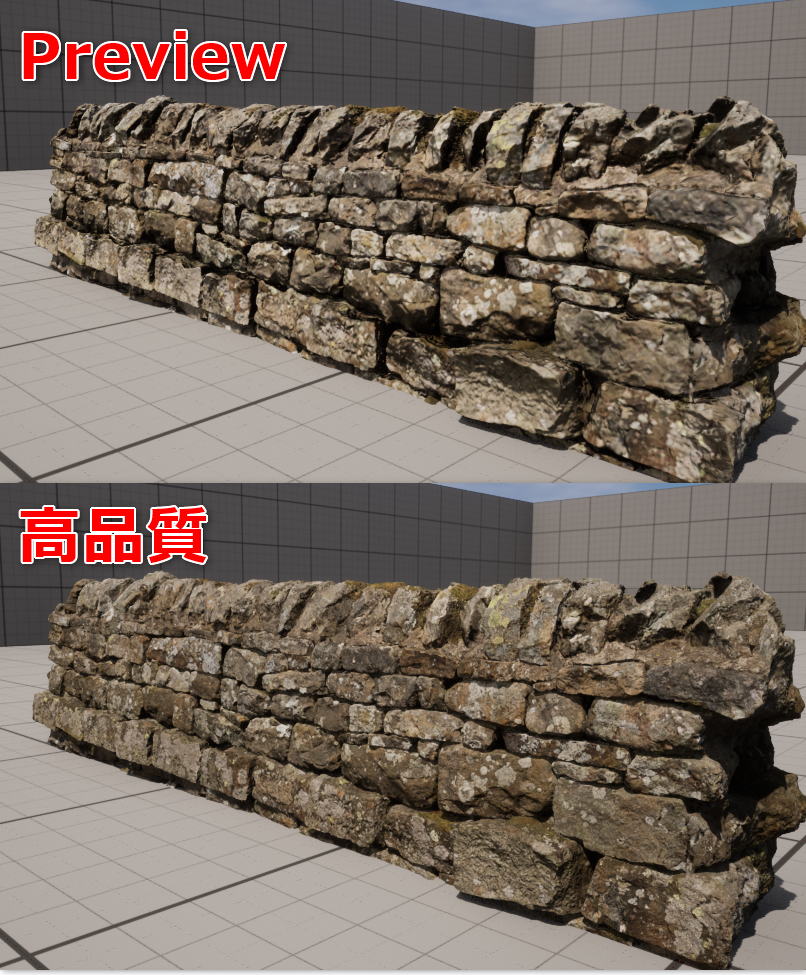
すると、Preview用の低品質アセットがすぐにDownloadされて配置されます。

アップで見ると解像度が低いことが確認できます。
Previewのアセットが配置されると、
同時にBridgeで高品質アセットのDownloadが開始されます。
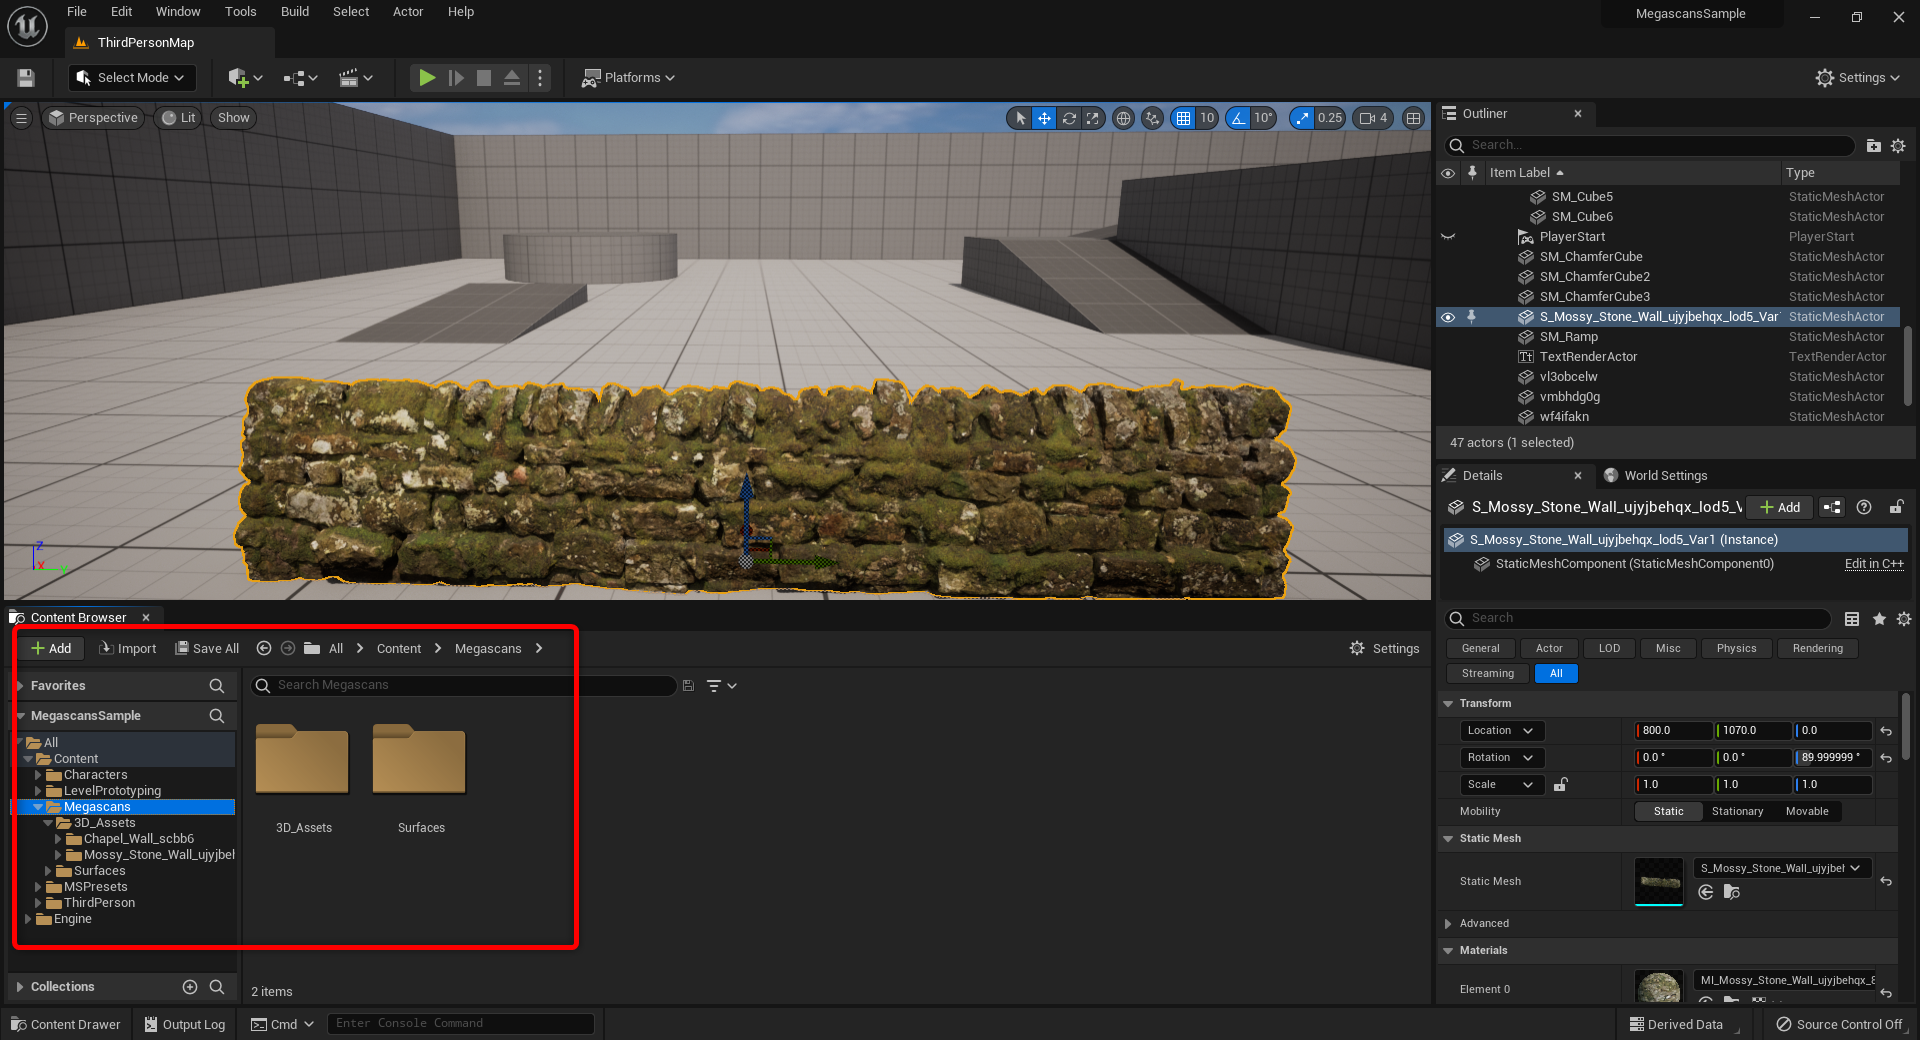
Downloadが完了するとUE5のマップ上で配置したPreviewアセットが
自動で高品質のアセットに置き換わります。
これは複数のアセットを配置して同時にダウンロードを進めることも可能です。
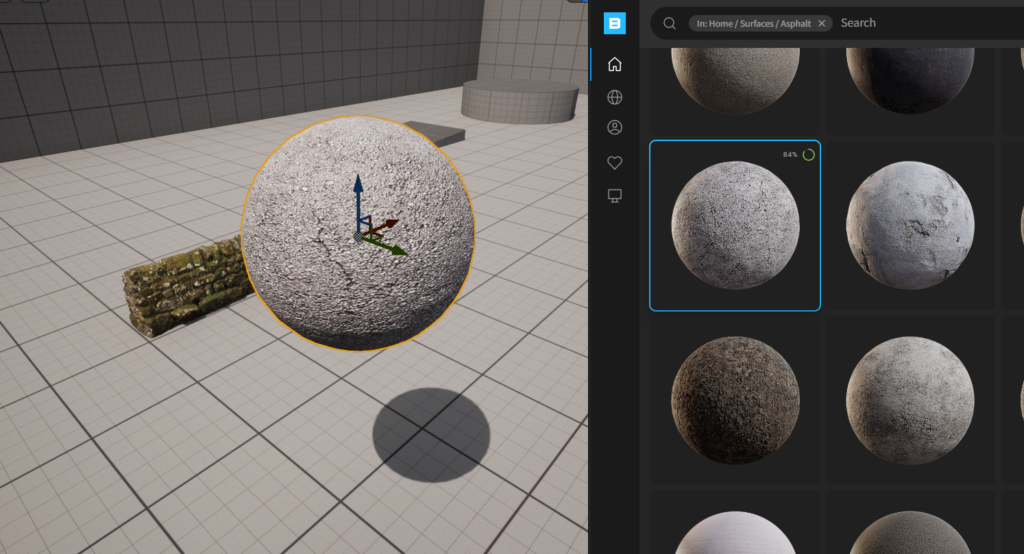
――マテリアルをレベルにドラッグ&ドロップしした場合
球にマテリアルが貼り付けられた状態で配置されます。
ドラッグ&ドロップしたマテリアルは自動的にPreview品質から高品質に切り替わりますが、
Preview品質のまま別のアセットに割り当てた場合、
割り当てられたアセットの品質は高品質に切り替わらないので注意が必要です。
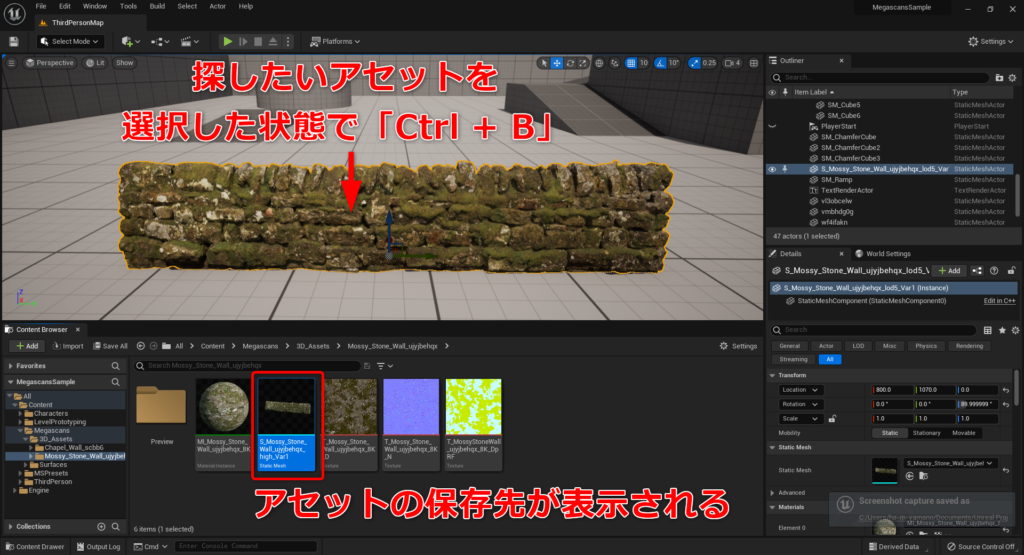
――アセットの場所
アセットは
Content>Megascansの中のフォルダに作成されます。

どのフォルダに保存されたのかわからなくなった場合は
配置したアセットを選択して Ctrl+B
レベル上で選択したアセットが保存されている場所にContent Browser上で移動できます。
Content Browserでアセットを探すときにとても役に立つショートカットです。
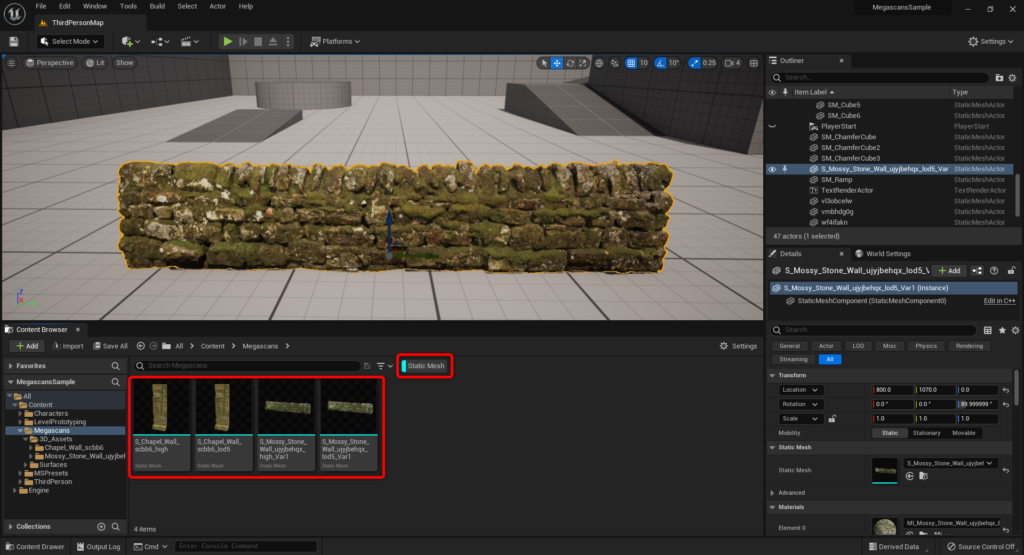
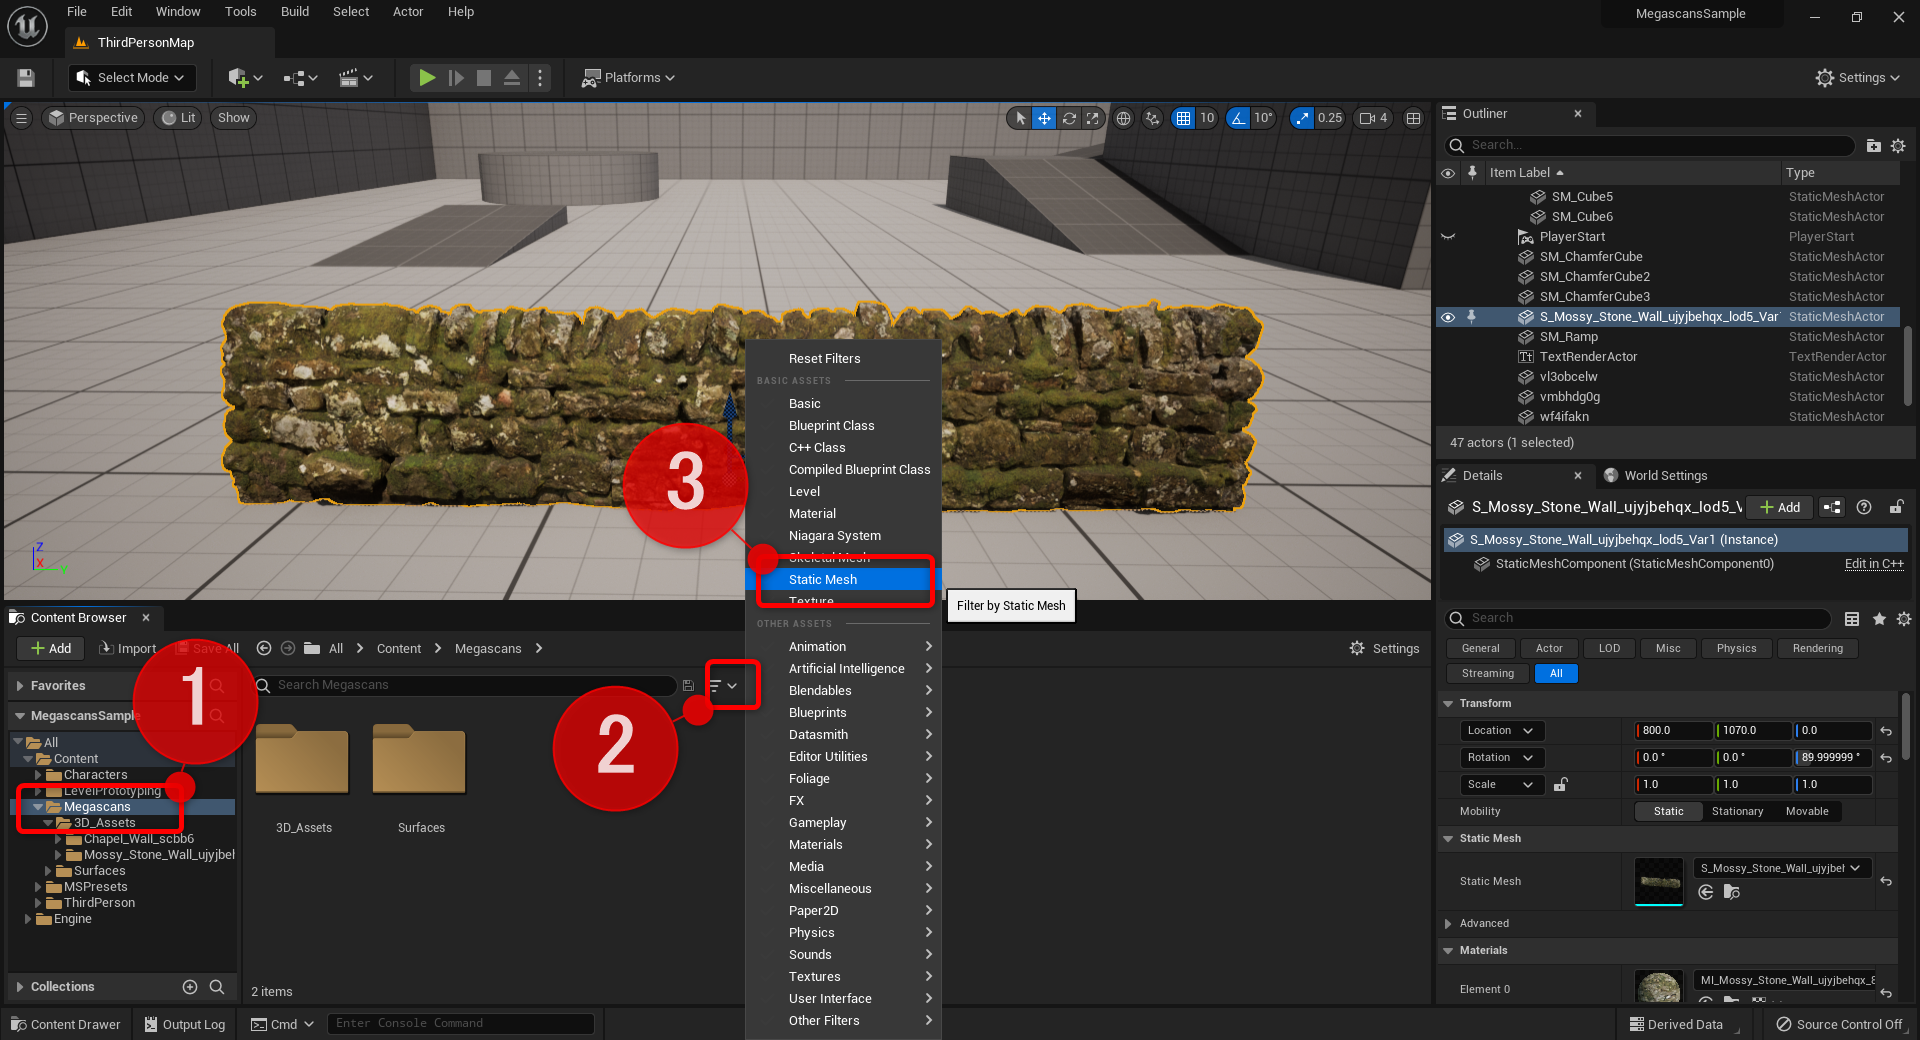
フォルダ内のアセットを一覧で見たい場合は
フィルターを使用しStatic Meshを選択します。
選択したフォルダの内にあるすべてのStatic Meshが表示できます。

ドラッグ&ドロップするやり方とは別に
従来のUE4のときと同じExport手順も可能です。
アセットを選択しDownloadを押して
完了したらAddを押せばUE5のContent Browser上に作成されます。
 |
――データの保存場所
Megascansアセットはプロジェクトに追加される前に別の場所に保存される仕組みとなっております。
そのプロジェクトにコピーされる前のuassetのファイルの場所は右上アイコン>Preferenceから設定できます。
Quixel Bridgeの中のダウンロードされたデータなので
削除してもUE5のプロジェクトのアセットは消えません。
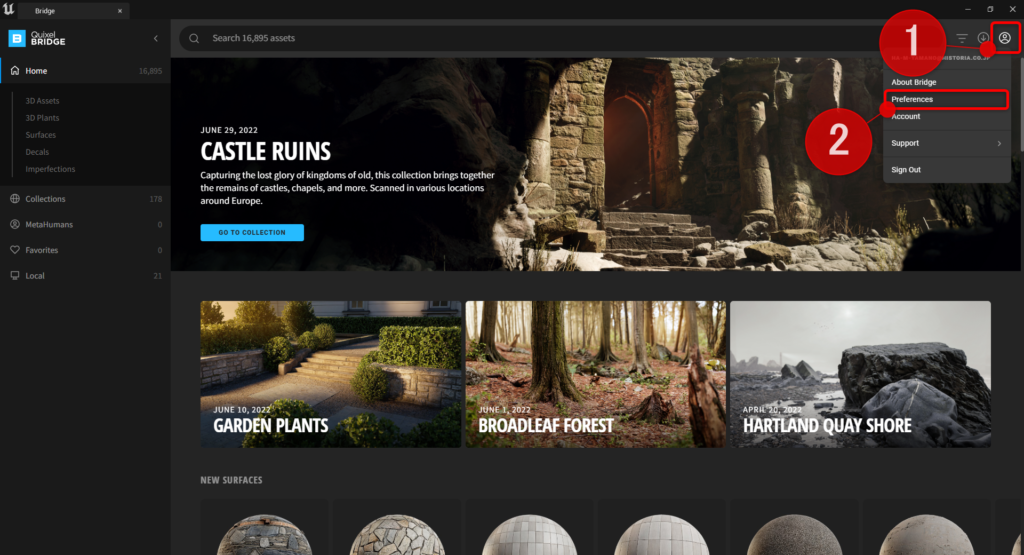

具体的なダウンロード状況と履歴は
右上のアイコンから表示可能です。

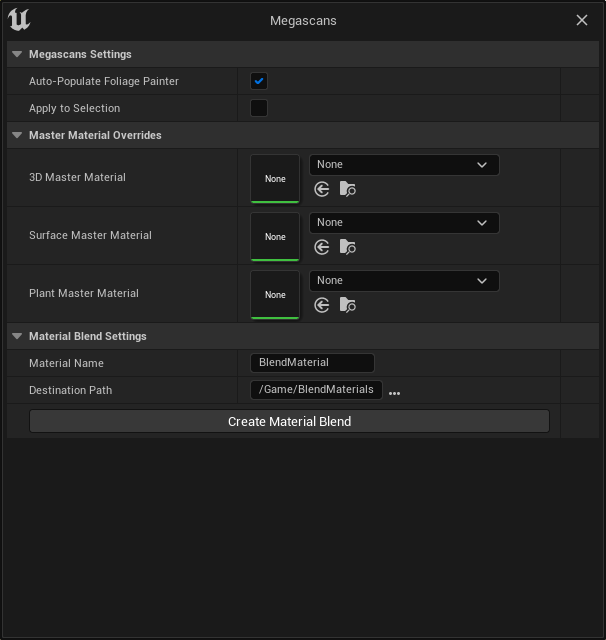
――マスターマテリアルの設定
マテリアルはMegascansの用意したものが自動で作られますが、
自分で作成したマテリアルもこちらで設定すれば
エクスポートされるアセットのマテリアルを指定したものに変更することが可能です。

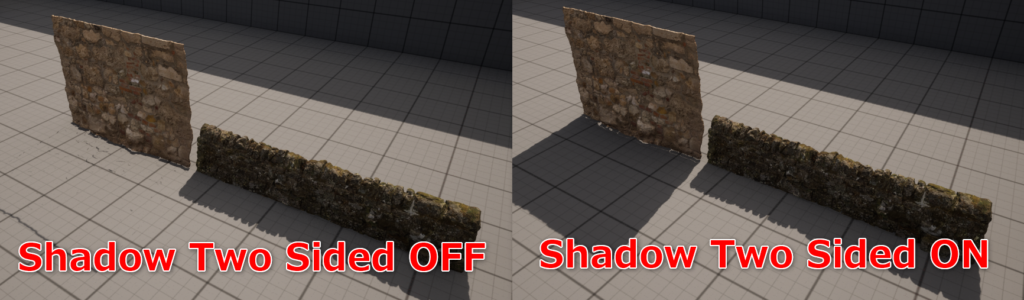
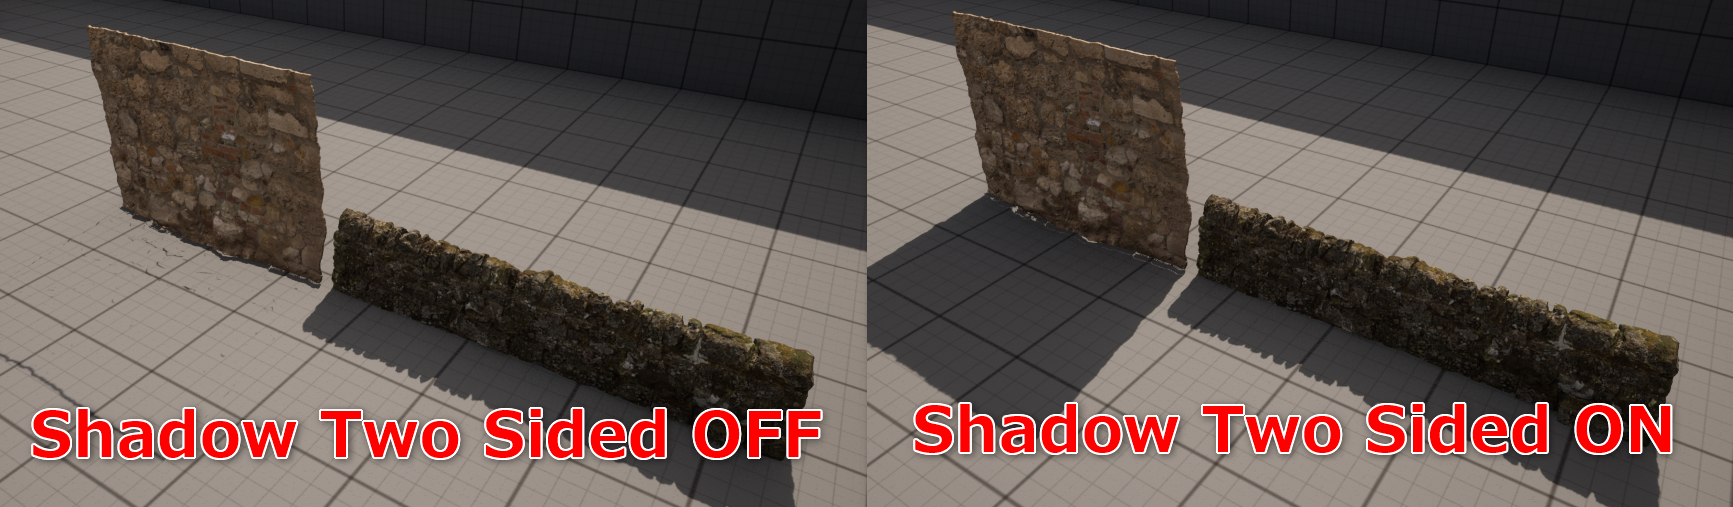
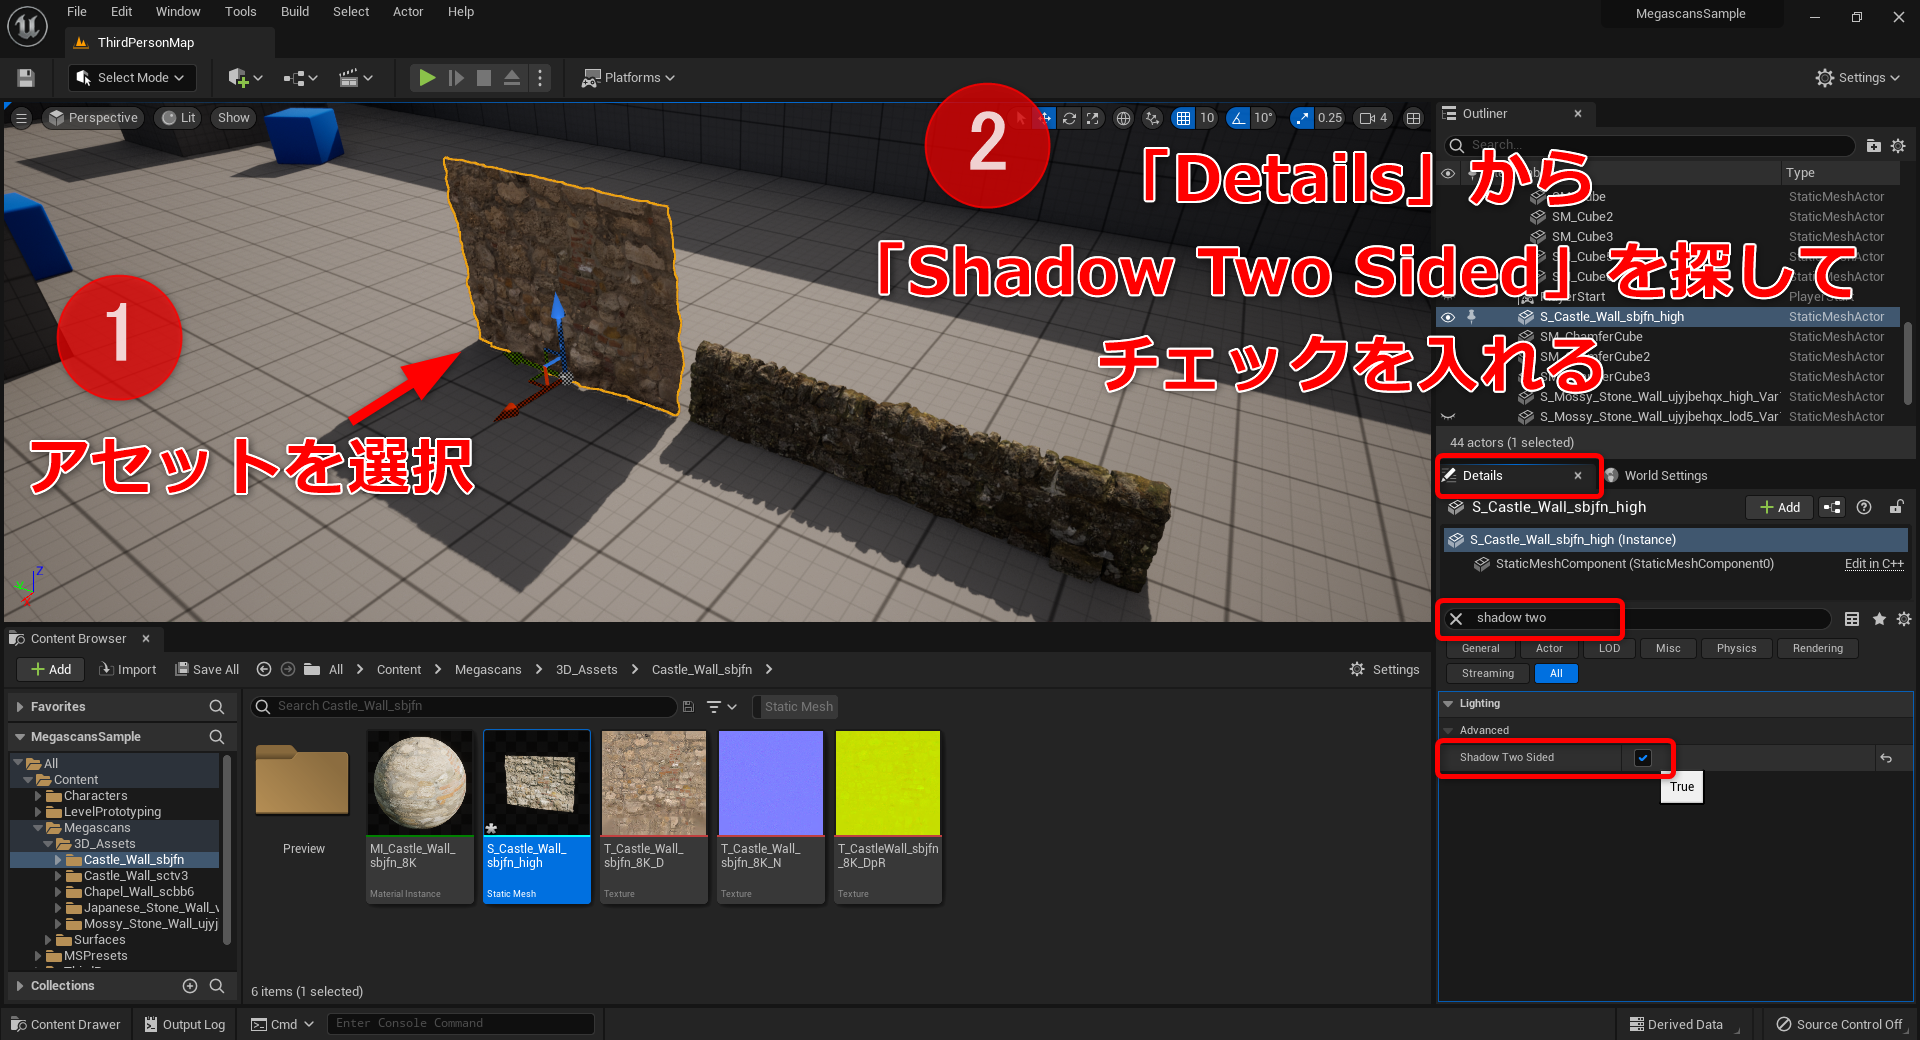
――影の修正
置いたアセットの背面のメッシュがなく影が不自然になる場合は
アセットを選択してDetailタブから「Shadow Two Side」を オンに。
これで正常な影を作れます。

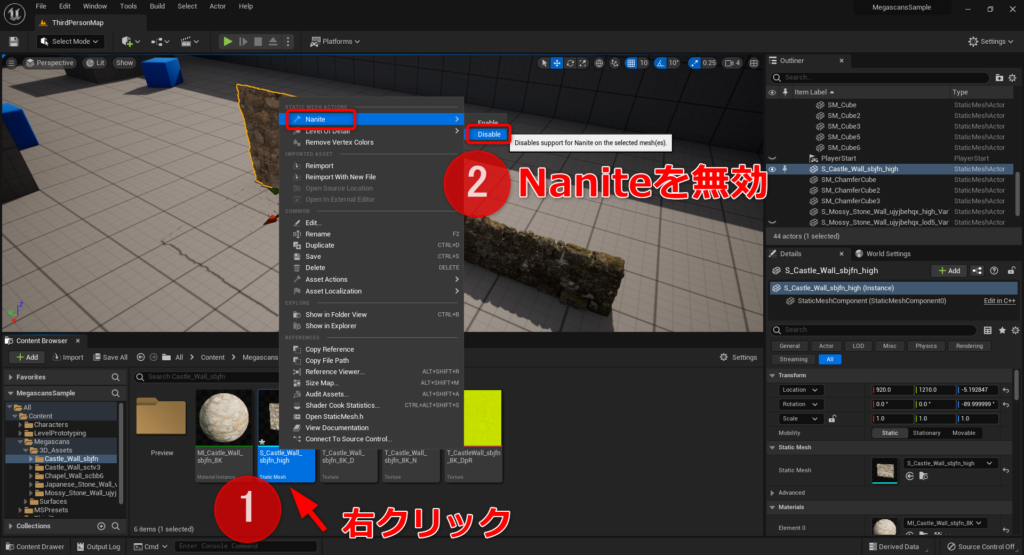
ただし「Nanite」ではこの機能はサポートされていません。
Content Browser上でアセットを右クリックで選択して「Nanite」を無効化するか、
Bridgeからダウンロードする品質を「Nanite」以外のものにしてください。
UE5ではDownloadを待たずにMegascansアセットをPreview状態でたくさん配置すれば、
裏で高品質アセットにいつの間にか置き換わるので
待つ時間のストレスなく作業が可能になりました。

どんどん活用して楽しんでいきましょう。


 [UE5]UnrealEngineでビットフラグを使用する方法
2026.03.11UE
[UE5]UnrealEngineでビットフラグを使用する方法
2026.03.11UE

 [UE5] レイトレシェーダーを追加してみよう
2026.02.25UE
[UE5] レイトレシェーダーを追加してみよう
2026.02.25UE
 [UE5]簡易的なタワーディフェンスを作ってみよう!
2026.02.13UE
[UE5]簡易的なタワーディフェンスを作ってみよう!
2026.02.13UE