| 改訂バージョン: Unreal Engine 4.19 |
今回はLayered Materialの基本的な設定方法をご説明したいと思います。
Material Function(マテリアル関数)という機能を応用した機能ですので、中級者以上向けの内容となってしまいますがご了承ください。
(Material Functionについては別途記事にまとめたいと思います。)
Layered Materialとは?
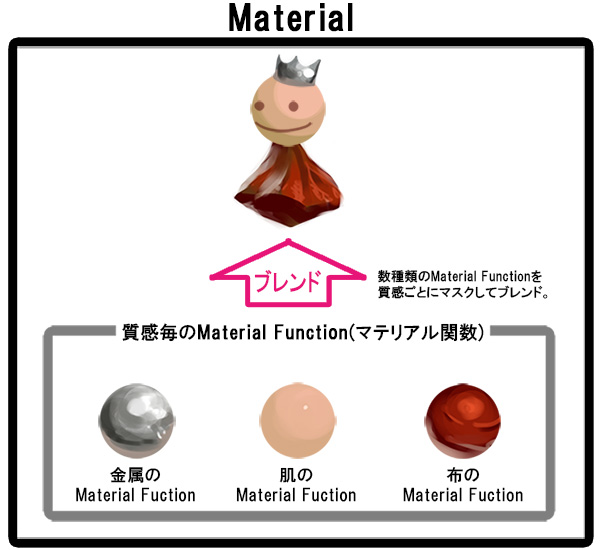
質感毎に作成したMaterial Function(マテリアル関数)を、マテリアル内でブレンドする機能です。
概要や利点は公式ドキュメントを参照して頂ければと思いますが、ざっくり表すと上の図のような構造です。
1.Material Functionを作成する。
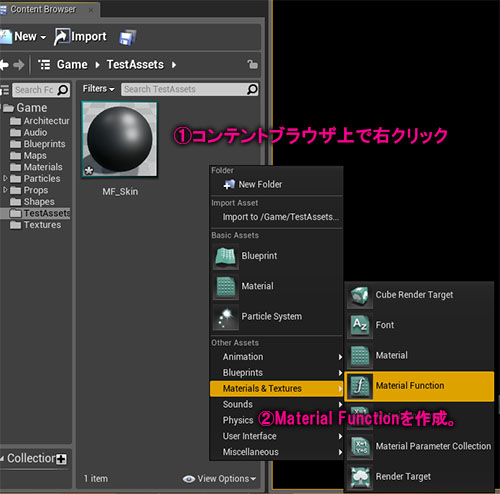
① コンテントブラウザ上で右クリック
② Materials & Textures → Material Function をクリック。
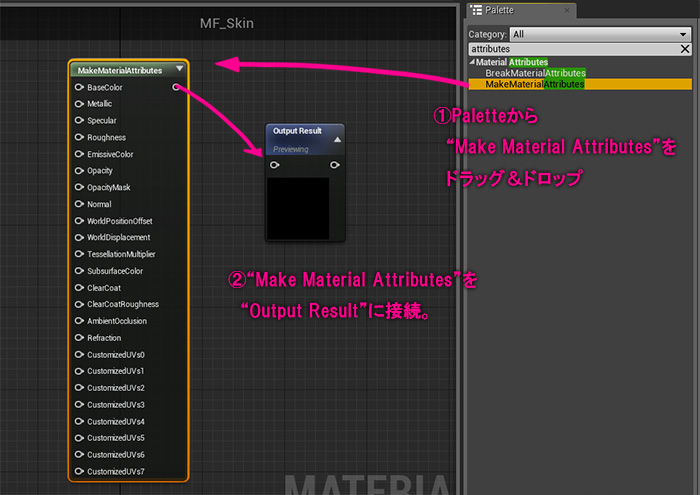
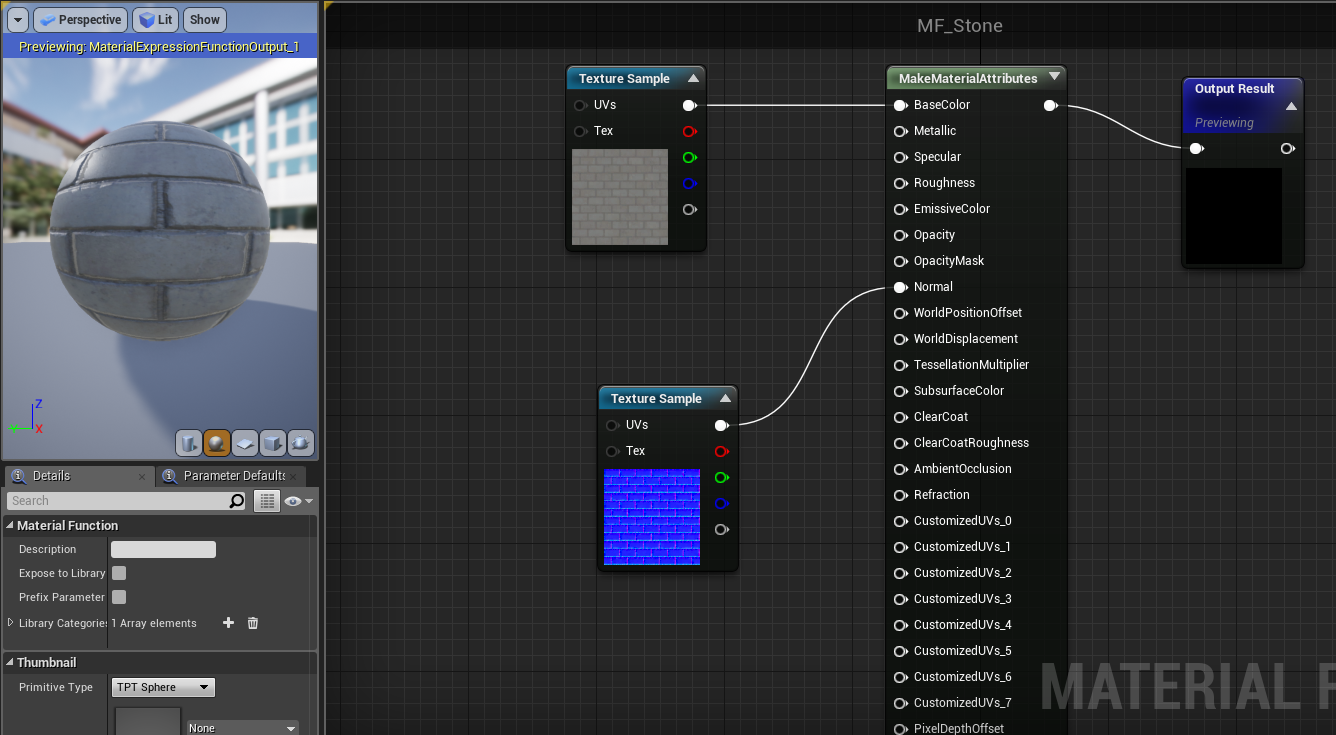
作成したMaterial Functionをダブルクリックして、マテリアルエディターを開きます。
① Paletteパネルから、”Make Material Attributes”をドラッグ&ドロップし、ノードを配置します。
② 最初から配置してある”Output Result”の入力ピンに、”Make Material Attributes”を接続します。
あとは普通のマテリアルと同じように、BaseColorやMetallic、Roughnessに対してテクスチャや各種ノードを接続して質感を設定してください。
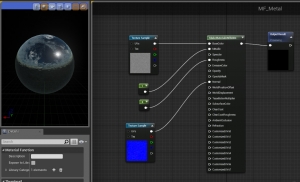
今回は下図のような、金属とレンガの2種類のMaterial Functionを作成しました。(クリックで拡大)
2.Material FunctionをブレンドしたLayerd Material を作成する。
まずはコンテントブラウザ上で右クリック→Material で、新規マテリアルを作成してください。
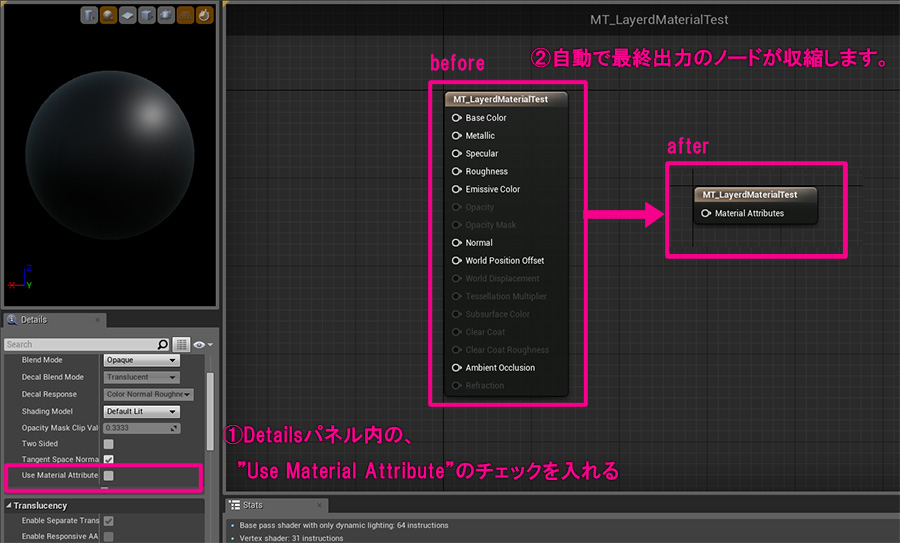
① Detailsパネル内の”Use material Attributes”のチェックをオンに変更します。
② 自動で最終出力のノードが縮小し、入力ピンが1つしかない状態に変化します。
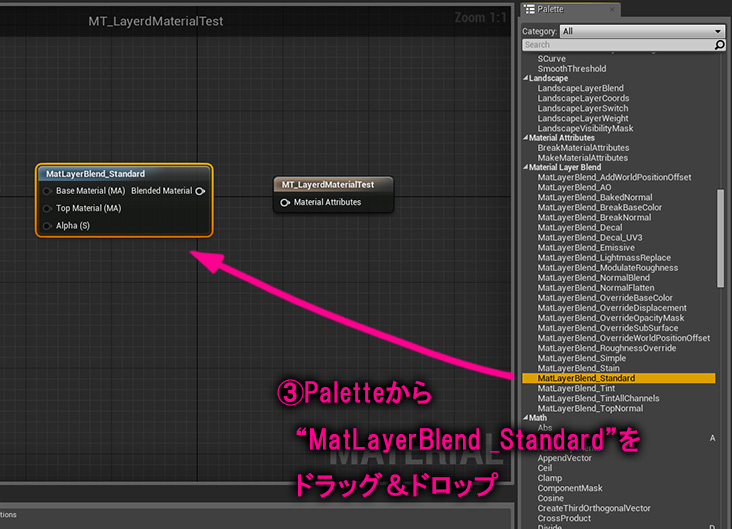
③ Paletteから、”MatLayerBlend_Standart”をドラッグ&ドロップし、ノードを生成します。
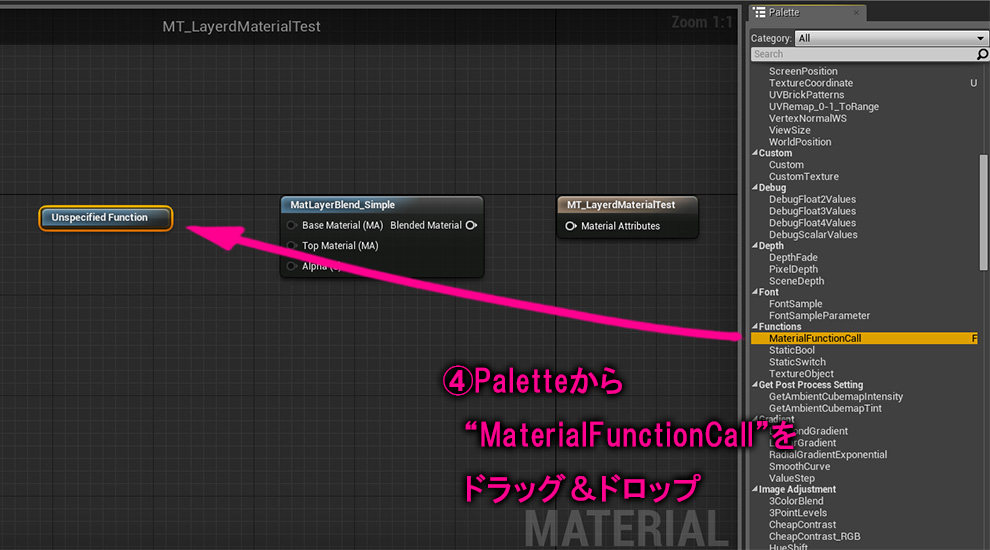
➃ つづけてPaletteから、”MaterialFunctionCall”をドラッグ&ドロップし、ノードを生成します。

⑤ ”MaterialFunctionCall”(デフォルトではUnspecified Functionという名前になっています)をクリックしてアクティブに。
⑥ Detailパネルの”Material Function”から、先ほど作成したMaterial Function を指定します。
“MaterialFunctionCall”を複製し、それぞれに金属質のMaterial FunctionとレンガのMaterial Functionをアサインします。
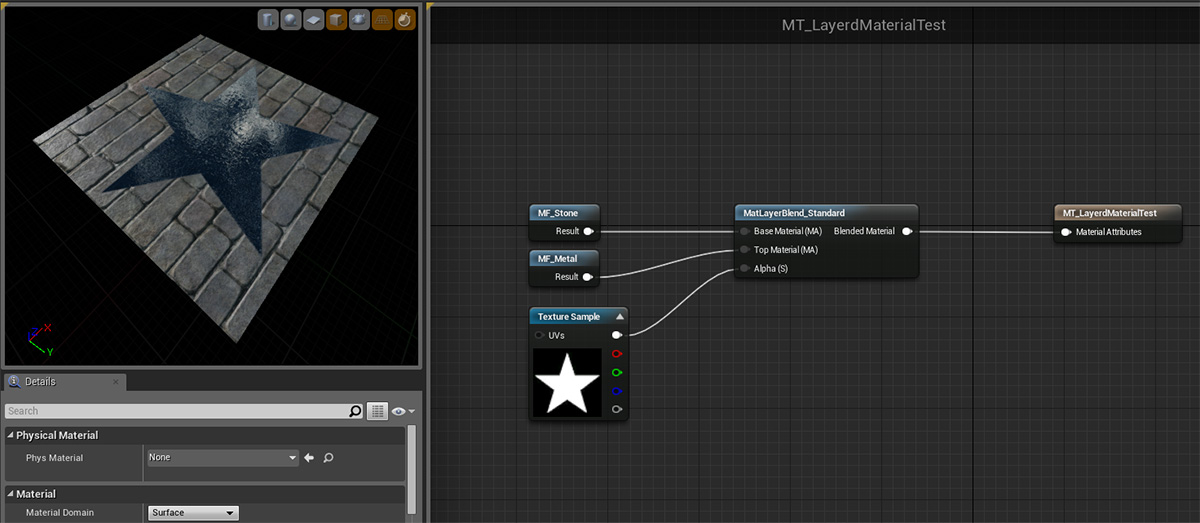
Base Material …Alpha の黒いところ(0)に適用されるMaterial Function。
Top Material …Alpha の白いところ(1)に適用されるMaterial Function。
Alpha …上の2つのMaterial Functionのブレンドを「0~1」で指定する。今回は下のようなTextureを適用してます。
(UVに合わせて適切なマスクテクスチャを作成する事で、肌や服や金属のMaterial Functionを正確にブレンドする事ができます。)

3.Material FunctionにInputノードを設定し、Materialからパラメータを変更できるようにする。

① Palletパネルから、”Function Input”ノードをドラッグ&ドロップして配置します。
② ”Function Input”ノードがアクティブな状態で、Detailsパネルの”Input Name”を分かりやすい名前に変更します。
③ つづけてDetailsパネル内のInput Typeを、用途に合わせて切り替えます。今回はDiffuse Textureを置き換えたいので、”Function Input Vector 3″を選択しました
(※”Function Input Texture 2D”というタイプもありますが、何故かBase Colorのピンに接続出来なかったので、Vector 3を用いています。)
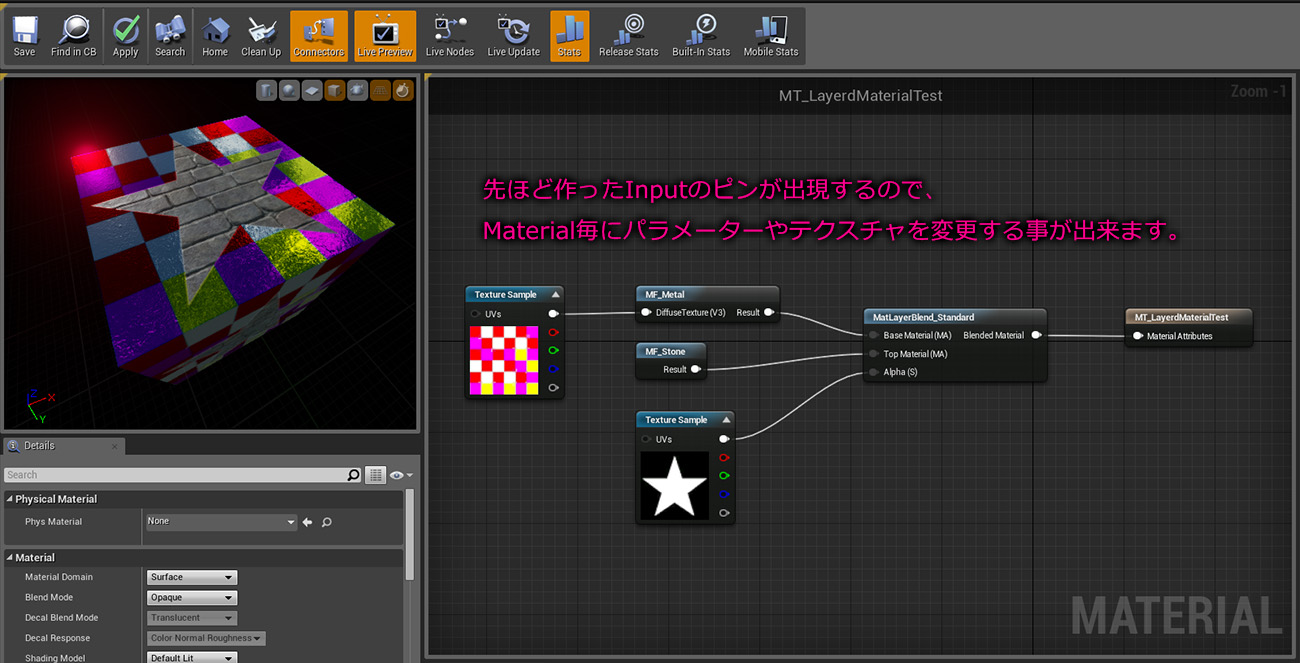
その後、Materialを開いてみると、先ほど設定したImput Nameの入力ピンが出現しました。
こうしてMaterial Function無いのBaseColorに接続したテクスチャを差し替えることができました。
更にそのテクスチャをParameter化する事で、Material Instance毎にパラメータを変更する事もできます。
Layered Materialは便利な機能ですが、計画的に作らないと無駄で煩雑なマテリアルを生んでしまう危険性もあります。
Layered Materialを用いるべきなのか、Material IDを分けて別のマテリアルをアサインした方が良いのか、用途に応じて吟味する事をおすすめします。


 [UE5]マテリアルのSDFとは?画像から考える距離場のしくみ
2025.12.03UE
[UE5]マテリアルのSDFとは?画像から考える距離場のしくみ
2025.12.03UE
 [UE5]Color CurveをMaterial Functionで設定するには
2025.04.09その他
[UE5]Color CurveをMaterial Functionで設定するには
2025.04.09その他
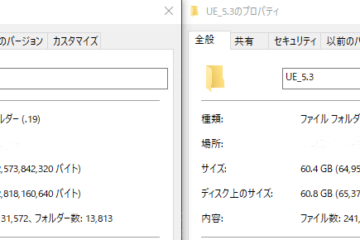
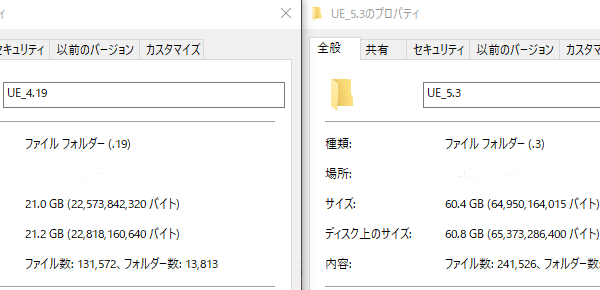 [UE4][UE5]開発環境の容量を少しでも減らす
2024.08.14UE
[UE4][UE5]開発環境の容量を少しでも減らす
2024.08.14UE