| 執筆バージョン: Unreal Engine 5.0 |
今回の記事ではシーケンサーのキーフレーム調整に便利な機能をご紹介します。
準備
UE5から初めて触った方もいると思いますので、まずシーケンサーの作り方を説明します。
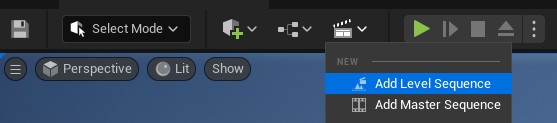
新規レベルを開き、シーケンサー(LevelSequenceアセット)を追加しましょう。
LevelSequenceアセットは上部ツールバーより作成するか、
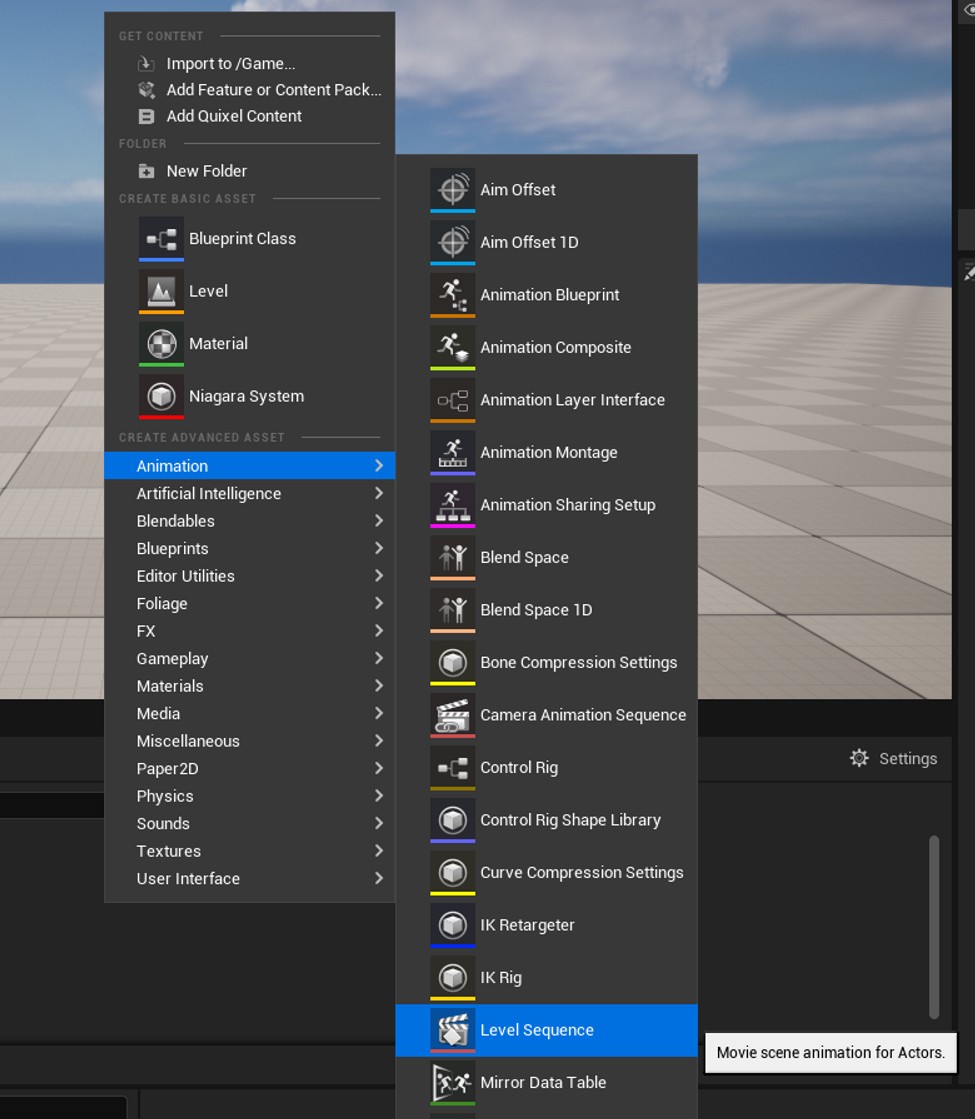
コンテンツブラウザを右クリックしてAnimation > LevelSequenceより作成して下さい。
次にシーケンサーで制御するアクターを準備しましょう。
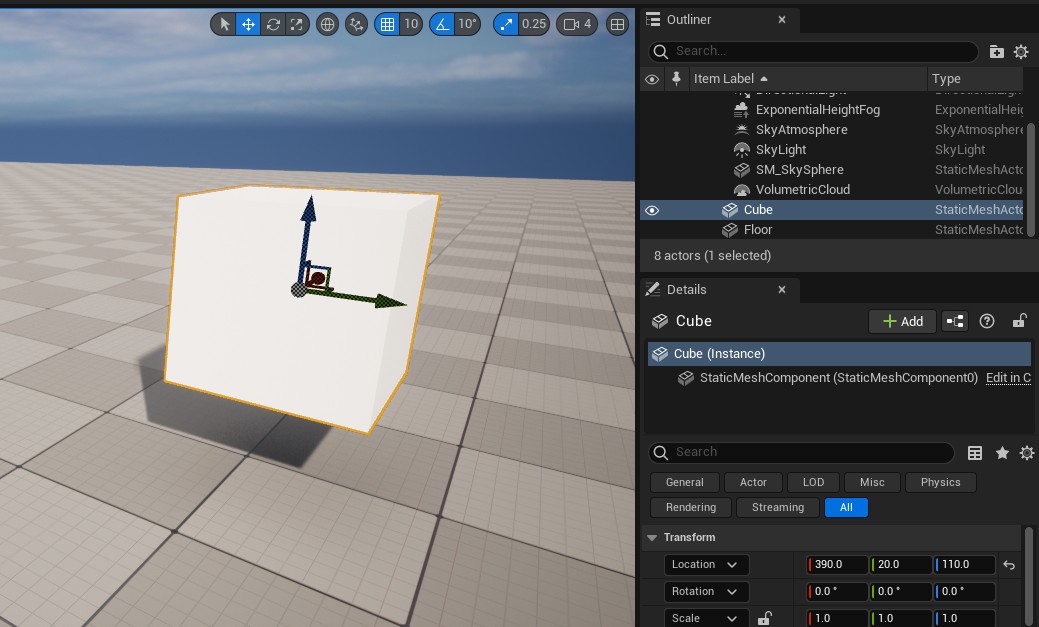
レベルにテスト用のスタティックメッシュ(Cube)を配置します。
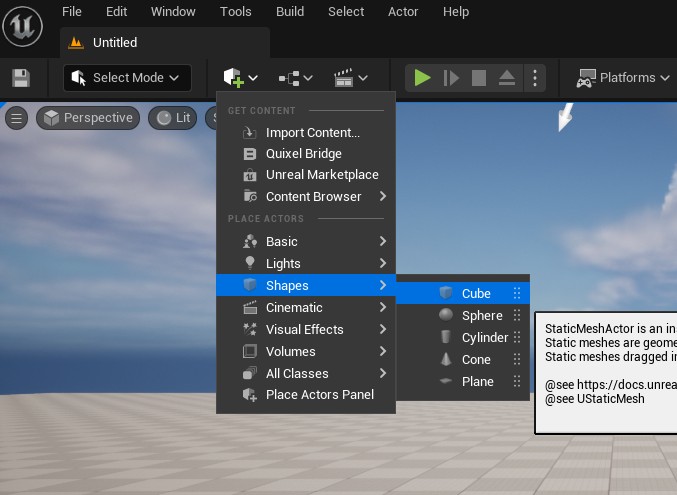
レベルへ新規に配置するには、上部ツールバーやコンテンツブラウザを使います。
今回のスタティックメッシュはツールバーより Shapes > Cube で追加しました。
なお、以前のUE4のようにPlace Actorsウィンドウを表示することもできます。
その場合は、Window メニューよりPlace Actorsを選びます。
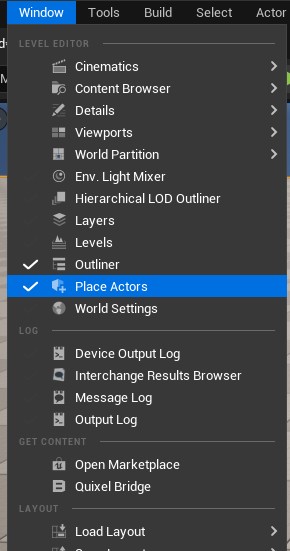
Place Actorsウィンドウではアクター名で検索できます。
追加したいものの名称が分かっている場合はこちらの方が便利です。

では、LevelSequenceアセットを開き、レベルに配置したスタティックメッシュをアウトライナーからドラッグ&ドロップで登録します。
キーフレームも準備しておきましょう。
次図のようにCubeのLocation(位置)を変更してアニメーションを設定しました。
これで準備完了です。
キーフレームの調整機能
Transform Selection
それでは、キーフレームを調整する機能を使ってみましょう。
シーケンサー上ツールバーのActionsボタン(レンチアイコン)からTransform Selection を選択します。
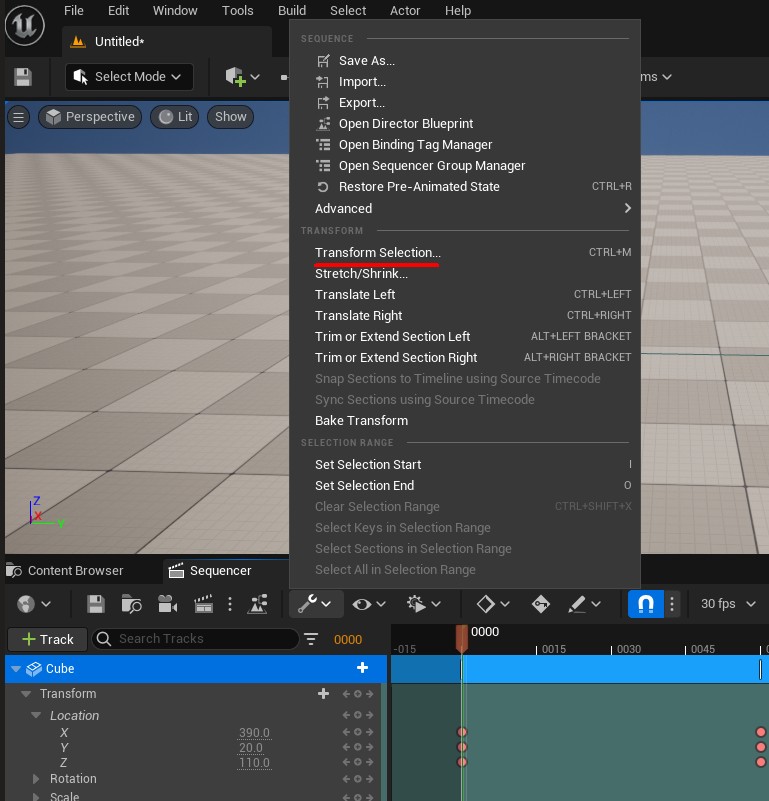
すると、タイムラインの左上に小さいウィンドウが表示されます。
このウィンドウから数値でキーフレームを調整することができます。
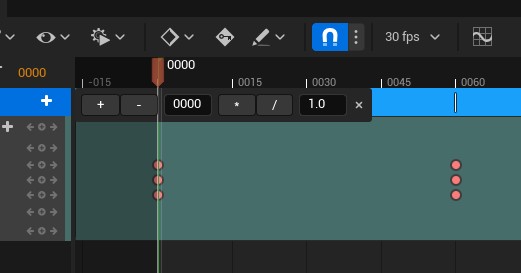
数値入力は +-(加減)と*/(乗除)で左右に分かれています。
試しにキーフレームを選択して、左側のボックスに10と入力し、+ボタンを押してみましょう。
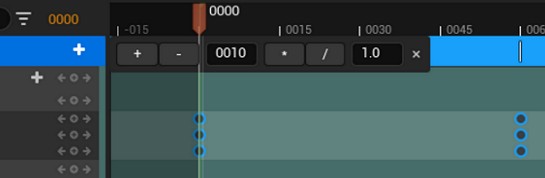
選択したキーフレームが10フレーム分オフセットされます。
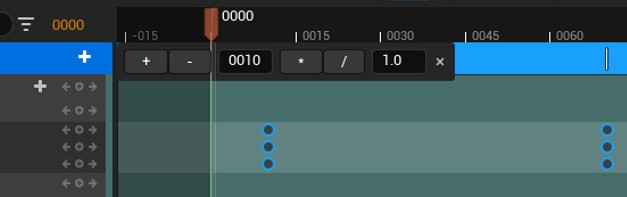
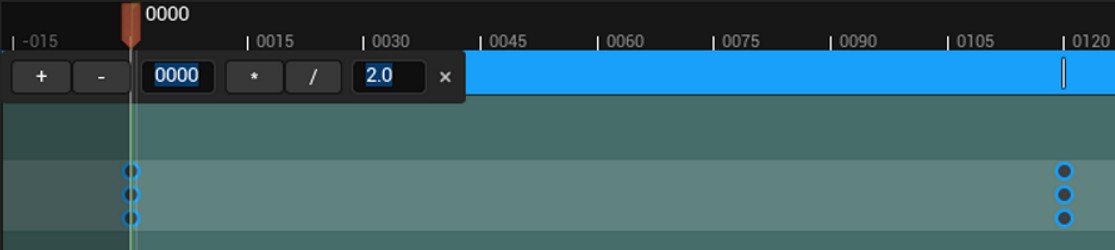
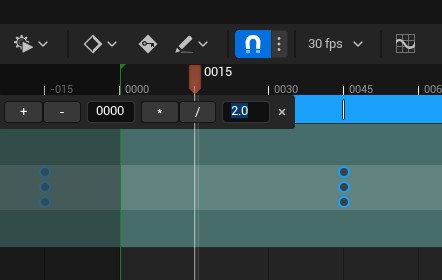
では、右のボックスを使ってみます。
変更を元に戻し、今度は2と入力して*ボタンを押しました。
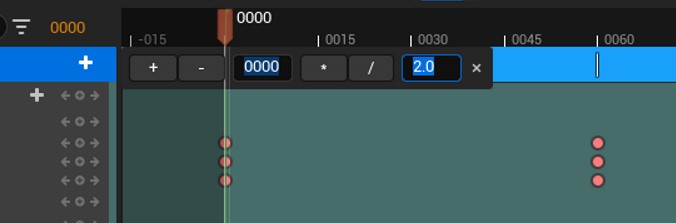
選択したキーフレーム全体が2倍の長さに延長されました。
ここまでの操作
キーフレームが多くなってくると全体の長さを変更するのは結構な手間ですので役立ちそうですね。
ただ、この機能はシンプルに使えて便利なのですが注意点もあります。
それはキーフレームがタイムスライダーの位置から相対的に変更されるという点です。
タイムスライダーをキーフレームの中間に移動して試してみましょう。
今度は/を押して半分の長さにしてみます。
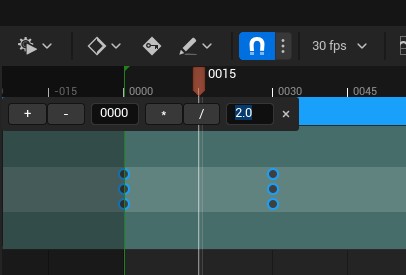
すると、キーフレームがタイムスライダーを基点として集まるように調整されました。
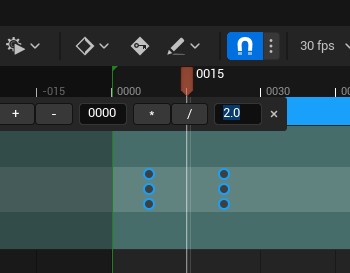
*2を押してみると、中心から間隔が広がっていきます。
このように、Transform Selectionボックスではタイムスライダーを基準に選択したキーフレームが調整されます。

したがって、全体の長さを変更したい場合はキーフレームの末端にタイムスライダーを合わせる必要があります。
Stretch/Shrink
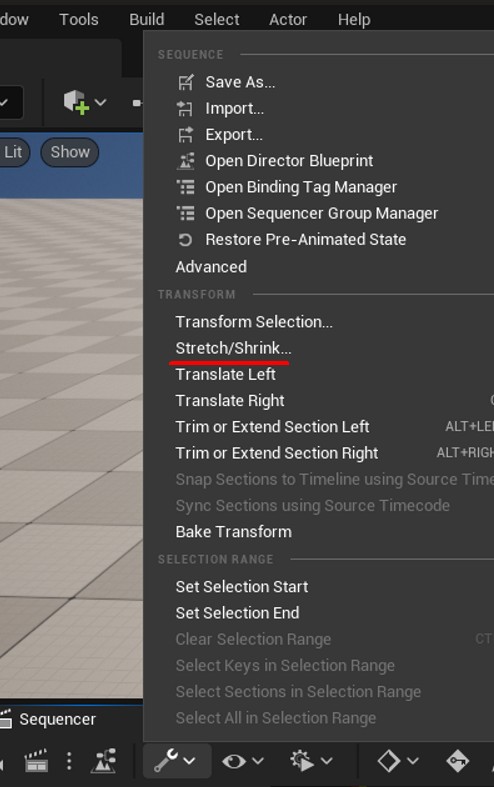
では、次にTransform Selection の1つ下にあるStretch/Shrinkを試してみましょう。
選択すると、こちらも小さいウィンドウが表示されます。
先程のTransform Selectionウィンドウを閉じていないと表示位置が重なるので気を付けて下さい。
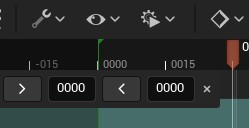
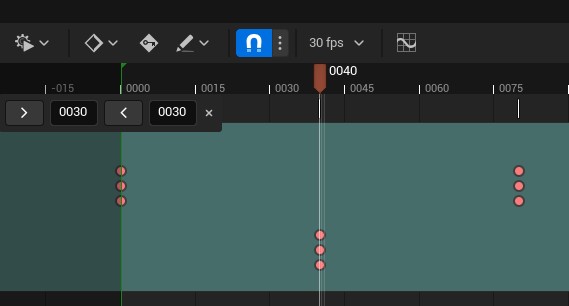
Stretch/Shrinkはフレームの挿入/削除に使います。
こちらはタイムライン全体に影響があり、キーフレームの選択は不要です。
分かりやすいように、Locationの下にもう1段 Rotationのキーフレームを追加しました。
この状態で左のボタンを押して後ろに30フレーム挿入してみます。
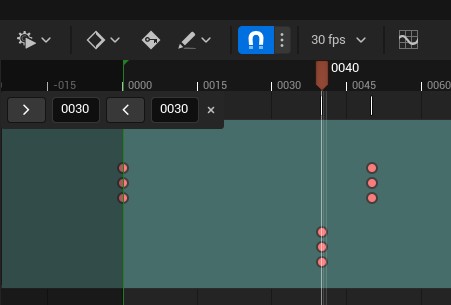
タイムスライダーの位置を基準に30フレーム分の時間が挿入され、以降がオフセットされています。
Stretch/Shrinkの動作
登録しているActorが多数ある場合、すべてのキーフレームを選択して移動するのは手間が掛かりますが、
Stretch/Shrinkはキーフレーム選択が不要なので手早く調整できます。
カーブエディタ
では、次にカーブエディタで使える機能をみていきましょう。
カーブエディタはシーケンスエディタの右上のアイコンから開くことができます。
キーフレームの編集ツールとして以下の3つが用意されています。
Transform Tool
Retime Tool
Multi Select Tool
Transform Tool
まず、Transform Toolをみていきます。
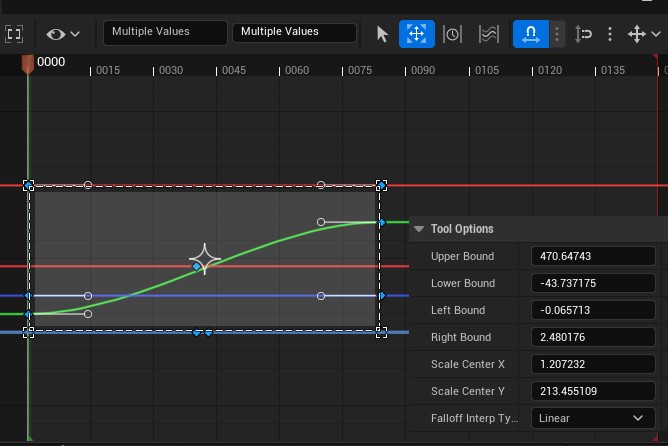
Transform Toolは選択したキーフレームのバウンディングボックスを変形するようなツールです。
囲われた選択範囲に対しての移動や、アンカーポイントを基準とした拡縮ができます。
拡縮はアンカーポイントを適切な地点へ配置しないと意図した挙動にならないため、少し調整が必要です。
次のようにシーケンサーのスナップをオフにした状態だとアンカーポイントのみ枠へ吸着するため位置調整しやすくなると思います。
また、Ctrlキーを押すとグラデーションで影響範囲の調整もでき、
右下に表示されるTool Options下段のFalloff Interp Typeから補間方法の選択もできます。
Retime Tool
次にRetime Toolをみていきましょう。
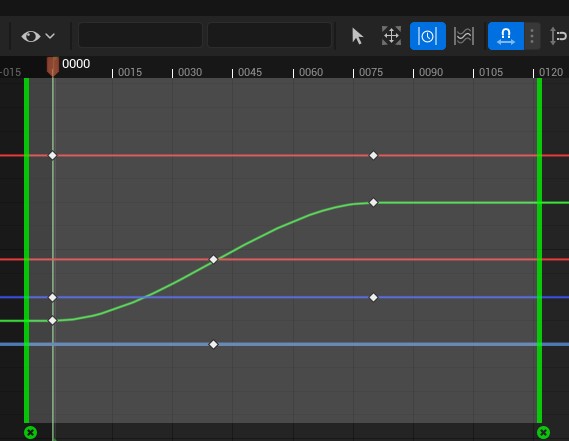
Retime Toolを選択すると緑色の線(アンカー)が表示されます。
この緑線を移動することで範囲内にあるキーフレームも一緒に移動します。
また、緑線はダブルクリックで任意の箇所に増やすことができ、キーフレームに影響する範囲を限定することが可能です。
なお、下部のxボタンから消去できます。
Retime Toolはタイミング調整に便利なツールで、操作も直感的にできるため使いやすいと思います。
Multi Select Tool
最後にMulti Select Toolをみていきます。
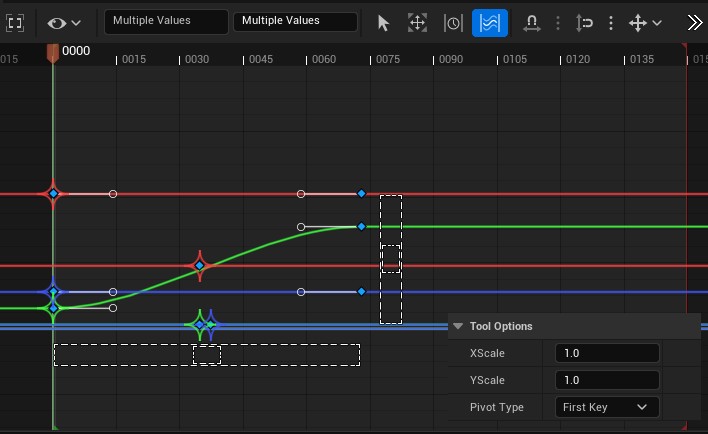
Multi Select Tool ではキーフレームの拡縮ができます。
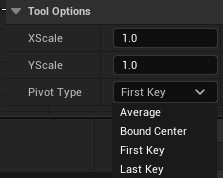
拡縮は先程のTransform Tool でも行えますが、こちらではPivot(基点)がリストに用意されており、素早く調整ができるようになっています。
選べるPivot Typeは4種あり、First / Last Keyはキーフレームの選択順ではなく
選択範囲の左 / 右端を基準とした動作になります。
まとめ
シーケンサーでキーフレーム調整に便利な機能
Transform Selection
Stretch/Shrink
Transform Tool
Retime Tool
Multi Select Tool
をそれぞれ紹介しました。
これらの機能を使えば、調整したいキーフレームが多数あるとき効率的に作業できます。
ぜひ試してみて下さい。


 [UE5]Cameraの種類と使い方
2026.04.01UE
[UE5]Cameraの種類と使い方
2026.04.01UE

 [UE5]UnrealEngineでビットフラグを使用する方法
2026.03.11UE
[UE5]UnrealEngineでビットフラグを使用する方法
2026.03.11UE

 [UE5] レイトレシェーダーを追加してみよう
2026.02.25UE
[UE5] レイトレシェーダーを追加してみよう
2026.02.25UE