執筆バージョン: Unreal Engine 4.20
|
Latentノードといえばよく見かける以下のような
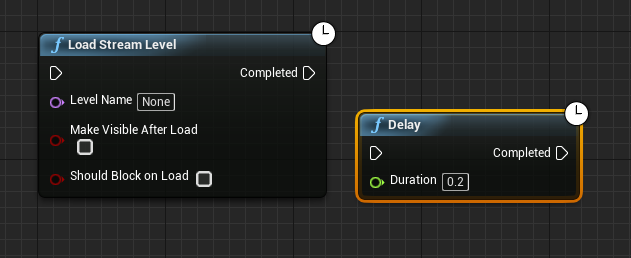
ノードの右上に時計のマークが表示されてるノードのことを言います。
ノード内部で処理が終わり次第、次に進むことができるものです。
これをプロジェクト専用に追加する場合FPendingLatentActionを継承したりFLatentActionInfoを使用して実装することができるのですが(※1)
少しめんど……く……さい……
なんてことを思ってたんですが実はもっとシンプルに作ることができる方法があったので今回はそれをご紹介したいと思います。
では早速サンプルをご確認ください。
上記のサンプルコードではUBlueprintAsyncActionBaseというクラスを継承して作成したものですがこれだけで
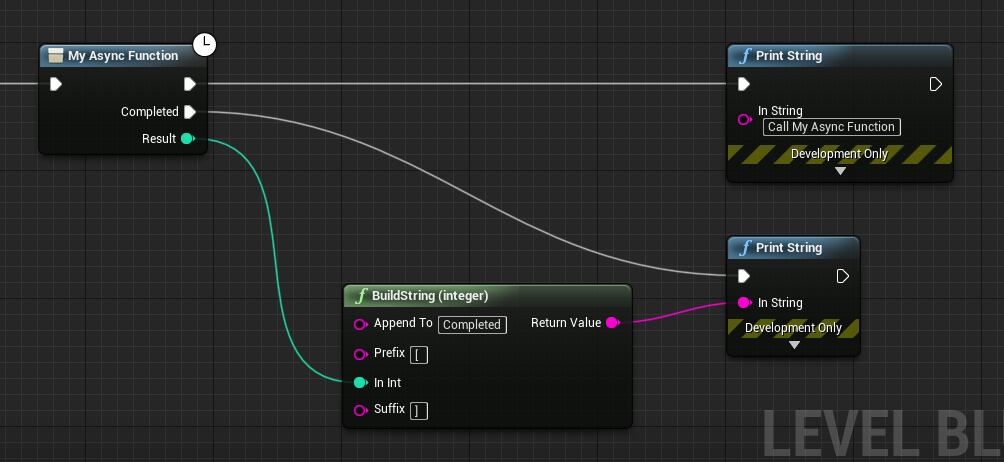
という感じにLatentノードを作成することができます。またコード上の変数「Completed2」のコメントを消すだけで

のようにピンを増やすこともできます。
UBlueprintAsyncActionBaseを使用してLatentノードを作成する場合のポイントは4点です。
- UBlueprintAsyncActionBaseを継承したクラスを生成し返すStaticな関数を定義し、メタ情報にBlueprintInternalUseOnly = “true”を指定する
- ノード終了時に通知するためのデリゲートを定義する
- Activateをオーバーライドして処理を実装する
- 不要になったらSetReadyToDestroyを呼び出してGC対象に
短いですが今回は以上になります。少しでも皆様の開発に役立てばと思います。
ここまで読んでいただきありがとうございました。
※1
FLatentActionInfo、FPendingLatentActionを使用しての実装に関しては以下のブログが参考になるかと思います。
http://unwitherer.blogspot.com/2017/06/unrealclatent_11.html
http://unwitherer.blogspot.com/2017/06/unrealclatent.html


 [UE5]マテリアルのSDFとは?画像から考える距離場のしくみ
2025.12.03UE
[UE5]マテリアルのSDFとは?画像から考える距離場のしくみ
2025.12.03UE
 [UE5]Color CurveをMaterial Functionで設定するには
2025.04.09その他
[UE5]Color CurveをMaterial Functionで設定するには
2025.04.09その他
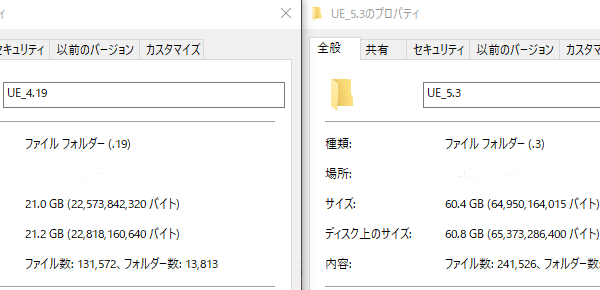 [UE4][UE5]開発環境の容量を少しでも減らす
2024.08.14UE
[UE4][UE5]開発環境の容量を少しでも減らす
2024.08.14UE